How to Grow and Care: Tulip
Contents
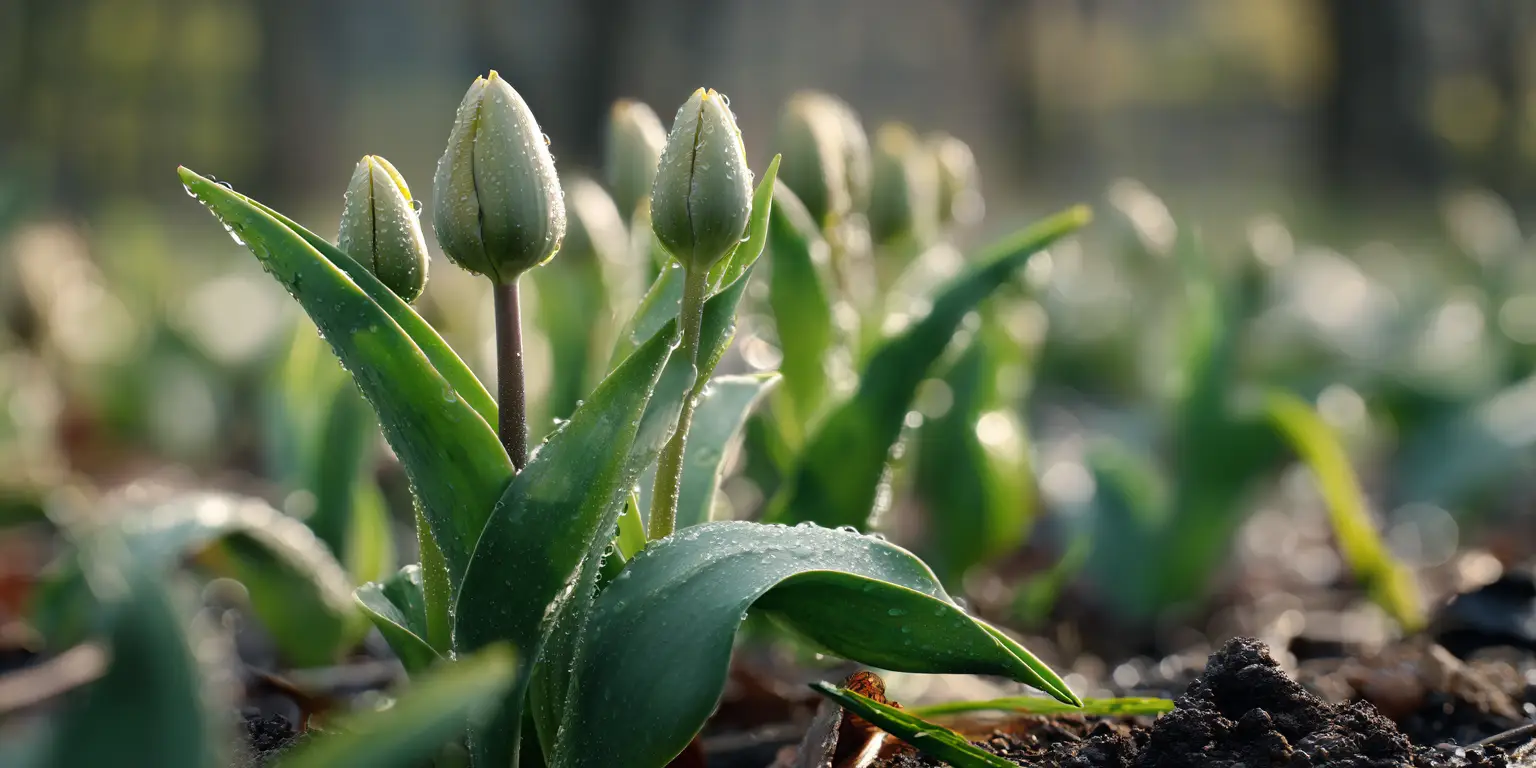
Tulip is a spring flowering bulb in the genus Tulipa, with the widely grown garden tulips derived mainly from Tulipa gesneriana. In catalogs and gardens the name tulip refers both to large hybrid groups and to small species tulips that return reliably in colder regions. Tulips are cool season plants that grow from a true bulb and form roots in fall, flower in spring, and enter summer dormancy. They perform best in full sun with at least 6 hours of direct light, though in early spring they will tolerate light shade from deciduous trees. Most tulips are hardy in USDA Zones 3 to 7 and are often treated as annuals in Zones 8 to 10 unless bulbs are prechilled. Successful tulip care is simple. Plant healthy bulbs in fall into cool, well drained soil. Keep the site evenly moist from fall root growth through bloom. Let leaves mature fully after flowering so the bulb can recharge for next year. Thoughtful soil preparation and the right planting depth do most of the work, and careful watering protects bulbs from rot. Tulips sit among the most recognizable types of flowers, and with steady attention to timing and drainage you can expect reliable color in spring year after year.
Soil & Bed Preparation
Healthy tulips start with a bed that drains quickly yet holds moderate moisture in fall and spring. Aim for a friable loam to sandy loam rich in organic matter that never stays saturated for long periods. The ideal pH is slightly acidic to neutral at 6.0 to 7.0. In heavy clay, blend in coarse mineral material and compost to open the texture, or consider a raised planting where you control the mix and can keep bulbs high and dry through winter wet periods. Use aged compost or leaf mold for organic matter and avoid fresh manure because it can burn tender roots and may encourage disease. When you prepare the bed, loosen the soil 10 to 12 inches deep (25 to 30 cm) so bulbs can root deeply and drain well. Tulip bulbs resent poor aeration and standing water in winter and early spring, which easily leads to basal plate rot. A simple rule helps: if your soil is slow to drain or compacts into clods, treat the site with amendments or choose a raised bed to protect your bulbs and keep foliage clean.
Drainage Test and pH Targets. Before planting, test drainage in a hole 12 inches deep and 12 inches wide. Fill with water and allow it to drain, then refill and time the second drain. Water that disappears in 1 to 3 hours indicates acceptable drainage. If water lingers longer than 3 hours, add coarse sand or fine gravel and compost, or move to a raised bed 6 to 12 inches high (15 to 30 cm). For pH, use a home soil test or send a sample to a cooperative extension laboratory. If the test shows pH below target, apply garden lime according to the laboratory rate. If pH is above target, elemental sulfur is the usual correction. Follow the rate on your soil test, mix amendments throughout the planting layer, then water the bed to settle the profile two to three weeks before planting so the environment is stable when bulbs arrive.
Tulips are bulbs with prominent basal plates and a tunic. In heavy soils or areas with prolonged winter wet, a special bulb zone helps reduce rot. After loosening the bed, scratch in a 1 to 2 inch layer of coarse horticultural sand or fine gravel in the bottom of each planting hole to promote drainage right under the basal plate. Then backfill with your improved soil blend rather than pure sand. Pure sand dries too quickly and can starve roots. A small handful of compost can be mixed into the backfill, but avoid fertilizers high in nitrogen at this stage because that can push lanky foliage at the expense of sturdy stems.
Raised beds versus in ground plantings require slightly different approaches. In ground sites are fine when native soil drains well and holds shape. In high rainfall regions or compacted yards, raised beds shine because you can set the top of the bulb layer above surrounding grade. In containers and raised beds, be sure that the sides have weep holes or gaps so winter rain can escape. A mulch of shredded leaves or pine fines two inches thick (5 cm) helps keep the top zone cool and evenly moist during root growth, then protects the bulb from temperature swings as winter sets in.

Planting Calendar by USDA Zone
Tulip bulbs are planted in fall after soil cools, with the goal of allowing several weeks for root growth before the ground freezes. Timing depends on latitude, elevation, and local weather, but a simple test for readiness is soil near 50 to 55 degrees Fahrenheit (10 to 13 degrees Celsius) at 4 inches deep for two weeks. Plant 6 to 8 weeks before the soil typically freezes. In Zones 3 to 4, this often means late September to early October. In Zone 5, the main window is October to early November. In Zones 6 to 7, aim for late October to late November. In Zones 8 to 9 where winters are mild, prechill bulbs for 10 to 14 weeks at 35 to 45 degrees Fahrenheit (2 to 7 degrees Celsius) in a ventilated paper bag away from produce in a household refrigerator. Plant immediately after chilling when nights are reliably in the 40s Fahrenheit.
Bulbs are usually sold dry rather than bare root, and that is the standard for fall planting. Container grown tulips are available in late winter to spring for instant color. In cold climates where the ground is still frozen in late winter, hold potted plants in an unheated garage or porch just above freezing and move them outdoors once the soil can be worked. Plant containers after the last hard freeze window has mostly passed so green shoots are not burned. In areas with hot autumns or long autumns, delay outdoor planting until overnight temperatures settle into the 40s Fahrenheit. The goal is enough cool weather to trigger root growth without initiating premature shoot growth before true winter arrives.
Hot humid, arid, coastal, and high elevation regions each call for adjustments. In hot humid areas, bulbs keep best when refrigerated for prechilling and planted later than the calendar suggests because warm soils persist. In arid climates, irrigate the planting bed several days before planting so the bulb zone is lightly moist. Along the coast where wind and saline spray can scorch petals, place tulips behind a hedge or fence and water the bed deeply the day after storms to leach salt. High elevation gardeners often plant earlier than neighbors at lower elevations because hard freezes arrive sooner. Watch soil temperature and work backward to allow 6 to 8 weeks of root time. Local extension calendars are excellent for adjusting by county, but soil temperature at the planting depth is the most reliable guide for tulip care.
Planting: Depth & Spacing
Bulbs or Tubers. Tulips are true bulbs. For most garden hybrids, plant the bulb with the pointed tip up at a depth equal to three times the bulb height. This is typically 6 to 8 inches deep measured from the bulb shoulder to the soil surface (15 to 20 cm). In naturally warm climates, a slightly deeper depth at 7 to 9 inches helps moderate temperature swings and improves stability. Space bulbs 4 to 6 inches apart (10 to 15 cm) for single lines and 3 to 4 inches (8 to 10 cm) for dense, bedded displays. In borders, a staggered triangle pattern creates a fuller look while keeping adequate airflow. For species tulips that perennialize, give a bit more room at 6 to 8 inches so offsets can form. Water thoroughly after planting to eliminate air pockets and start root development.
Bare Root or Divisions. Tulips are not sold bare root in the way that peonies or daylilies are. Division refers to lifting clumps after the leaves wither and separating offsets. If a clump has become crowded and bloom size declines, lift bulbs in early summer once the foliage has turned papery and the bulb tunic is firm. Dry the bulbs in single layers in a shaded, airy place for two weeks. Discard any bulbs that feel soft. Replant in fall at standard depth and spacing, or store cool and dry in a breathable bag until the normal fall window.
Container Grown. When transplanting nursery pots in spring, handle the root ball as a unit. Set plants so the crown sits at the same depth as in the pot, with the soil surface level with the surrounding bed. If plants were forced in a warm greenhouse, harden them off for 3 to 5 days in bright shade and light morning sun to limit shock. Water immediately after transplanting and again two days later to settle soil. For patio containers planted with dry bulbs in fall, use a pot at least 10 to 12 inches deep (25 to 30 cm) with generous drainage holes. Arrange bulbs nose to nose for a full effect, leaving about 1 inch between bulbs. Many gardeners layer bulbs in a lasagna pattern with larger tulips on the bottom tier and small species above, but always keep at least 2 inches of mix above the top layer.
Minimizing transplant shock is straightforward. Plant into moist, cool soil, not a dry or hot bed. Avoid adding strong fertilizer salts at planting. After placing bulbs, backfill firmly, water to settle, then mulch lightly so the surface does not crust. If a sudden warm spell arrives after planting, shade the area with evergreen boughs to hold soil temperature down so roots continue to develop without pushing premature shoots. If bulbs sprout early during a midwinter thaw, protect the area with a loose mulch until temperatures normalize. Tulips tolerate light frost at the leaf stage, but young buds are sensitive, so protect swelling buds with a breathable cover during a late cold snap.

Watering & Mulching
Tulip roots begin growing soon after fall planting, so water the bed thoroughly at planting and again during extended dry spells before the ground freezes. In fall and winter in much of the United States, natural precipitation is enough. In zones with dry winters, supply water as needed to keep the bulb zone lightly moist, which generally means providing about half an inch of water per week during open weather. In spring, aim for about one inch of water per week from rain and irrigation combined. Use a rain gauge and water in the morning so leaves dry by midday, which helps keep foliar disease in check. Tulips are sensitive to chronically wet soil, so never allow the planting area to remain saturated for more than a short period.
Mulch helps regulate moisture and temperature. Apply a two inch layer of shredded leaves, pine fines, or clean straw after planting. Pull mulch back slightly just over the bulb zones to keep the necks from staying wet. In snow country, wait to apply thick winter mulch until the ground surface has begun to freeze. This timing prevents rodents from tunneling easily and reduces freeze to thaw cycles that can heave bulbs. In spring, thin the mulch to one inch to encourage faster soil warming and sturdier stems, then refresh it after bloom to keep weeds down while bulbs finish their energy recharge. Avoid deep bark mulch directly over the planting because it can hold excess moisture in cool springs and slow soil warming, which in turn lengthens the vulnerable period for disease.
Heat spikes and drought call for small adjustments. During an unseasonably hot spring spell, add temporary shade during the hottest part of the afternoon and water in the morning so the bulb zone stays evenly moist. Prolonged drought while foliage is still green shortens bulb recharge, so provide consistent moisture until leaves have fully yellowed. Hard water is rarely a problem for tulips in the short term, but saline soils or coastal salt spray can scorch leaf tips. After any salt exposure, water the bed deeply to leach salts below the root zone. Never waterlog the site to correct salt stress. A slow soak is better than a brief flood.
Feeding
Tulip care relies more on soil preparation than frequent fertilizer. The target is a fertile, organically enriched soil with a balanced nutrient supply, not a quick surge of nitrogen. A low nitrogen, higher phosphorus and potassium formula such as 5 to 10 to 10 or 4 to 10 to 6 supports strong roots and sturdy stems. Mix a modest amount of a slow release bulb fertilizer into the planting zone in fall, or scratch a small dose into the top two inches of soil after you plant, then water thoroughly. In established beds, apply the same low nitrogen formula in early spring as shoots emerge. Avoid high nitrogen lawn fertilizers near tulips because they encourage soft growth that flops and invites disease.
Where soil tests indicate adequate phosphorus, you can skip additional phosphorus and rely on organic matter and a balanced slow release product. Compost applied as a one inch topdressing after bloom adds biology and helps with moisture management. Bone meal is often recommended, but it may attract digging animals and is unnecessary if your soil test shows sufficient phosphorus. The most reliable guide is a periodic laboratory soil test every two or three years. Retest sooner if plants show persistent nutrient deficiency symptoms like pale leaves or short stems even with correct watering and light. Healthy soil biology is the long term goal. A steady diet of leaf mold and compost encourages a broad microbial community that helps bulbs withstand stress and complete their annual cycle without excessive inputs.
In containers, nutrients leach more quickly, so a small monthly topdressing of compost or a light dose of a balanced, low nitrogen fertilizer during active growth is helpful. Stop feeding as soon as leaves begin to yellow after bloom. Tulips do their nutrient absorption during the cool, moist portion of the season. Adding fertilizer during summer dormancy does nothing for the bulb and may leach away before roots resume.
Pruning & Support
Tulips do not require pruning in the woody plant sense, but they benefit from deadheading and seasonal clean up. After the petals drop, snap or cut off the spent flower heads before seed capsules form. This directs the plant’s energy back to the bulb instead of seed production. Leave the leaves and stems in place until they turn completely yellow and papery. At that stage they detach easily with a gentle tug. Removing foliage early weakens the bulb and often results in smaller flowers next season. Tidy up the bed by lifting the fallen leaves and refreshing the light mulch so the site stays clean through summer dormancy.
Stems of tall single late and large double tulips sometimes lean in wind exposed sites. In very windy gardens, a discreet ring support or short bamboo sticks placed before buds open can keep stems upright without detracting from the display. More often, the best support is right plant, right place. Plant taller groups where a fence, hedge, or building provides a wind break. Space bulbs generously in humid climates so air can move between leaves and dry the canopy after rain. For disease prevention, clean tools before and after working in the bed. Dip blades in 70 percent isopropyl alcohol or a 10 percent bleach solution for one minute, then rinse and dry. Sanitation matters with tulips because fungal diseases like botrytis can spread on sap and plant debris.
If a tulip shows distorted leaves, mottled or streaked petals outside of a known striped cultivar, or fails to thrive while neighbors look normal, suspect a virus. Remove the entire plant with the bulb and dispose of it in the trash. Tulip breaking virus historically caused dramatic streaking in old Rembrandt tulips. Modern striped varieties are bred to be stable without virus, so surprise streaks on solid cultivars are a red flag. Good tool hygiene and prompt removal keep problems localized. Aphids are the typical vectors for viruses, so reducing weeds and removing infected plants lowers risk for the whole bed.
Overwintering
In cold winter regions, tulips are well adapted to a deep freeze provided the soil drains and the bulbs are planted at the right depth. After soil has begun to freeze, cover the bed with a protective two to four inch layer of straw, shredded leaves, or pine needles. This winter mulch limits freeze to thaw cycles that can heave bulbs and exposes less tender tissue to drying winds. Remove the bulk of the mulch in early spring as snow melts so shoots are not blanched in the dark. Spread the remaining mulch thinly to suppress weeds and conserve moisture once active growth resumes.
Rodent protection is often necessary in regions with voles, mice, chipmunks, or squirrels. Planting in cages made from half inch hardware cloth works well. Create a box large enough for your bulbs, set it into the bed, plant inside it, then place a matching lid over the top before covering with soil. In very active rodent areas, line trench walls with hardware cloth to keep burrowers from the sides. Avoid tasty soil amendments like bone meal that may attract digging. Above ground, place temporary netting over freshly planted areas for a week to discourage squirrels from exploring newly disturbed soil. Deer relish tulip buds in spring. Where browse pressure is high, protect displays with fencing or plant tulips in fenced courtyards and rely on other spring bulbs beyond the fence where necessary.
In warm winter regions where chilling hours are limited, treat large hybrid tulips as annuals. Buy fresh bulbs each fall, prechill them for 10 to 14 weeks, then plant into cool soil for a reliable spring show. Species tulips like Tulipa clusiana and Tulipa saxatilis tolerate warmth better than large hybrids and may return for several seasons in Zones 7 to 8 when planted in fast draining soil in full sun. For patio pots in any region, overwinter containers in an unheated garage, shed, or against a north wall where temperatures remain 35 to 45 degrees Fahrenheit (2 to 7 degrees Celsius). Water containers lightly every four to six weeks during winter so the potting mix does not go bone dry. Move pots back into light once shoots are 1 to 2 inches tall so growth stays sturdy and compact.
Growing Environments
Tulips are well suited to beds, borders, naturalizing in meadow style plantings with species tulips, and to containers on porches and patios. For containers, choose a pot at least 10 inches deep and 12 inches wide (25 by 30 cm) for 10 to 12 standard bulbs. Use a high quality peat or bark based potting mix with 10 to 20 percent coarse perlite or sharp sand for drainage. Water the pot thoroughly after planting and set it where rain can reach it. In very wet climates, raise pots on feet so water can escape freely. If your patio faces south and reflects heat, shift containers slightly back from bright walls and use a light mulch to keep the surface cool during the root building period. Rotate pots a quarter turn weekly in spring so stems stay straight.
Microclimate adjustments help in many yards. Under deciduous trees that leaf out late, tulips enjoy bright spring light and light afternoon shade once the canopy fills. Along south facing foundations that gather heat, plant deeper and use a thicker mulch, because soil temperatures will climb earlier than in the open garden. In windy sites, tuck tulips on the leeward side of shrubs or fences. In coastal settings where salt spray occurs, place tulips behind salt tolerant hedging and water after storms to flush salt from the soil surface. In high altitude sun, a thin layer of mulch over the bulb zone and a slightly deeper planting help moderate wild temperature swings while still allowing strong bloom.
Tulip care in lawn style displays requires a patient approach. If you underplant in turf, wait to mow until the leaves have begun to yellow. Mowing too early removes the leaves before they charge the bulb for next year. Many gardeners confine tulips to borders and use other bulbs in lawns because the mowing schedule for turf often conflicts with tulip aftercare. Where you want a natural look, choose short species tulips that flower before grass takes off and disappear cleanly by early summer.
Companion Planting & Design
Tulips deliver concentrated color early in the season, so the best companions extend the display and hide the inevitable die back of foliage. Pair mid to late tulips with perennials that leaf out in late spring such as hosta, daylily, hardy geranium, and ornamental grasses. As tulip leaves yellow, these companions spread and cover the gap. In the bulb layer itself, combine tulips with grape hyacinth and daffodils for a classic look that carries color from March into May depending on your zone. Daffodils have a scent and alkaloids that rodents dislike, so they provide a measure of pest deterrence in mixed plantings. For a cool palette, explore single and lily flowered tulips in violet and blue tones along with muscari and early salvias for an echo of themes in our blue flowers and purple flowers collections.
Pollinators appreciate open single tulips and species types more than densely double forms. Early bees and hoverflies will visit flowers on mild days. Plant in broad drifts so they can forage efficiently. Space bulbs for airflow, especially in humid regions, to reduce the time leaves stay wet. For front yard curb appeal, line a walk with 2 to 3 rows of single late or triumph tulips for strong stems and long lasting flowers. In cutting gardens, plant tulips in blocks by color and stem length. Harvest just as petals color but before flowers fully open to maximize vase life. If you cut for vases, leave as much foliage as possible to recharge the bulb. A second bed planted densely for cutting is often easier to manage so you can treat those as annuals and keep a separate perennializing display for the landscape.
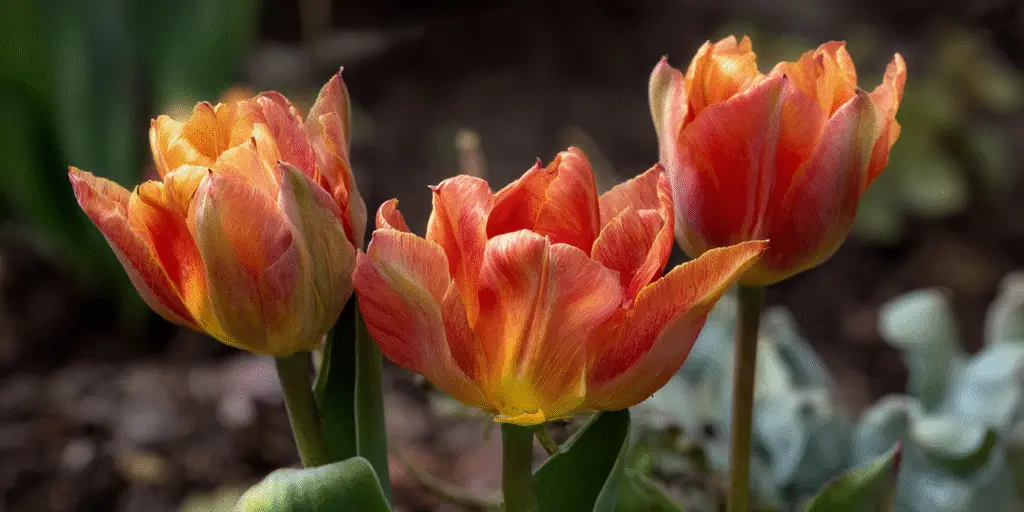
Color planning is straightforward. Warm reds, oranges, and yellows read strongly from a distance and pair well with evergreen hedging and spring flowering shrubs. Pastels shine near entries, patios, and borders viewed up close. Mix tulips by bloom time to stretch the show from early singles, to midseason triumphs and doubles, to late singles and fringed forms. For wedding season interest, mid to late tulips time well with flowering shrubs and can be part of spring arrangements, a good tie in to a broader wedding flowers guide. To coordinate with other favorites, group tulips with classic spring icons that you will also find among yellow, pink, white, purple flowers, and tulips features on this site. Thoughtful combinations highlight the strengths of each plant and keep the bed lively long after tulip petals fall.
References
- NC State Extension. Tulipa genus profile.
- Chicago Botanic Garden. Tulip growing information.
- ASPCA Animal Poison Control Center. Tulip.


Written by: Your Flowers Guide editorial team
We are a small independent group of flower lovers who research and review each guide using trusted horticultural and educational sources. Learn more about us