How to Grow and Care for Chrysanthemum
Contents
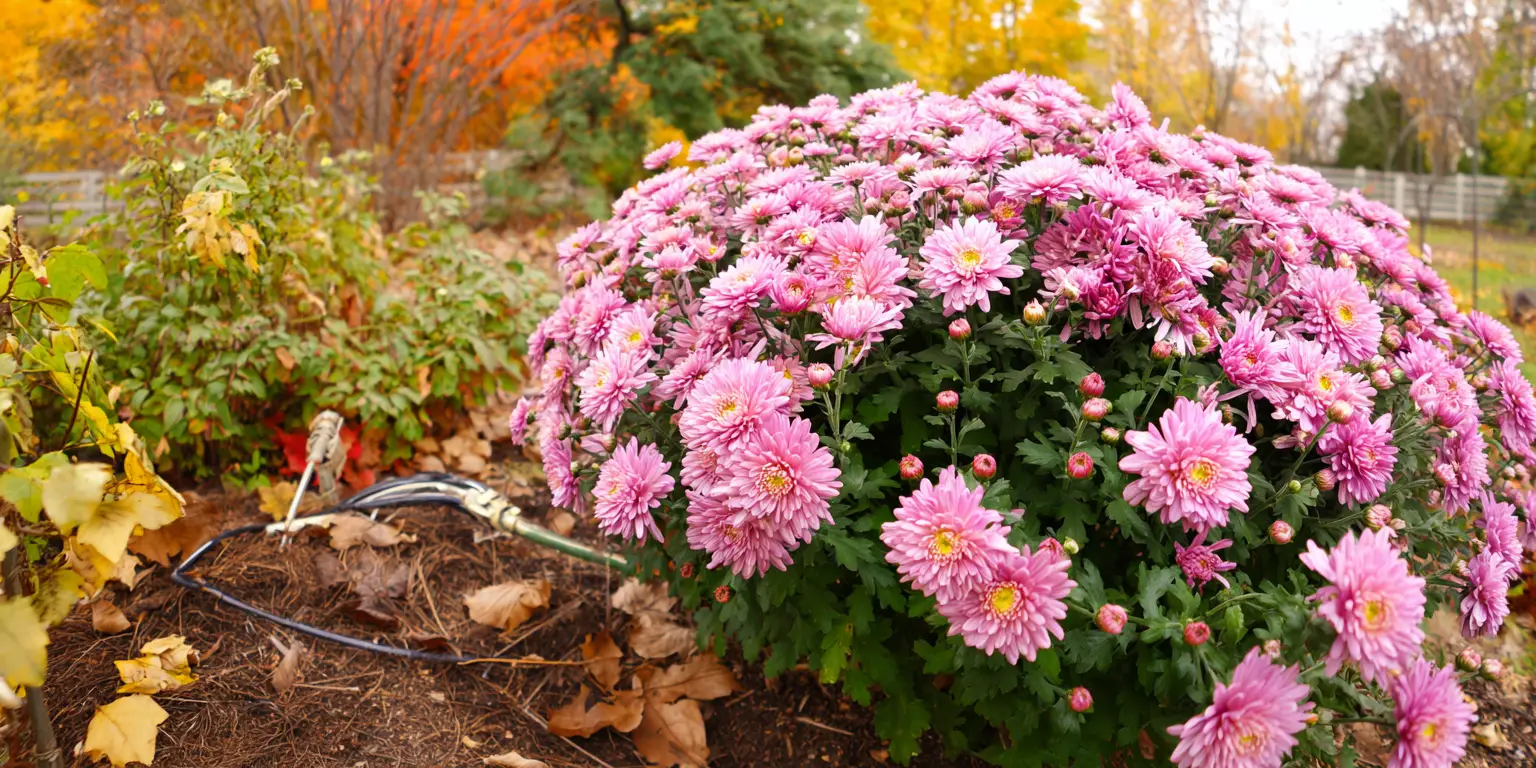
Chrysanthemums are fall’s headline act for home landscapes, offering dense mounds of color just when summer beds fade. The accepted botanical name for garden mums is Chrysanthemum × morifolium Ramat. Common names include florist’s chrysanthemum and garden mum. Older literature may list them as Chrysanthemum morifolium or under the former genus Dendranthema. For U.S. gardens, most hardy mums perform best in full sun with at least 6 hours of direct light daily and thrive where winters are cool and soils drain well. Hardy garden selections are commonly reliable in USDA Zones 5 to 9 with proper siting and winter protection.
A quick snapshot for success: plant in spring so roots establish before winter, choose full sun and well drained loam, keep soil evenly moist but never soggy, and pinch stems through early to mid summer to build a compact, flower‑laden dome. If your goal is repeat performance year after year, treat Chrysanthemum care as a season‑long plan rather than a one‑week makeover. As color planning companions, mums pair naturally with yellow, white, and purple flowers for layered autumn borders.
Soil & Bed Preparation
Texture and drainage: Mums need a friable, well drained soil that holds moisture yet never puddles. Heavy clay increases the risk of crown and root rot, while very sandy soils dry too fast and starve plants of nutrients. You can correct both by mixing in 2 to 3 inches of finished compost across the entire bed and working it into the top 8 to 10 inches. Raised beds help in wet sites because they lift crowns above waterlogged soil and warm more quickly in spring. In arid climates, incorporate compost plus a small fraction of fine bark to increase water holding while keeping pore space open.
pH range: Aim for slightly acidic to near neutral soil. For in‑ground beds, a target of 6.3 to 6.7 is ideal. For soilless potting mixes, a slightly lower reaction of about 5.5 to 6.0 encourages nutrient uptake in containers. If the soil test shows acidity below your target, add garden lime as recommended by the lab. If it is alkaline, elemental sulfur or acidifying fertilizers can move pH downward over time. Retest after soil amendments have had time to react.
Drainage Test and pH Targets: To check drainage before you plant, dig a hole about 12 inches deep and 12 inches wide, fill it with water, let it drain, then refill the next day. All water should drain within about 8 hours. If water stands for longer, prioritize raised beds or install subsurface drainage. This simple field test, paired with a lab pH test, gives you the two numbers that matter most for mums: percolation time and pH.
Special note on planting medium: Chrysanthemums are herbaceous perennials with fibrous roots, not bulbs. They do not need the sharp sand or layered planting mixes used for true bulbs. What they need is an airy, organically enriched bed that drains freely yet holds even moisture.
Planting Calendar by USDA Zone
Zones 3 to 4: These regions are at the edge of garden mum hardiness. For the best chance of carryover, plant in late spring after danger of frost when soil warms, then mulch well the first winter and consider trialing cultivars bred for northern performance. Fall planting is fine for seasonal color but rarely overwinters reliably in the open garden. Avoid late summer planting because roots will be too shallow before freeze.
Zones 5 to 6: Plant in spring from mid April to late May once soil is workable. Spring planting gives mums all season to root deeply, which is the single biggest predictor of winter survival. If you buy blooming pots in fall, enjoy them as porch or border accents and either heel the pots into a protected bed or treat them as annual color. Stop fertilizing by early to mid July so growth hardens by fall, then mulch after the soil surface freezes.
Zones 7 to 8: Plant in early to mid spring once nights settle above the upper 40s °F. In hot and humid summers, choose sites with strong morning sun and a bit of high, open afternoon shade to reduce stress and disease pressure. Pinch stems through late June in the Piedmont or through early July near the coast. If you plant in fall, expect seasonal color only unless you can provide perfect drainage and a protected winter microclimate.
Zones 9 to warm coastal areas: Treat chrysanthemums as cool‑season color or short‑lived perennials in the mildest pockets. Plant in late winter to early spring for spring and fall shows. Provide afternoon shade in heat waves, and irrigate consistently. Some cultivars may not set buds if nights remain short and bright well into fall, so avoid nighttime light sources that interrupt darkness.
High‑elevation sites: The repeated freeze to thaw cycle can heave shallow‑rooted plants. Plant in spring, set crowns at grade, and mulch after the ground freezes to lock soil temperatures in place.
Bare‑root vs. container windows: Divisions and cuttings are set in spring just as new shoots emerge. Container‑grown plants can be planted any time from spring through early fall, with spring still the strong preference for winter survival.
Planting: Depth & Spacing
Bare‑Root or Divisions: Divide clumps in early spring when new shoots are 1 to 4 inches tall. Lift the clump, discard the tired central wood, and replant the vigorous outside sections. Set each division so the crown sits level with the surrounding soil. Water to settle, then mulch lightly. Space divisions 18 to 24 inches apart for cushion forms and 24 to 30 inches for vigorous or taller types. In cut‑flower rows, allow 24 to 36 inches between rows for airflow and access.
Container‑Grown: Plant mums at the same depth as in the nursery pot. The top of the root ball should be flush with the soil surface, not buried. Rough up circling roots before backfilling. For a single plant display, an 8 inch nursery pot is the basic unit seen in commerce; larger 10 to 12 inch containers produce a broad dome of flowers. In beds, space most garden mums 18 to 30 inches apart to maintain air circulation and to reduce mildew risk.
Transplant shock and acclimation: Harden off greenhouse or indoor mums for 5 to 7 days before planting. Set them outdoors in bright open shade for a couple of days, then in morning sun before transitioning to full sun. Plant on a cool, overcast day if possible, water thoroughly to settle soil, and shade with a temporary fabric or evergreen boughs for a day if you see flagging.

Watering & Mulching
Establishment phase: Right after planting, your goal is steady moisture without saturation. Check the top 2 inches of soil; if it is dry to the second knuckle, water thoroughly so moisture penetrates 6 to 8 inches. In the first four to six weeks, avoid cycles of wilting and drenching because that leads to spindly stems and root stress.
Mature schedule: Once established, mums prefer consistent, moderate moisture. Deeply water when the upper few inches are dry, then allow the surface to dry between waterings. Drip lines and soaker hoses shine here because they keep foliage dry, which lowers disease pressure in humid climates. In containers, water until it flows from the drain holes and never allow the pot to stand in a saucer of water.
Mulch types and thickness: A 2 to 3 inch layer of shredded bark, pine needles, or clean straw moderates soil temperatures, reduces crusting, and extends watering intervals. Keep mulch pulled back 1 to 2 inches from stems to prevent rot at the crown. In summer heat, mulch also lowers splash of soil onto foliage, which helps with leaf spot and blight.
Heat spikes and drought management: During prolonged heat, shift plants into morning sun with open afternoon shade in warm zones or use shade cloth temporarily. Water early in the day so foliage dries quickly. In extremely arid regions, consider a coarse organic mulch plus a thin mineral layer such as small gravel to slow evaporation without trapping water at the crown.
Salinity and water quality: Avoid softened household water because dissolved sodium can damage roots over time. If hard water leaves white crust on container rims, occasionally flush with clear rainwater to push salts out of the root zone.
Feeding
Timing: For in‑ground plantings, mix a balanced flower‑bed fertilizer into the soil before planting based on your soil test. After plants are growing, a light topdress in late spring helps, but stop regular fertilizing by early to mid July in cold winter regions so stems harden before frost. Container mums are heavier feeders and benefit from periodic soluble feeding during the active growth phase.
N‑P‑K guidance: For new beds built on poor soil, a modest pre‑plant application in the neighborhood of 1 to 1.5 pounds of a 5‑10‑5 to 7‑6‑5 fertilizer per 100 square feet worked into the top 6 inches is a practical starting point. In many average garden soils, a lighter 10‑10‑10 style application worked in before planting, then no further feeding after early summer, is sufficient for robust growth without late, soft flushes. Avoid high nitrogen late in the season because it produces lush growth that flops and overwinters poorly.
Slow‑release vs. organic options: Slow‑release granulars offer steadier supply in beds and reduce leaching. Organic sources such as compost plus modest amounts of natural fertilizers can support steady growth while improving soil structure. In containers, use a complete potting‑plant fertilizer according to label directions, then taper feeding as buds color.
When to skip fertilizer: Well prepared beds with healthy organic matter often supply enough nutrients for established mums. If growth looks balanced and leaves are deep green, skip extra feeding. Overfertilized mums grow tall and loose, invite mildew, and may delay flowering.
Soil biology pointers: Aim for at least a few percent organic matter in landscape soils, with 3 to 5 percent a practical target for flower beds. Compost, leaf mold, and shredded bark feed the microbial engine that converts nutrients into plant‑available forms. Retest soil every 2 to 3 years, or sooner if you have ongoing pH or salt issues, to keep amendments tuned rather than guessed.
Pruning & Support
Pinching for shape and bloom: Pinching is the key to that tight, rounded habit loaded with flowers. When stems reach about 6 inches tall in spring, remove the soft tip, taking about three quarters of an inch to 1 inch of new growth. Repeat every 2 to 4 weeks whenever new shoots add 3 to 5 inches. In most regions, stop pinching around early July in the interior and by late July near warm coasts so flower buds set and mature for fall. This schedule produces a dense canopy with more flowering shoots.
Deadheading and clean‑up: During bloom, snip off spent flower heads to keep plants tidy and direct energy to the remaining buds. After a hard frost darkens the leaves, leave stems standing for winter if your goal is survival in cold climates. In spring, cut back to 3 to 4 inches above the crown as new growth emerges.
Support for tall or top‑heavy types: Some heirloom and exhibition forms can grow well over 2 feet. Use ring stakes or light tomato hoops early in the season, adding ties loosely as the plant fills out. Set supports when plants are under 12 inches tall so the canopy grows through them and hides the hardware.
Tool hygiene: To limit the spread of disease, clean pruners and snips between plants. A quick wipe or dip with 70 percent isopropyl alcohol works well and does not require soaking. Rinse and dry tools at day’s end, and oil pivots to prevent corrosion.
Overwintering
Mulch strategy for in‑ground plants: After a hard freeze kills the tops and once the soil surface has frozen, blanket crowns with 3 to 4 inches of light, airy mulch such as pine needles, loose shredded bark, clean straw, or evergreen boughs. The goal is insulation and protection from freeze to thaw cycles, not warmth. In very windy sites, a loose wire hoop or low fence prevents mulch from blowing away. Remove winter cover gradually in early spring once severe cold has passed but before new shoots stretch pale under the mulch.
Freeze to thaw management: The enemy of shallow‑rooted mums is heaving. The winter mulch stabilizes the soil temperature to reduce this up and down movement. In early spring, pull mulch back from crowns as soon as you see new growth to keep shoots from etiolation and rot.
Rodent protection: Thick, fine mulches can shelter voles. If voles are common in your area, favor coarse mulch, keep it thinner and pulled back a bit from the crown, and consider a hardware‑cloth collar with quarter‑inch mesh pressed a few inches into the soil around newly planted clumps. General yard sanitation helps too: keep grass trimmed and remove piles of debris that provide cover.
Containers and tender situations: If you are overwintering mums in pots in cold regions, the safest place is often the ground. You can sink the entire pot into the soil in a protected bed for winter, then lift in spring. If that is not possible, move containers into an attached but unheated garage, shed, or cold frame that stays roughly 20 to 45 °F. Water sparingly so the root ball never dries to dust, yet avoid soggy media. Bring pots back into light as days lengthen, acclimate gradually, then cut back dead stems and resume feeding once growth is active.
Growing Environments
Containers: Mums are excellent in containers for porches, stoops, and decks. A single rooted cutting is commonly grown in an 8 inch pot for fall sales; for showy domes, step up to 10 to 12 inches or use 1 to 2 gallon nursery containers. Choose a peat‑ or bark‑based commercial potting mix with ample perlite for drainage. Ensure each container has large drain holes and never add a saucer that traps water. In very windy exposures, add pot feet or wedge containers so they cannot tip.
Minimum soil volume for performance: For a single display mum, think of 8 to 12 inches in diameter or about a 1 to 2 gallon container as a functional minimum. Larger volumes hold moisture longer and buffer heat better, which matters on sun‑baked patios.
Microclimate tips: In the South and along reflective hardscapes, give mums morning sun and dappled light later to reduce heat stress. In windy Plains or high‑elevation sites, set beds where a fence or evergreen hedge breaks prevailing winds. Avoid night lighting near security lamps or porch lights. Mums are short‑day plants that require long, uninterrupted nights to set flower buds, and stray light can delay or reduce blooming.
Companion Planting & Design
Extend color and hide die‑back: Pair mums with late season perennials like aster, seed heads of ornamental grasses, and fall sedums. These companions echo mum colors and keep the bed interesting after the mum display peaks. In colder zones, plant ornamental kale and pansies ahead of mums to bridge color into true cold. Evergreen groundcovers fill gaps in winter once stems are cut back.
Pollinator‑friendly choices: Single and semi‑double chrysanthemums offer more accessible pollen and nectar than fully double forms. Mixing a few singles with popular decorative types brings in bees on warm fall afternoons. Keep spacing generous, 18 to 30 inches, to promote airflow and reduce leaf disease in humid weather.
Color stories and anchors: For classic fall warmth, combine amber, copper, and gold mums with coneflower seed heads and tawny grasses, then punctuate with yellow flowers and white flowers in nearby beds. For cool contrast, layer violet and burgundy mums against blue asters and salvias and mention nearby purple flowers content to inspire ideas. If your readers plan seasonal décor or events, mums are a natural feature in a wedding flowers guide, especially for rustic or harvest themes. Spring bulbs like tulips and daffodils take over the same spaces in early season while mums sleep below. To carry fragrance across seasons, weave in roses and drifts of lavender along approach paths, keeping each group in its own micro‑climate and spacing to maintain airflow.
References
- Penn State Extension. “Chrysanthemum Care.”
- Utah State University Extension. “Growing Chrysanthemums in the Home Garden.”


Written by: Your Flowers Guide editorial team
We are a small independent group of flower lovers who research and review each guide using trusted horticultural and educational sources. Learn more about us