How to Draw Hydrangea macrophylla (Bigleaf Hydrangea) Step by Step
Step 1: Build the layout with simple guides

Start with the biggest shapes, not the details. Hydrangea flower heads are round masses, so two circles are the best first step. Place your first circle high on the left side. Make it larger. Place the second circle to the right and a bit lower. Make it slightly smaller. Leave enough space between them so the stems can split naturally, but let the circles feel like they belong to the same plant.
Add a light cross inside each circle. One vertical and one horizontal line is enough. These guide lines help you keep the cluster balanced when you add florets later. Do not press hard. These are planning lines, not final lines.
Now draw the main stem from the bottom center area going upward. Keep it smooth and slightly curved. Split it into two thinner stems that point toward the center of each circle. The split should happen below the flower heads, not inside them. Think of a gentle Y shape.
Next, block in the leaves with simple oval shapes. Use four leaf guides, two on the left and two on the right. Make them wide and slightly pointed at the tips. Hydrangea leaves are large, so let them feel generous. Keep all leaf guides light and clean. At this stage, do not add serrated edges or veins. You are only placing the shapes so the whole drawing feels balanced. When the layout looks good, move on.
Step 2: Turn guides into clean silhouettes

Now you will replace the perfect circles with soft, natural outlines. A hydrangea flower head is not a smooth ball. It has a fluffy edge created by many small florets. To show that, trace around each circle with a gentle scalloped line, like small rounded bumps. Keep the bumps subtle and even. Avoid sharp points. You want a soft cloud shape that still reads as round.
Next, clean up the stems. Trace over your stem lines to make them slightly clearer and more confident. Keep the main stem a bit thicker than the two stems that hold the flower heads. This small thickness change makes the plant look stable. Make sure each stem connects into the base of the flower head area.
Then refine the leaves. Replace each oval guide with a clean leaf outline. Hydrangea leaves are oval to egg shaped with a pointed tip. Let the base of each leaf attach to the stem with a short, simple leaf stalk. Keep the leaf edges smooth for now. This keeps the drawing easy and helps you focus on the flower clusters first.
Add a simple center line inside each leaf if you want to match the look of the next stages. Keep it light. This is the midrib line, and it runs from the leaf base to the tip. Do not add side veins yet.
At the end of this step, you should have two fluffy cluster outlines, a clean stem split, and clear leaf shapes. Your drawing should still feel simple and open, with plenty of white space inside the clusters for florets.
Step 3: Add the first large florets
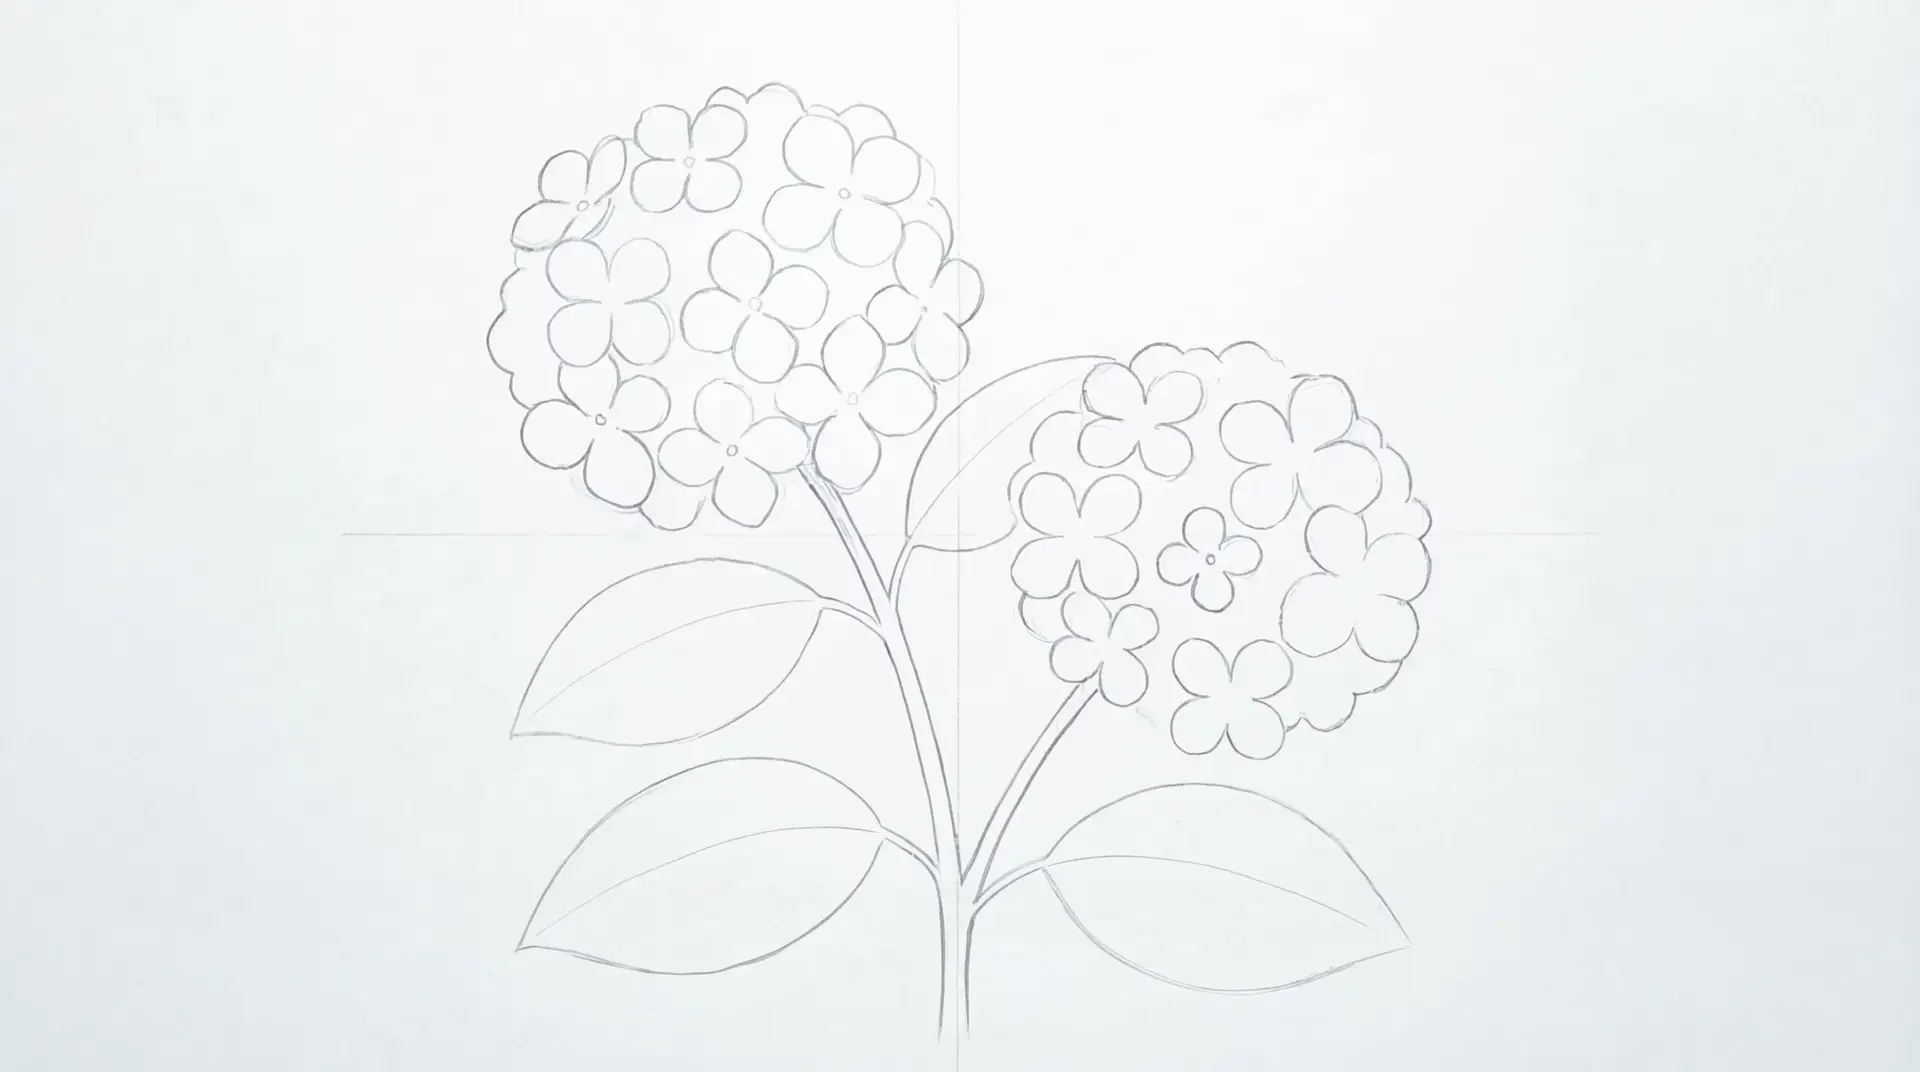
This is the fun part. Hydrangea mophead clusters are made of many small florets that often look like four rounded petals. Start with a small number of larger florets. Do not try to fill everything at once.
Begin on the left cluster. Place a few large four petal shapes near the outer edge. Each petal can be drawn like a rounded heart shape, but softer. Keep the petals slightly uneven so they look natural. Add a tiny circle or dot in the center of each floret. That small center mark helps the shape read as a flower, not a clover.
Work your way across the cluster, spacing the florets so they do not all touch. Leave gaps. Those gaps will be filled later with smaller florets and overlaps. Vary the size. Put the biggest florets near the front and the outer edge. Put slightly smaller florets toward the center.
Move to the right cluster and do the same. Keep the right cluster a bit less full than the left if you want a natural asymmetry. The important thing is to keep the overall round silhouette. If a floret goes too far outside the fluffy outline, adjust it inward so the cluster stays round.
Keep leaf details minimal here. If your leaf midrib lines are not drawn yet, add them now with a light stroke. Do not add serration or side veins yet. At the end of this step, both clusters should show clear, simple florets, but the clusters should still feel airy and unfinished.
Step 4: Fill the clusters and show overlaps
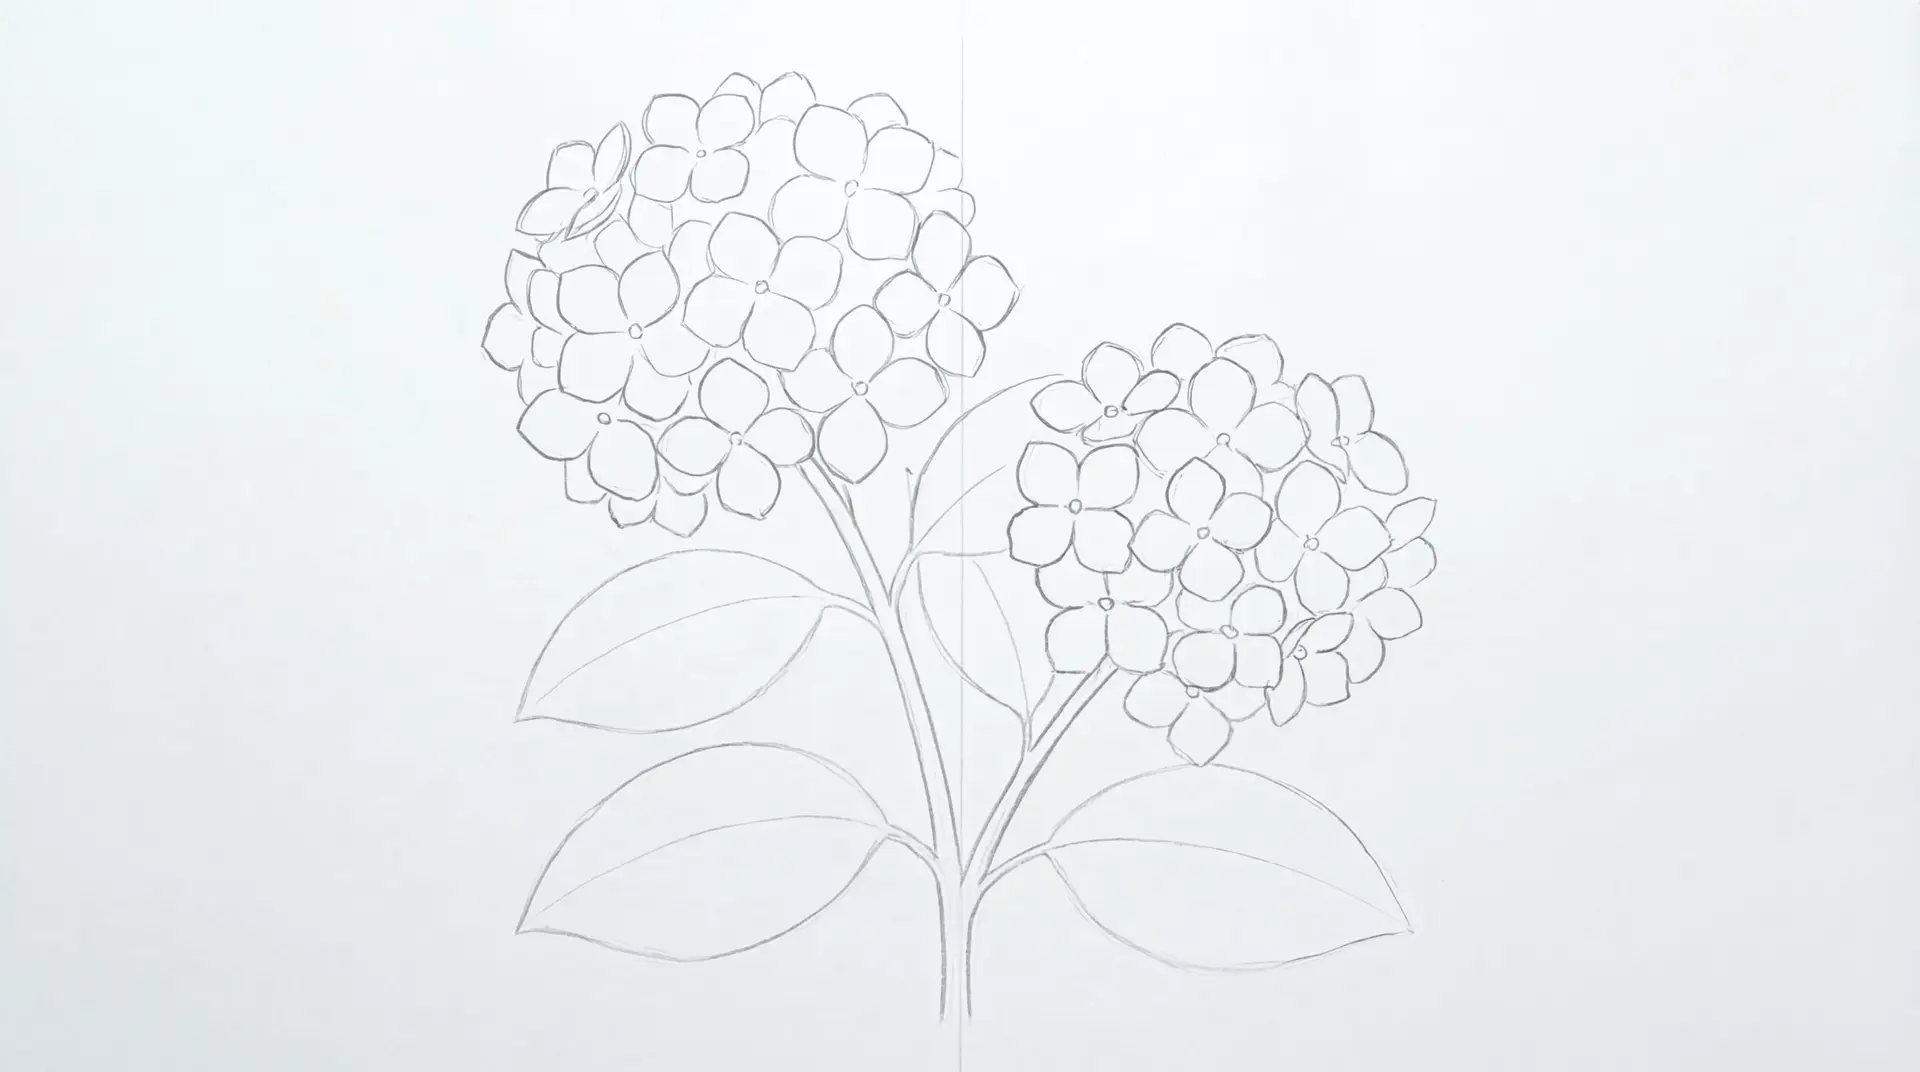
Now you will make the hydrangea look full. The goal is not to draw hundreds of tiny flowers. The goal is to create a believable cluster by layering medium and small florets around the big ones.
Start with the left cluster. Add more four petal florets in the spaces between the existing ones. Let some petals overlap slightly. Overlap is what creates depth. When two florets overlap, you can hide a small part of one petal behind another floret. Keep the overlaps gentle so the drawing stays clean.
As you reach the edge of the cluster, add a few partial florets that are cut off by the outer silhouette. This is a strong realism trick. It makes the cluster feel like a rounded mass, not a flat pattern.
Move to the right cluster and repeat. Add florets with a mix of sizes. Keep the center area less detailed than the edge area. This keeps the cluster from looking too busy.
Refine the stems a bit more. Make sure the two cluster stems connect cleanly and do not look like they float. If you want an extra leaf behind the clusters, sketch it lightly so it sits between the two flower heads. Keep it simple and do not let it steal attention from the blooms.
At the end of this step, both flower heads should feel full and rounded, with clear floret shapes and a few overlaps that suggest depth.
Step 5: Add leaf serration and veins
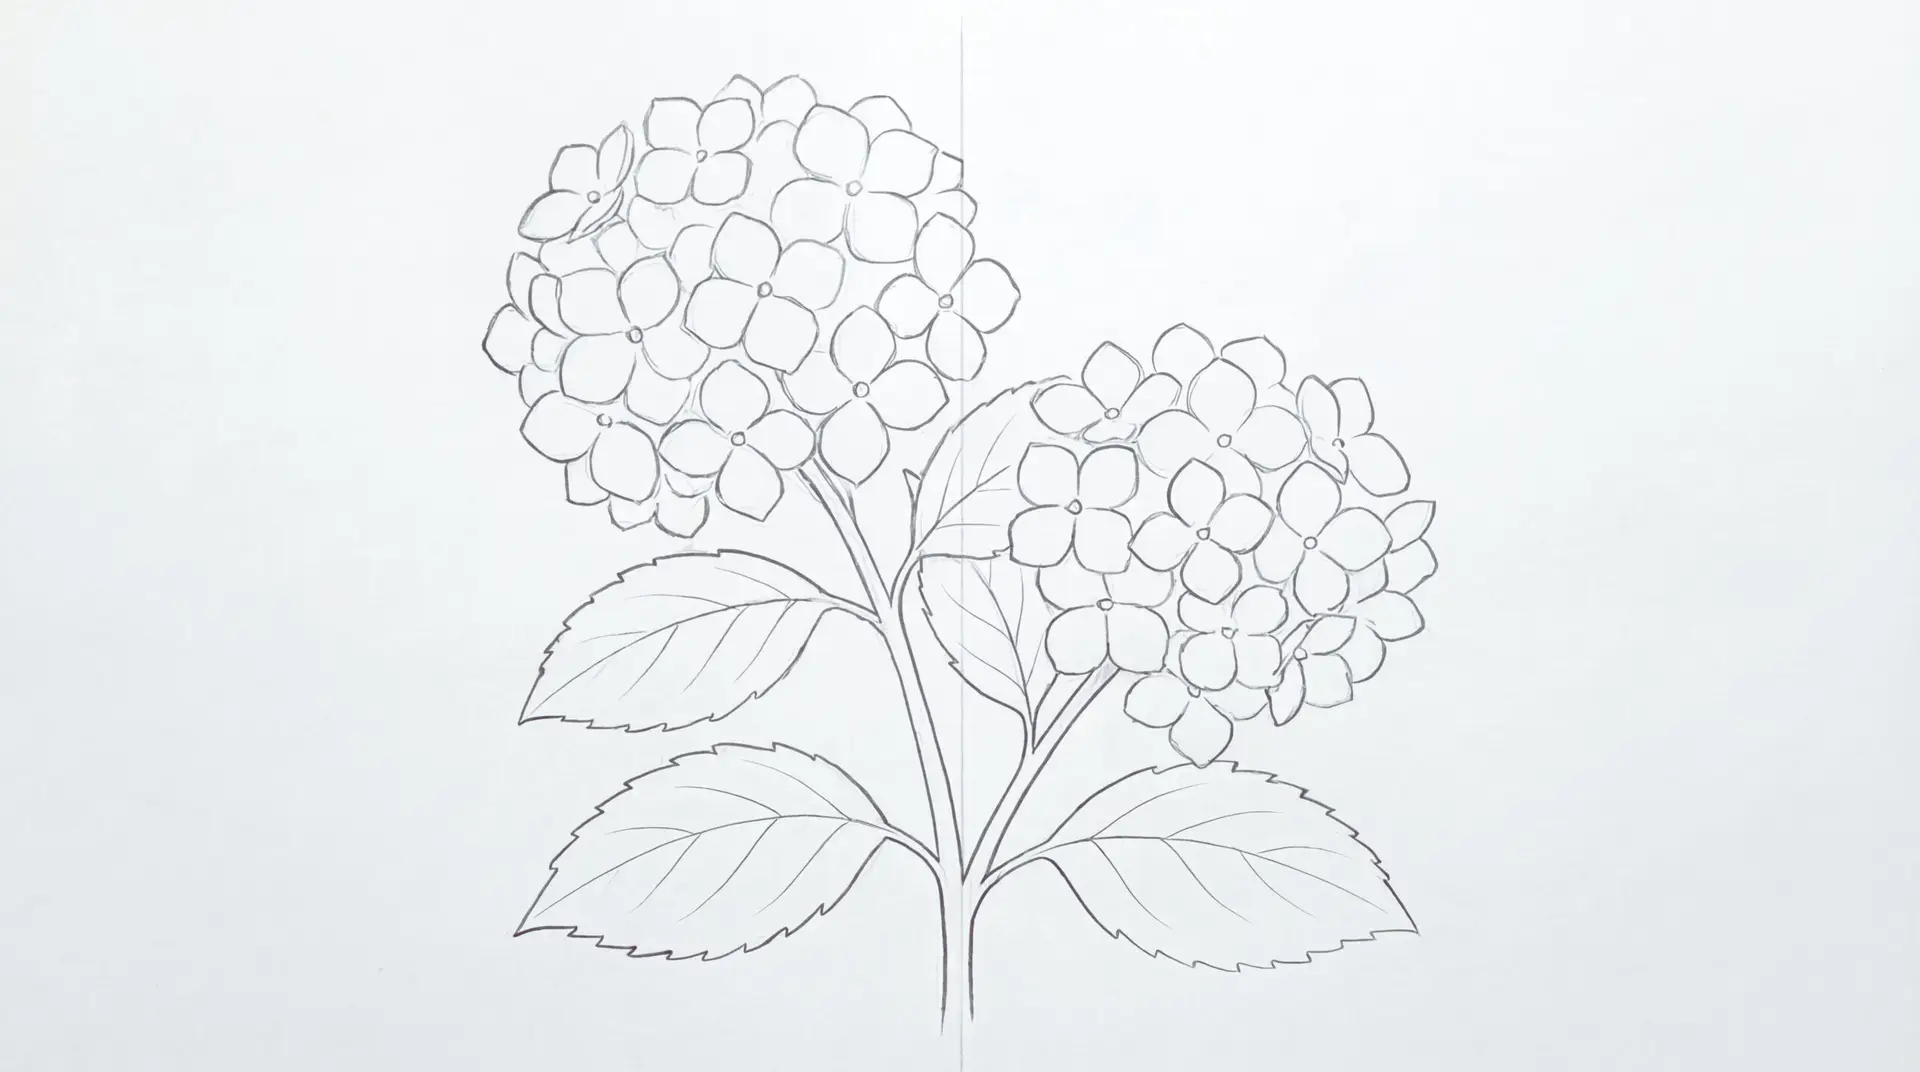
Hydrangea leaves are a big part of the plant. They are broad, slightly glossy, and usually have a toothed edge. In this step you will add that leaf character without making it messy.
Start by shaping the leaf edges. Add gentle serration, small tooth-like bumps along the leaf outline. Keep them consistent in size. Do not make them sharp or spiky. A smooth, repeating tooth pattern looks better than random jagged edges.
Next, add the main leaf veins. You already have the midrib. Now add a few side veins that branch out from the midrib toward the edges. Keep them light. Hydrangea veins are visible, but they should not overpower the flower heads. Angle the veins slightly upward as they move toward the leaf tip. Do not draw too many. A few clean veins on each leaf is enough.
Now do a quick cleanup pass on the flower clusters. Make sure the floret edges are clear. If any petals look too similar, vary them slightly. You can also strengthen the outline of a few front florets to help them stand out.
Make the stems look confident with one clean line on each side. Keep the stems simple. At the end of this step, your drawing should look complete as line art, with realistic leaves and full flower clusters.
Step 6: Finish with subtle shading and clean line weight

This final step is about depth and polish. Keep the shading soft. Hydrangea drawings can look heavy if you shade too much.
First, erase or soften the construction guides if they are still visible. Keep only the lines you want in the final drawing. Then adjust your line weight. Make the main outer shapes slightly darker: the cluster edges, the most important floret outlines, the main stem, and the leaf outlines. Keep interior lines lighter: leaf veins and inner petal details.
Now add light shading between florets. The easiest method is to place a soft shadow in the small gaps where petals overlap. Shade just under the edge of a petal that sits on top. This creates a layered look. Do not shade the whole petal. A few shadows in key places are enough.
You can also add a tiny hint of texture inside some petals, like a short curved line or a very light stroke that suggests the petal surface. Keep it minimal and consistent. Too many interior lines can make the flower look busy.
Finally, check the balance. The left cluster should feel slightly larger and closer. The right cluster slightly smaller and a bit lower. Leaves should frame the stems and clusters without covering the blooms. When everything feels clean and readable, your hydrangea drawing is finished.
Written by: Your Flowers Guide editorial team
We are a small independent group of flower lovers who research and review each guide using trusted horticultural and educational sources. Learn more about us