How to Grow Peonies from Bare Root: Step-by-Step Guide
Why bare root is actually the best way to start
Most gardeners discover peonies through potted plants at a nursery. But if you want to build a serious peony garden – or just get the best plants for the price – bare root divisions are the way to go. They are cheaper than potted specimens, they travel well, and they establish faster because there is no root disturbance at planting time.
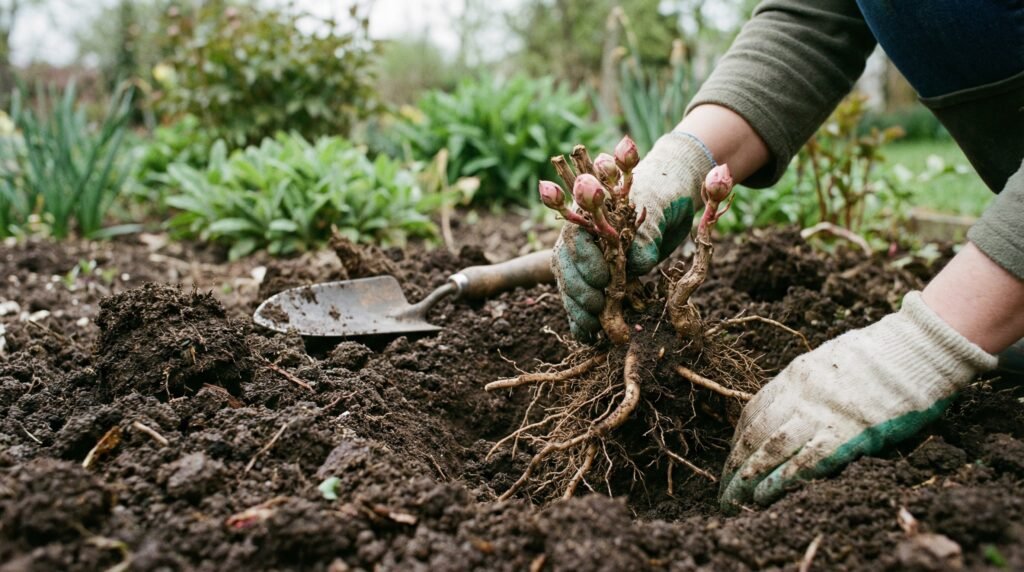
A bare root peony looks nothing like a finished plant. It is a clump of fleshy roots with a few small pink or red buds called eyes at the crown. This is what the whole plant grows from. If you understand how to handle this correctly, the rest is straightforward.
What a bare root peony is – and how to pick a good one
When you order bare root peonies, you receive a root division that was dug from a mature plant. The standard retail size is a 3-5 eye division, meaning the crown has three to five visible growth buds. This is the minimum for a plant that will bloom in its second or third year.
When evaluating what you receive: the roots should feel firm and slightly damp, not shriveled or soft. The eyes should be visible – pink, red, or cream-colored – and intact. Some minor surface mold is not necessarily a problem, but rot that has reached the interior of the root is. If roots are hollow or mushy at the base, the division is compromised.
Two or three eyes is workable but slower to establish. Five or more eyes will typically produce blooms in year two. More eyes generally means a stronger first-year plant.
When and where to plant
Fall is the ideal planting time in most of North America – September through November, before the ground freezes. Bare roots planted in fall have the entire winter to develop a root system before spring growth begins. Spring planting works but often delays establishment by a full year.
Peonies need full sun – at least 6 hours of direct light daily. This is not negotiable. Plants in partial shade grow fine but bloom poorly or not at all. Morning sun with some afternoon shade is acceptable in very hot climates (USDA zones 7-8), but avoid planting against north-facing walls or under trees.
Soil should drain well. Peonies sitting in wet soil over winter will rot. If your garden has heavy clay, amend the planting area with compost or coarse sand before planting, or build a slightly raised bed.
Planting depth: the number one mistake gardeners make
This is where most failures happen. Peonies planted too deep will not bloom. It is that simple, and it is extremely common.
The rule: plant the eyes no deeper than 1 to 2 inches below the soil surface in cold climates (zones 3-5). In warmer zones (6-8), planting at soil level or just barely below is better, since the chilling effect of the soil surface helps trigger dormancy properly.
When you set the root in the planting hole, the eyes should be pointing upward. Backfill around the root, firm the soil gently, and check the depth before you finish. It is worth doing this carefully rather than guessing.
Gardeners who plant at 3, 4, or even 6 inches deep – which feels more secure – often wait years for blooms that never come. If your peonies have lush foliage but no flowers, depth is almost always the first thing to check.
First year expectations: sleep, creep, leap
There is an old gardener’s saying for peonies: sleep, creep, leap. In the first year, the plant sleeps – it establishes roots underground with minimal visible top growth. In the second year, it creeps – you might see stems and a few leaves, possibly one or two small blooms. In the third year, it leaps – full stems, full foliage, and if everything went well, flowers.
This timeline frustrates impatient gardeners, but it reflects how the plant actually works. A peony invests early energy in its root system. Trying to rush it with heavy fertilizer in year one usually backfires (more on that below).
One reassuring note: once a peony is established, it can live and bloom for decades without being moved. Plants over 50 years old are not unusual in older gardens. The early patience pays off in a very long relationship.
Watering and mulching after planting
After planting, water thoroughly to settle the soil around the roots and eliminate air pockets. Then water regularly through fall if rainfall is sparse, giving the root system a chance to establish before freeze.
Mulch lightly – 1 to 2 inches of straw, bark, or shredded leaves over the planting area helps moderate soil temperature through winter and prevents frost heave. Do not pile mulch directly on top of the crown, especially in the first winter. Pull it back slightly in early spring as new growth appears.
Avoid high-nitrogen fertilizers in the first season. Nitrogen promotes leaf growth at the expense of roots and flowers. If you want to feed the plant, a low-nitrogen, high-phosphorus fertilizer applied in spring year two is more appropriate.