How to Grow and Care for Gerbera daisy
Contents
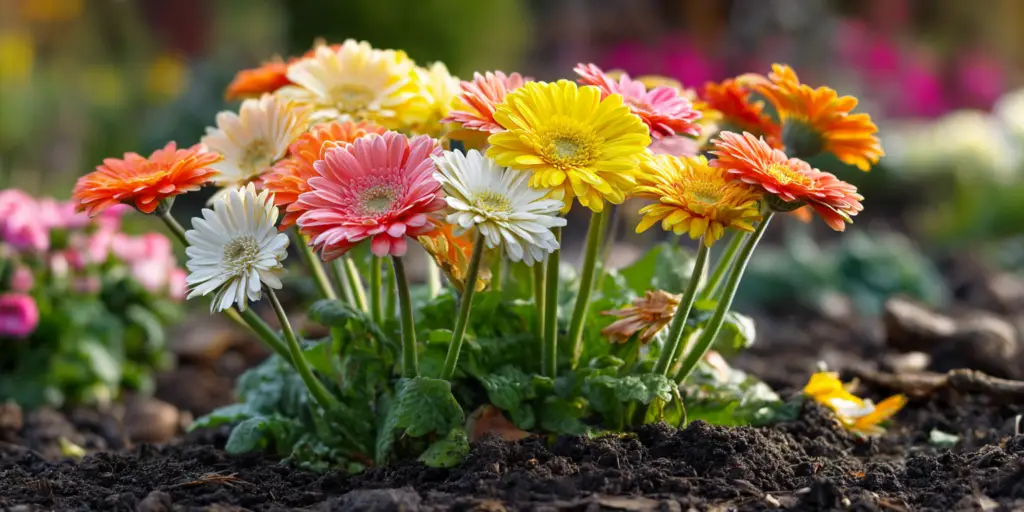
Gerbera daisy is the florist favorite with garden potential. The accepted botanical name for the most common garden types is Gerbera jamesonii and modern hybrids are often listed as Gerbera × hybrida. You may also see common names such as Transvaal daisy and Barberton daisy. In U.S. landscapes it is usually grown as a warm season bedding plant or container specimen. In mild regions it behaves as a short lived perennial. Plants form a tight basal rosette of leaves that send up leafless flower scapes in bright shades from white and yellow to pink and red. For most home sites the ideal exposure is morning sun with light afternoon shade. In hot southern summers this balance encourages continuous bloom and limits heat stress. Success with Gerbera Daisy care comes down to five habits that never change: start with fast draining soil, set the crown a little above the soil line, water at the base early in the day, feed lightly and regularly, and remove spent scapes to keep new flowers coming.
Soil & Bed Preparation
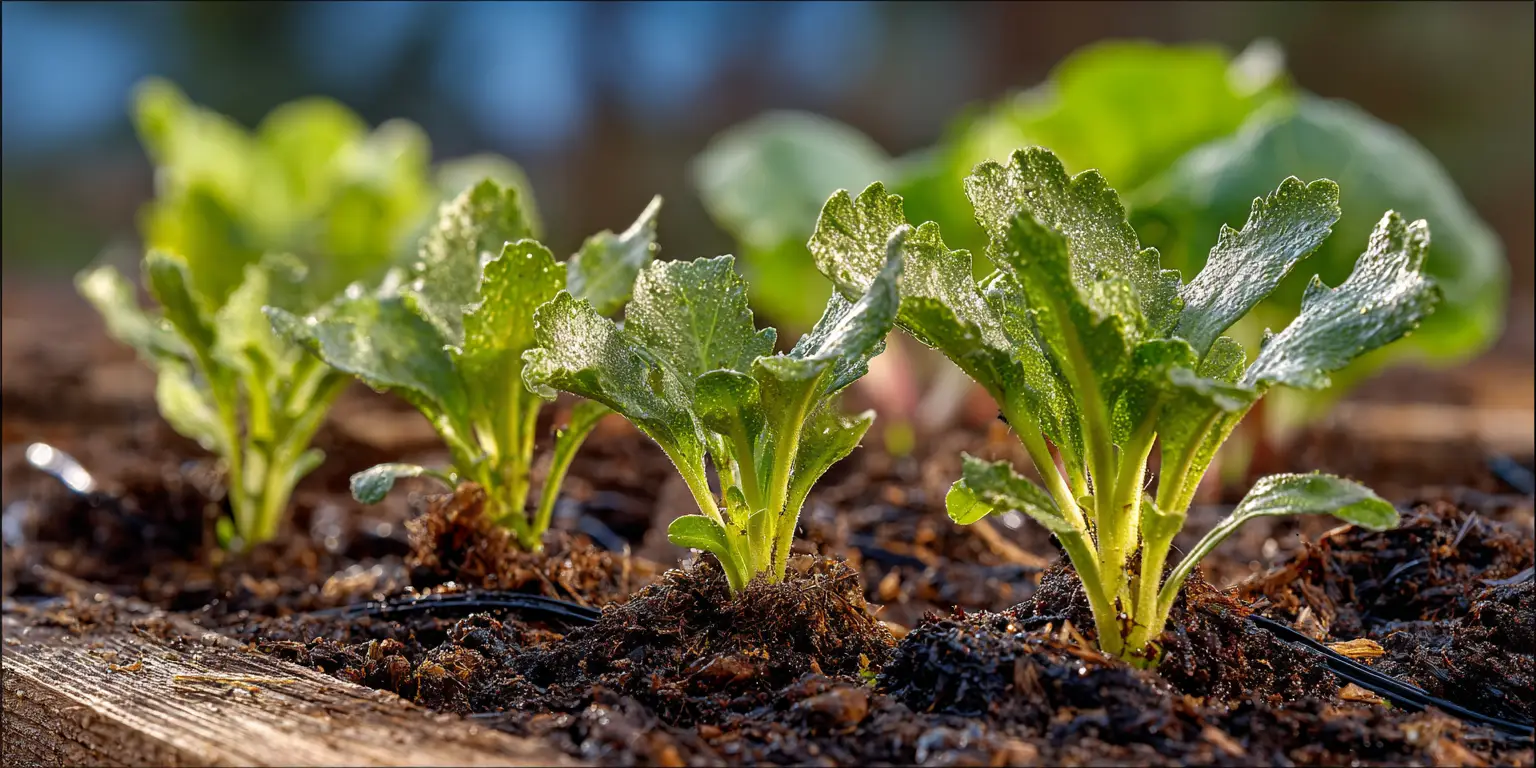
Gerbera needs a porous, organic rich medium that drains quickly yet holds even moisture. A sandy loam that has been amended with compost works well for in-ground beds. For containers, use a peat or bark based potting mix with added perlite to keep air in the root zone. Avoid heavy clay that puddles after rain. If your native soil is slow to drain, use raised beds filled with a high quality mix or grow in containers. Keep the planting area free of standing water and avoid burying the crown. The crown is the point where roots meet stems; setting it too deep is the fastest way to invite crown and root rot. Work two to three inches of finished compost into the top eight to ten inches of garden soil before planting. This lifts structure and improves moisture balance. In containers, refresh the top two inches with new mix each spring and repot with fresh medium every one to two years when plants become root bound. If your soil crusts, puddles, or compacts, prioritize structure first. Blend in coarse compost or fine pine bark. For beds that stay soggy after storms, create mounded rows that rise four to six inches above grade so water sheds away from the crown. In very sandy soils that drain too fast, increase organic matter and mulch to slow evaporation.

Planting Calendar by USDA Zone
Zones 3 to 5. Treat Gerbera as an annual outdoors. Plant nursery transplants after the last spring frost when soil has warmed, which is often late May to early June. Consider containers so you can move plants under cover when early fall cool spells arrive. For a bloom head start, buy established, budded plants rather than sowing seed.
Zones 6 to 7. Set transplants outdoors after the last frost date in spring. Expect best performance from late spring through early fall. In Zone 7, plants may survive a mild winter with heavy mulch and excellent drainage, but most gardeners treat them as annuals or bring pots inside. Where summers are hot and humid, morning sun with afternoon shade produces longer flower stems and steadier bloom.
Zone 8. Plant in spring after danger of frost. Mulch plants for winter and protect from freezing nights with frost cloth when needed. Expect occasional perennial return in well drained beds. In long hot summers, plan for a bloom lull in the most intense heat, then renewed flowering when nights cool.
Zones 9 to 10. In the warmest parts of the South and coastal California, use Gerbera as a cool season to shoulder season color plant. Set transplants from fall through early spring, choosing bright exposures with afternoon shade and constant airflow. In late spring shift to morning sun sites. In zones with warm winters, transplant windows can extend from late fall to early spring.
Zone 11. Grow through the cooler months and give midday shade in late spring. Plant in raised beds or large containers and refresh soil annually. In summer heat waves, provide temporary shade cloth and water early to hold plants until nights cool again.
Special environments. In arid Southwest sites, group plants so irrigation can be targeted and mulch to slow evaporation. Near salty coasts, irrigate at the base and avoid overhead water to limit leaf spotting. At high elevation with intense sun and cool nights, provide wind breaks and observe the same frost based timing as your last freeze date.
Planting: Depth & Spacing
Garden Gerbera is usually purchased as potted transplants, but established clumps can be divided in late spring when active growth begins. Lift the clump carefully, tease apart crowns so each division carries its own roots and growing point, and replant with the crown at or a touch above the surrounding soil. Space divisions 12 to 18 inches apart to encourage airflow and reduce disease pressure. Water deeply to settle soil and shade lightly for a couple of days while roots reestablish. Most home gardeners will set out container transplants. Loosen circling roots, position the crown level with or slightly above the soil line, and backfill with your prepared mix. Space plants 12 to 18 inches apart in beds. For cut flower rows, leave 18 to 24 inches between rows so you can reach for deadheading and harvest. Plant on a cloudy day or late afternoon to reduce stress. Water to settle, then mulch, keeping mulch pulled back two to three inches from the crown. Not applicable. Gerbera grows from a crown and fibrous roots, not from bulbs or tubers. Harden plants outdoors for 7 to 14 days before setting them in the ground. Start with a couple of hours in bright shade, increase time and light daily, and protect from cold wind. Transplant after this hardening period on a mild day. Water well right after planting and for two to three days provide light shade during the hottest hours. Hold fertilizer for one to two weeks while roots knit into the new soil. If a late frost is predicted, cover with frost cloth and remove covers each morning.

Watering & Mulching
Water is a balancing act with Gerbera. The goal is even moisture without soggy soil. During the first two to three weeks after planting, keep the root zone consistently moist. Once established, supply about an inch of water per week from rain and irrigation combined, adjusting for your soil type and weather. Always water at the soil surface and avoid wetting the crown and foliage. Morning irrigation is best so leaves that do get splashed can dry before night. In prolonged heat, give a deep soak in the cool of morning and check again in late afternoon; if the top inch of soil is dry, water lightly at the base.
Mulch helps regulate temperature and reduces weeds, but keep it away from the crown. Spread a two to three inch layer of pine straw, shredded bark, or similar organic mulch around each plant, stopping a couple of inches short of the crown. This prevents the crown from staying wet and reduces the chance of rot. In very sandy soils, mulch also slows evaporation. In heavy soil, be cautious: too much mulch can trap moisture and aggravate disease. Check beneath the mulch regularly and adjust thickness as seasons change. During heat spikes, provide temporary shade cloth at midday and increase airflow around plants. In drought, prioritize fewer plants and water them well instead of keeping many plants barely alive. If your irrigation water or soil tends to the alkaline side, watch young leaves for interveinal chlorosis which looks like yellowing between green veins. This usually signals iron or manganese deficiency caused by high pH. Correct by using a fertilizer or foliar spray that includes these micronutrients and by managing soil pH toward slightly acidic. Water with plain water the day after any foliar application to rinse residues from leaves.
Feeding
Gerbera is a moderate feeder. In most home gardens a light, consistent program outperforms heavy doses. At planting, incorporate compost into the bed. Through the growing season, use either a controlled release fertilizer two to three times or a complete liquid feed once each month. A balanced complete fertilizer is appropriate for Gerbera Daisy care. Products formulated for flowering plants that include iron and manganese are helpful, especially in containers. Avoid frequent high nitrogen spikes, which push leaves at the expense of flowers. If plants are growing in rich soil and blooming steadily, it is fine to skip a feeding cycle. Feed when plants are actively growing and temperatures are in a seasonable range. Early to mid spring and again in midsummer are good windows. Slow release blends labeled for flowers are convenient and reduce the risk of overfertilizing. Where you garden year round, a balanced slow release formula applied lightly at planting and again midseason is usually sufficient. In warm winter climates that use Gerbera as a cool season plant, a low rate of complete slow release fertilizer at transplant is enough to carry through most of the bloom season. Good organic matter supports a healthy soil food web which helps buffer nutrition. Maintain two to three inches of mulch and refresh your compost additions each season. Retest soil every two to three years to confirm pH and nutrient levels and to avoid building excess phosphorus. In alkaline regions focus on container culture and use mixes and fertilizers that keep pH slightly acidic.
Pruning & Support
Deadheading keeps flowers coming. Follow the spent scape down into the clump and remove the entire stem at its base. Do not leave stubs. Removing the whole scape reduces disease entry points and signals the plant to send new scapes. Periodically remove old or tattered basal leaves so air and light can reach the crown. In windy gardens or where stems are exceptionally tall, a low hoop or short bamboo stake with a soft tie can prevent flopping without drawing attention to supports. Clean pruners before you start and sanitize between plants, especially if you have been removing diseased tissue. Wipe or dip blades with 70 percent isopropyl alcohol as you move from plant to plant. Bleach solutions disinfect as well but can corrode blades and require a longer soak, so alcohol is the practical choice for day to day garden sanitation. Keep a small spray bottle of alcohol with your tools and let blades air dry after each wipe.
Overwintering
In USDA Zones 8 to 11, Gerbera can overwinter outdoors if planted on well drained ground. Before the first hard freeze, tidy plants by removing spent scapes and damaged leaves. Mulch with two to three inches of pine straw or similar airy material, keeping mulch off the crown. In the warmest parts of Zone 8, add a breathable frost cloth during cold snaps and remove covers promptly in the morning. In spring, pull mulch back from the crown as soon as new growth appears.
For gardeners in colder zones or anyone growing in containers, move plants indoors before the first fall frost. Keep them in a bright, cool room at roughly 45 to 50 °F (7 to 10 °C). Water sparingly, just enough to keep the root ball from drying out, and provide airflow with a small fan if the room is closed. Do not fertilize during this rest. When danger of frost has passed, harden plants back to outdoor conditions over one to two weeks and reset into beds or display on the patio.
Growing Environments
Gerbera excels in containers. Choose a pot with generous drainage holes. Depth matters because Gerbera makes a relatively deep root system compared with many bedding plants. For a single plant, a container that holds at least one to three gallons of mix will work, and larger volumes are better in summer. For stronger performance and fewer midday wilts, a container with four to six gallons of volume is ideal for flowering perennials. Use a high quality potting mix and avoid heavy garden soil which compacts and suffocates roots. Elevate pots on feet so water can exit freely and empty saucers after irrigation. Position containers where they receive morning sun and bright light the rest of the day. Keep them out of reflected afternoon heat from walls and pavement. In windy exposures, group pots so plants shelter one another and consider a short screen to break the prevailing wind. On covered porches, rotate pots weekly so scapes track light evenly. Indoors, avoid jets of dry air from vents and keep leaves clean so they can photosynthesize well.
Companion Planting & Design
Gerbera’s clean basal rosette and vertical scapes pair well with soft, mounded partners. Low catmints and compact salvias make a gentle skirt that hides the base of the plant while leaving the crown open to air and light. For a pollinator friendly ribbon in full sun, run Gerbera between drifts of coreopsis and dwarf blue salvia so an array of nectar is available across the season. In part sun borders, layer with heuchera and ornamental grasses that do not overwhelm the rosette. Keep neighbors at least a foot away in beds so air can move around plants.
Color play is where Gerbera shines. Echo a rose pink Gerbera with companions from our features on pink and white flowers for a light, wedding friendly palette. Use orange and yellow forms with selections from yellow flowers to create a summer tapestry that reads from a distance. Deep reds pop when set against cool companions from purple flowers and blue flowers lists. If you are building mixed borders or exploring seasonal color families, browse our types of flowers hub to plan continuity from spring to frost. For event styling and bouquet planning, our wedding flowers guide has palettes that welcome Gerbera for cheerful focal blooms. Whatever companions you choose, keep Gerbera crowns open. Avoid creeping groundcovers that run into the rosette and trap moisture. In humid regions give extra space on all sides and thin neighbors during the rainy season. Deadhead and groom often to keep the planting clean.
References
- Clemson University Cooperative Extension, Home & Garden Information Center. “Gerbera Daisy Care: Essential Growing Tips for Home Gardeners.”
- North Carolina State Extension Gardener Plant Toolbox. “Gerbera jamesonii.”
- University of Florida IFAS, Gardening Solutions. “Gerbera Daisy.”
- ASPCA Animal Poison Control Center. “Gerber Daisy (Gerbera jamesonii) — Non-Toxic to Dogs, Cats, and Horses.”
- Iowa State University Extension and Outreach, Yard and Garden. “How do I care for Gerber daisy purchased as a flowering potted plant?”
- Iowa State University Extension and Outreach, Yard and Garden. “Testing and Improving Soil Drainage.”
- University of Maryland Extension. “Soil Health, Drainage, and Improving Soil.”
- University of Maryland Extension. “Types of Containers for Growing Vegetables: Choose the Right Container Size.” (size guidance applicable to flowering perennials in containers)
- University of Minnesota Extension. “Clean and Disinfect Gardening Tools and Containers.”
- Penn State Extension. “Hardening Transplants.”


Written by: Your Flowers Guide editorial team
We are a small independent group of flower lovers who research and review each guide using trusted horticultural and educational sources. Learn more about us