How to Grow and Care for Calla Lily (Zantedeschia)
Contents
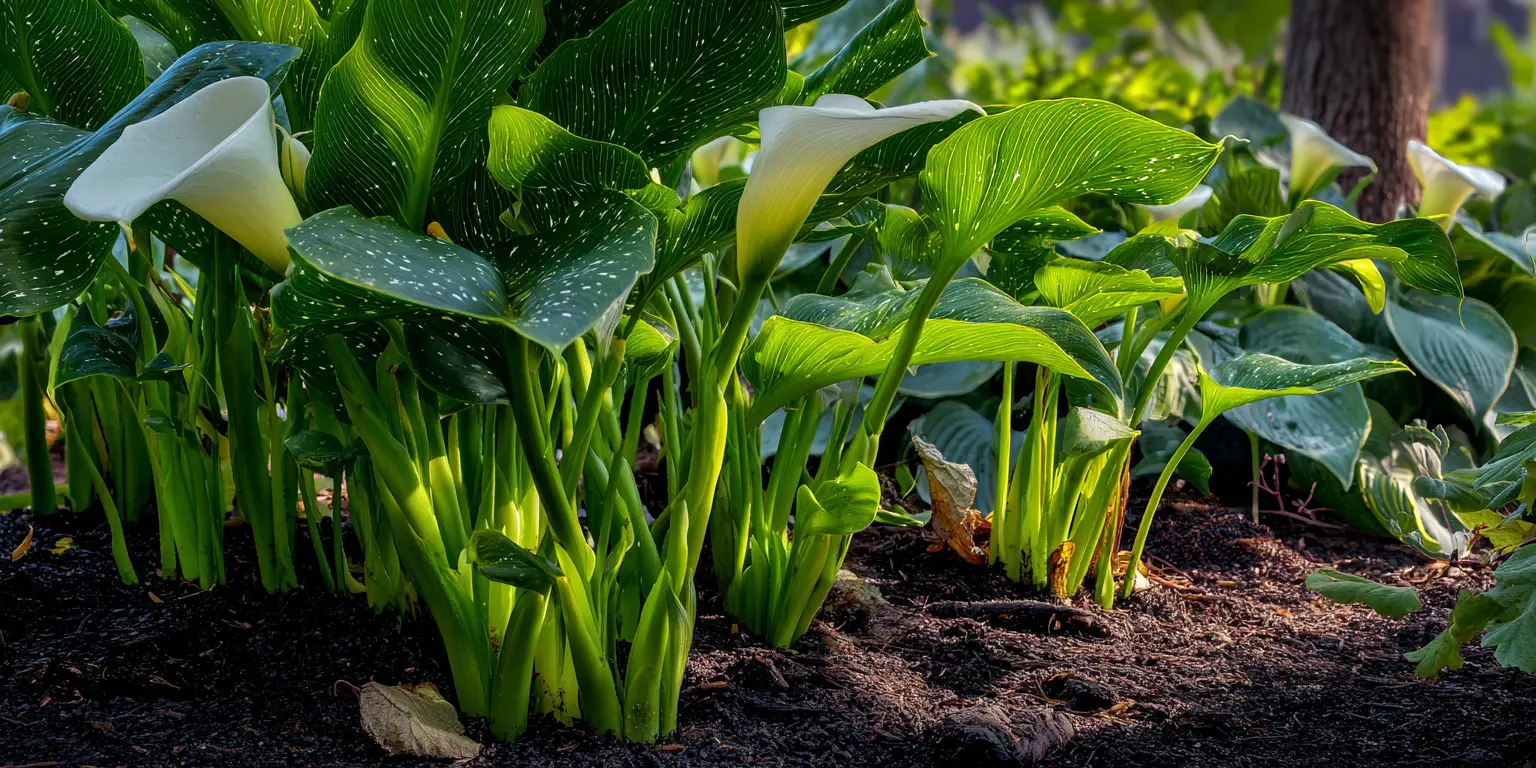
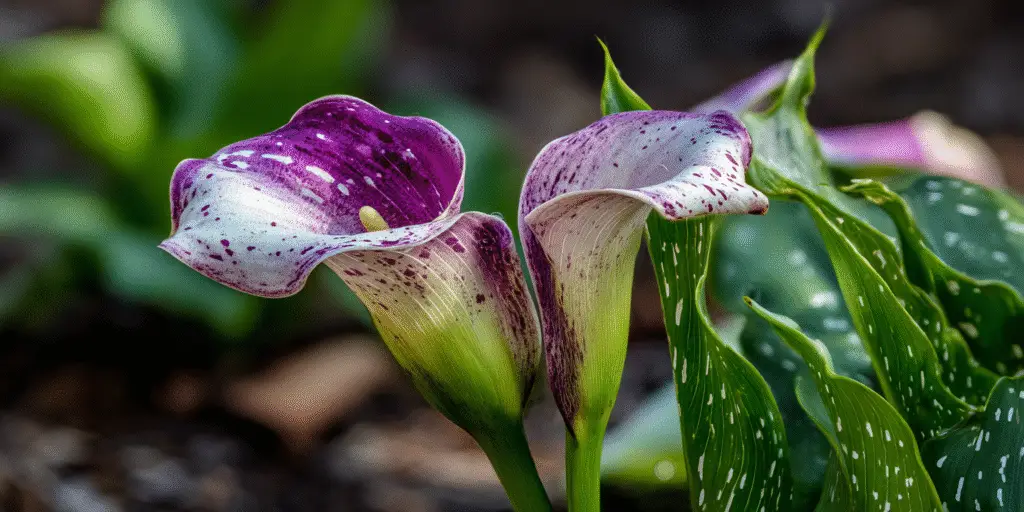
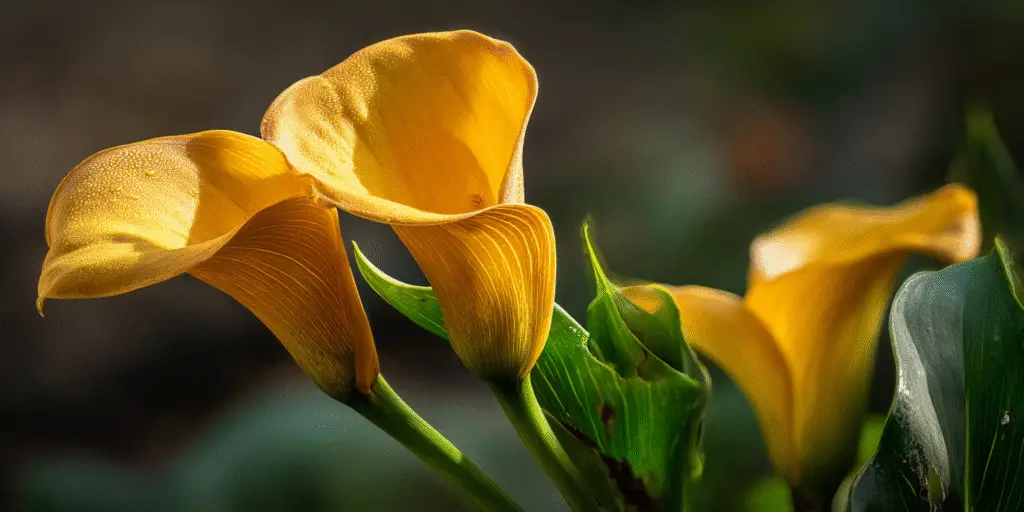
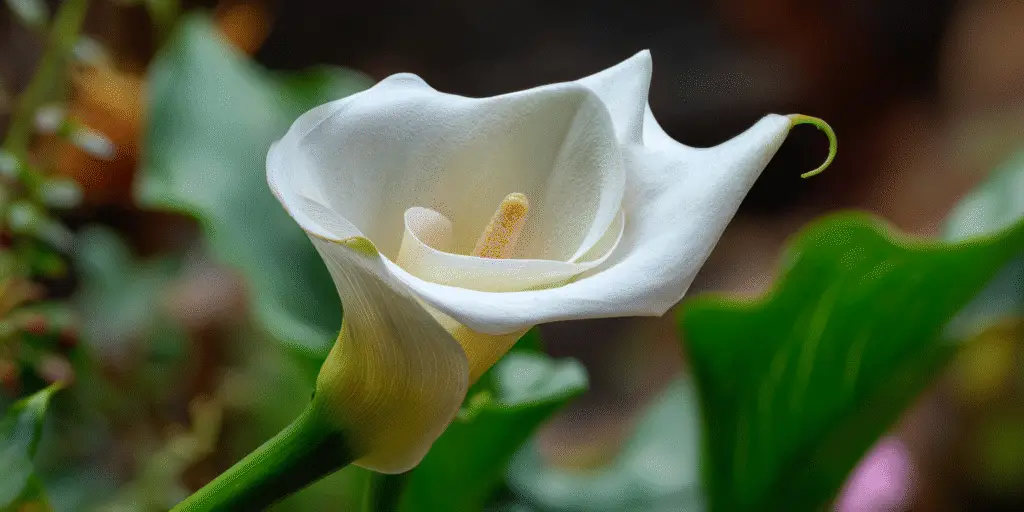
Calla lily is the common name for ornamental plants in the genus Zantedeschia in the arum family. The most widely grown species include Zantedeschia aethiopica, which is often called arum lily, and colored hybrids derived mainly from Zantedeschia rehmannii and Zantedeschia elliottiana. These plants grow from thickened rhizomes rather than true bulbs. The elegant bloom that most people notice is a modified leaf called a spathe that encircles a fingerlike spadix that bears the tiny true flowers. In U.S. landscapes callas are planted as tender perennials in cold regions or as hardy perennials in mild climates. They are dependable in warm zones and excellent summer accents everywhere. Zantedeschia are commonly hardy outdoors in USDA Zones 8 to 10. In Zone 7, Zantedeschia aethiopica may overwinter with protective mulch where winters are short and soils stay evenly moist, while the colored hybrids are best lifted and stored before freezing weather. In Zones 3 to 6 the plants are grown like summer bulbs. Plant the rhizomes after the last spring frost and lift them in fall. Indoors or in containers, callas need bright light and steady warmth to keep growing and blooming. Calla lilies flower best in full sun in regions with mild summers. In hot summer areas they benefit from afternoon shade and consistent moisture. Colored hybrids tend to prefer full sun for strong bloom and sturdy stems, while Zantedeschia aethiopica tolerates brighter shade and even edges of water features if the crown is not submerged. Provide good air movement to keep foliage clean and to limit disease. Start with firm, healthy rhizomes. Plant in rich, well prepared soil that drains freely yet stays evenly moist. Set rhizomes shallow and keep the crown slightly elevated so water never pools over it. Feed lightly and regularly during active growth, then stop feeding late summer as plants slow. Deadhead spent blooms, keep the soil mulched, and either mulch heavily for winter in mild zones or dig and store rhizomes in colder zones. This straightforward routine keeps calla lilies vigorous and flowering on schedule.
Soil & Bed Preparation
Calla lilies thrive in loamy soil that holds moisture without staying soggy. Aim for a crumbly structure with abundant organic matter. Work two to three inches of finished compost into the top twelve inches of soil before planting. Compost improves moisture retention in sandy soils and increases porosity in compacted or clay soils. In heavy clay, double digging or broadforking before adding compost opens channels that help both roots and water move. In very sandy beds, add compost and a small amount of fine bark or leaf mold to slow drainage just enough that the root zone stays evenly moist between waterings.
Drainage and Aeration: Consistent moisture is vital, but prolonged saturation invites soft rot in the rhizomes. The target is soil that absorbs water quickly, holds it like a wrung sponge, and then resupplies roots as it drains. If the site puddles or crusts, plan to raise the planting area by six to eight inches with a blended mix of topsoil and compost. Keep the top of each rhizome fractionally higher than the surrounding grade so irrigation never pools over the crown. In beds that stay damp through winter, prioritize Zantedeschia aethiopica, which tolerates wetter ground better than colored hybrids, and plant the latter in the sunniest, best drained spots.
pH Range and How to Adjust: Calla lilies tolerate a wide pH range from slightly acidic to moderately alkaline. For routine garden performance, aim for a reaction around 6.0 to 7.0 so nutrients remain available. If a soil test shows the pH below target, apply garden lime in fall and retest in spring. If it is above target, incorporate elemental sulfur or acidifying organic matter such as pine fines or leaf mold and retest after several months. Always adjust pH based on a lab test rather than guesswork, because overcorrection can limit bloom and overall vigor.
Drainage Test and pH Targets: Dig a hole twelve inches deep and twelve inches wide. Fill with water to the top. After it drains completely, refill and measure the drop in water level after one hour. A drop of at least one inch shows acceptable drainage. If it drops less, raise the bed and blend in organic matter until the test passes. Send a soil sample to your local Cooperative Extension for a pH and nutrient analysis. Keep most beds for colored callas near 6.0 to 6.8, while Zantedeschia aethiopica tolerates somewhat higher readings without issue.
Raised Beds vs In‑Ground Notes: Raised beds warm earlier in spring and drain more predictably, which suits colored hybrids and any garden with clay. In coastal or arid climates, slightly raised berms with rich, moisture retentive soil balance drainage with the need for steady moisture. In naturally moist sites near downspouts or pond edges, plant Zantedeschia aethiopica in ground soil improved with compost and leaf mold, but never allow the crown to sit under standing water.
Special Medium Needs for Rhizomes: Because calla lilies grow from rhizomes, oxygen around the crown is essential. Avoid dense, waterlogged mixes. In containers or very heavy soils, a blend of quality potting mix, composted bark, and perlite or pumice preserves pore space and keeps the crown from suffocating. When you set rhizomes, backfill gently and firm lightly so there are no large air gaps, then water to settle the soil.

Planting Calendar by USDA Zone
Zones 9 to 10: Where winter frost is rare and brief, plant calla lilies outdoors from late fall to early spring whenever the soil is workable and day temperatures are mild. Zantedeschia aethiopica can function as a near evergreen perennial if soil stays evenly moist. Colored hybrids appreciate a late winter to early spring planting window so they bloom as temperatures rise in late spring and early summer. In unusually hot inland areas, provide bright light with afternoon shade and maintain mulch so the root zone stays cool.
Zones 8 and Warm 7: Plant rhizomes in spring after the last frost when the soil has warmed and day temperatures remain reliably warm. If spring is cool and wet, wait until ground and air temperatures settle into the upper sixties to low seventies Fahrenheit to avoid early rot and sluggish starts. In protected microclimates of Zone 7, Zantedeschia aethiopica may overwinter under a thick organic mulch. Colored hybrids should be treated as summer bulbs: plant after frost, enjoy the bloom, then lift and store the rhizomes before hard freezes return.
Zones 3 to 6: Treat all calla lilies as tender summer bulbs. Start rhizomes indoors four to six weeks before your last spring frost date in roomy pots under bright light to gain a head start. Harden plants outside for seven to ten days by gradually increasing their exposure to sun and wind. Plant in the garden after all danger of frost when nights are consistently above 50 °F and soils are warming. In short growing seasons, containers often give the best bloom since the mix warms faster and you control moisture exactly.
Regional Caveats: In hot humid regions, give afternoon shade and extra air movement to reduce foliar disease. In arid climates, increase organic matter and use mulch to conserve moisture, and consider drip irrigation to deliver deep, even water without wetting the foliage. In coastal gardens with cool summer wind, choose sheltered, sunlit beds that warm well and stake tall varieties if breezes are persistent. In high elevations, prioritize containers and a protected patio or south facing wall that reflects heat and extends the season.
Planting: Depth & Spacing
Calla lilies grow from rhizomes. Plant each rhizome with the buds or eyes facing up. In garden beds set the rhizomes about 2 to 4 inches deep, measured to the top of the rhizome, and space 12 to 18 inches apart for good airflow. Larger rhizomes can sit slightly deeper in looser soils, while in heavier clay stay near the shallow end of the range to reduce rot risk. After planting, water thoroughly and apply mulch to stabilize moisture as shoots emerge. For cut flower rows, keep 18 to 24 inches between rows to allow easy access for deadheading and harvest.
Bare‑Root or Divisions: When dividing clumps, use a clean knife to cut sections that each include at least one healthy bud and a firm portion of rhizome. Dust cut surfaces lightly with garden sulfur if your climate is humid. Replant divisions at the same depth guidelines noted above and water to settle the soil. Divisions may bloom the same season if planted early in warm zones. Where seasons are short, expect divisions to spend more energy on root establishment the first year, then pick up flower count in year two.
Container‑Grown: For containers, an 8 to 10 inch pot suits one rhizome, while a 12 to 14 inch pot can hold two or three evenly spaced. Use a high quality potting mix amended with composted bark and a small amount of perlite or pumice. Set the rhizome 1 to 2 inches below the mix surface so new shoots break easily into light. Water thoroughly to settle and place in bright conditions. To minimize transplant shock when moving container callas into the ground, harden them outdoors for a week, plant on an overcast day or late afternoon, water in well, and shade temporarily with a lightweight fabric or a lath screen for three to five days.
Acclimation and Shock Prevention: Whether you start indoors or purchase a growing plant, hardening off is essential. Gradually increase sun exposure and reduce wind protection over a week. Keep soil evenly moist but never saturated during this period. Avoid fertilizing at the moment of transplant. Wait until new growth resumes, then begin a light feeding schedule.

Watering & Mulching
At planting and through early growth, keep the top six to eight inches of soil consistently moist. Water deeply when the top inch begins to dry, then check again before the next irrigation. Once plants are in full leaf, callas prefer steady moisture. Colored hybrids resent prolonged dryness during flowering. Zantedeschia aethiopica tolerates wetter ground but still performs best in soil that drains between irrigations. In containers, water when the mix is dry to the first knuckle, then apply water until it runs from the drainage holes and discard any water that collects in saucers.
Mulch Types and Thickness: A two to three inch layer of organic mulch stabilizes moisture and reduces surface temperature. Fine shredded bark, leaf mold, and composted pine fines all work well. Pull mulch back an inch from each stem so the crown breathes. In hot climates, add a thin layer of straw or pine needles over the bark mulch during heat waves to further cool the surface and reduce evaporation. Renew mulch as it breaks down to maintain depth through summer.
Avoiding Crown and Root Rot: Good drainage plus clean watering habits prevent most problems. Always water the soil, not the foliage or the crown, especially late in the day. Elevate containers on pot feet so water clears easily. If a spell of wet weather coincides with cool temperatures, gently pull back mulch to expose the crown to light and air, then replace once the soil surface dries. Where tap water is high in salts, leach containers monthly by watering generously until several pot volumes drain out, which flushes salts away from the crown.
Heat Spikes and Drought Management: During multi day heat events, shift container plants to bright shade and increase irrigation frequency while keeping the same total per week to avoid waterlogging. In the ground, add an extra deep soak during heat waves and spot shade the hottest exposures with a temporary shade cloth on the west side. After extreme heat, remove any scorched leaves and resume normal watering. Do not overcorrect with heavy extra feed, which can push soft growth that is more susceptible to disease.
Feeding
NPK Ranges and Timing: Begin feeding when shoots are 3 to 4 inches tall. A balanced but slightly phosphorus forward analysis such as 5 to 10 to 5 or 5 to 10 to 10 supports strong root development and reliable bloom without encouraging overly lush foliage. Apply a light dose monthly during active growth, or use a single application of slow release fertilizer labeled for flowering ornamentals at planting time following label rates. Stop fertilizing once flowering tapers in late summer so plants can wind down naturally.
Organic vs Slow‑Release Options: Well made compost provides baseline nutrition and trace elements. For organic programs, supplement with fish or sea based liquids or a flower formula with modest nitrogen during early growth, then taper. For conventional programs, a coated slow release prill blended into the topsoil at planting keeps nutrition steady without spikes. Skip fertilizer altogether if growth is dark green and flowering is adequate. Excess nitrogen leads to big leaves and fewer blooms. Retest soil every three to five years to rebalance the program as organic matter and pH change.
Pruning & Support
Deadhead spent spathes at their base as soon as color fades. This keeps plants orderly and encourages continued bloom on colored hybrids. Remove yellowing leaves promptly to reduce habitat for disease. When frost blackens foliage in cold zones, cut stems back to one to two inches above the soil line. In mild climates that allow winter foliage on Zantedeschia aethiopica, groom lightly through winter and perform a deeper cleanup in early spring just ahead of new growth.
Support and Stems: Most modern colored hybrids have sturdy flowering stems that stand on their own in the garden. Very tall selections and large clumps of Zantedeschia aethiopica can lean in wind or saturated soil. If needed, place a discreet ring stake or two single stakes early in the season so new growth conceals the support. Avoid tight ties that pinch soft stems. Use a loose figure eight with soft garden tape.
Tool Hygiene: Always clean pruners before and after work, especially if you remove any soft or discolored tissue. A quick dip in 70 percent isopropyl alcohol or a spray of a fresh bleach solution followed by a water rinse limits the spread of soft rot bacteria and other pathogens that exploit wounds.
Overwintering
In Zones 8 to 10, maintain a two to three inch mulch over the calla bed year round. In winter, feather mulch up to three or four inches to buffer freeze–thaw cycles that can heave shallow rhizomes. Pull mulch back in spring when regular growth resumes. In the few Zone 7 pockets where Zantedeschia aethiopica persists, a deep organic mulch is essential to protect crowns from sporadic hard freezes.
Digging and Storing Rhizomes: In colder regions, allow a light frost to collapse the foliage. Then cut stems back to one to two inches above the soil. Carefully lift rhizomes with a fork, keeping clumps intact. Shake or brush off soil and dry the rhizomes in a warm, airy room for one to two weeks. After curing, pack them in barely moist peat moss, sawdust, or vermiculite in a breathable box. Store at 50 to 60 °F in a dry location. Inspect monthly and remove any pieces that soften or mold. Do not allow storage media to become wet. Label by color and cultivar to simplify spring layout.
Rodent Protection and Replanting: Mice occasionally sample stored rhizomes. Use tight lidded bins with air holes small enough to block entry. In spring, wake rhizomes by potting them indoors four to six weeks before last frost or plant directly when soil warms and nights are reliably mild. Space carefully and refresh mulch to restart the moisture cycle that callas prefer.
Growing Environments
Calla lilies excel in containers on patios, porches, and decks. Select a pot with generous drainage holes. For a single rhizome, use a pot at least 8 to 10 inches wide and deep. For two to three rhizomes, a 12 to 14 inch container is appropriate. Use a premium peat based mix lightened with composted bark and a modest portion of perlite or pumice. Keep the crown one to two inches below the surface and water thoroughly after planting. Rotate containers every week so stems grow straight and do not lean toward light.
Drainage and Potting Mix: A well aerated potting mix is the single best insurance against soft rot. Avoid garden soil in pots. If you prefer a home blend, mix equal parts high quality peat or coir, composted fine bark, and perlite. Moisten the mix before filling containers so it settles without heavy tamping. Top dress with a half inch of compost in early summer to feed the soil biology and improve water holding without smothering the crown.
Microclimate Tips: In hot summer regions, place containers where they receive morning sun and bright afternoon shade. In cool summer zones, give full sun to drive strong bloom. Shelter pots from constant wind which can desiccate the foliage and topple tall flowers. Along south or west facing walls, use a light colored mulch and a saucer filled with pebbles under the pot to reduce reflected heat while still allowing excess water to drain fully. Indoors, give the brightest window available and rotate for even growth.
Companion Planting & Design
Calla lilies pair well with plants that enjoy the same moisture and light. In sun, combine them with canna, elephant ear, and tall beard irises for dramatic texture and a long season. In bright shade, hosta, heuchera, and fern fronds frame the smooth calla foliage and hide the base as older leaves are removed. In mixed borders, repeat colors by threading callas among daylilies and annual salvias to keep the eye moving. For ponds or rain gardens at the edge, Zantedeschia aethiopica partners with Louisiana iris and lobelia provided the crown remains just above saturated soil rather than submerged.
Pollinator and Airflow Notes: The calla’s spadix is visited by insects, but callas are not among the most nectar rich garden flowers. For pollinator support near your callas, weave in complementary blooms that like similar moisture such as bee balm and some salvias in sun, or astilbe and lobelia in bright shade. Allow a palm width of space between calla clumps for airflow. This spacing is especially important in humid climates and after summer rains.
References
- North Carolina State University Extension Gardener Plant Toolbox. Zantedeschia (Calla Lily).
- North Carolina State University Extension Gardener Plant Toolbox. Zantedeschia aethiopica.
- University of Minnesota Extension. Calla and canna lilies.
- Iowa State University Yard and Garden. How do I over‑winter calla lilies indoors?
- Iowa State University Yard and Garden. When can I start calla lilies indoors?
- UC IPM Floriculture and Ornamental Nurseries. Calla.
- Missouri Botanical Garden Plant Finder. Zantedeschia aethiopica.
- Missouri Botanical Garden Plant Finder. Zantedeschia elliottiana.
- University of Florida IFAS Extension, Santa Rosa County. Calla Lily (Zantedeschia aethiopica) PDF.
- University of Massachusetts Extension Greenhouse and Floriculture. Calla lily, bacterial soft rot.


Written by: Your Flowers Guide editorial team
We are a small independent group of flower lovers who research and review each guide using trusted horticultural and educational sources. Learn more about us