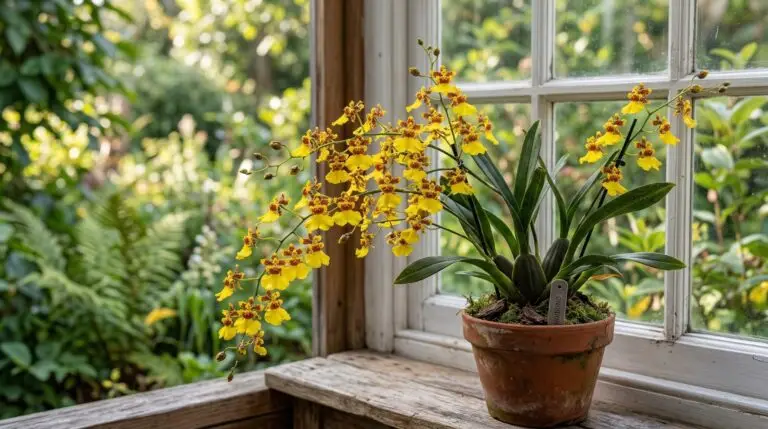
Oncidium orchids have a unique way of growing that eventually requires a direct intervention from their caretaker. Unlike a moth orchid that grows straight up from a single central stem, an oncidium grows horizontally along a thick stem called a rhizome. This sympodial growth pattern means the plant continually produces a new swollen storage organ, known as a pseudobulb, right next to the previous one. Over a few growing seasons, this forward momentum causes the newest pseudobulbs to reach the edge of the container and eventually crawl right over the side. When you see roots dangling in the air outside the rim and the plant looks like it is trying to escape its home, you know it is time to intervene. Repotting oncidium orchids gives them fresh space to expand and prevents the heavy new growth from tipping the container over completely. The best time to tackle this task is just as the newest pseudobulb begins to form and you see fresh green root tips emerging from its base. Waiting for this specific stage ensures the plant establishes quickly in its new environment, usually right as daytime temperatures consistently stay above sixty degrees.
Gathering supplies and unpotting the plant
Before pulling the plant from its container, you need to gather a pair of sterile pruning snips, a fresh plastic or terracotta pot, and a quality orchid potting medium. Oncidiums have finer roots than many other common orchids, so they do best in a medium bark mix rather than coarse chunks. A mixture of medium grade fir bark, perlite, and a little chopped sphagnum moss provides the exact balance of moisture retention and air circulation these fine roots demand. If you plant an oncidium in standard potting soil or a mix that holds too much water, the roots will suffocate and rot away in a matter of weeks. To test your mix, water a handful of it in a spare pot; the water should run out the bottom instantly without pooling. Unlike the thick, fleshy roots you might be used to seeing on a phalaenopsis moth orchid, these thin oncidium roots are quite fragile and require careful handling. Once your materials are ready, gently squeeze the sides of the old plastic pot to loosen the root ball from the plastic walls. Pull the plant out carefully, knowing that a few roots will inevitably snap during this extraction no matter how gentle you are.
Cleaning the root system and managing old pseudobulbs
With the plant out of its pot, your next task is to remove all the old, degraded potting material from the root mass. Bark breaks down over time, turning into a dense, soil-like compost that holds too much moisture and prevents oxygen from reaching the roots. Use your fingers to gently tease the old pieces of bark away, shaking the plant lightly to dislodge stubborn bits hiding in the center of the root ball. As the roots become visible, you will notice a mix of firm, white or tan roots and some that feel hollow, dark, and papery. Use your sterile snips to cut away the papery, dead roots entirely, leaving only the firm ones intact. This is also the time to look at the oldest part of the plant, which consists of back bulbs that have naturally lost their leaves over the years. These old pseudobulbs store energy and water for the active part of the plant, but if you have a massive specimen with more than six connected bulbs, you can safely sever the oldest ones. Cut cleanly through the tough rhizome between the bulbs with your sterile snips, and you can pot these separated back bulbs in small containers of damp sphagnum moss to propagate entirely new plants.
Positioning the orchid for future growth
Placing the oncidium into its new container requires a different strategy than potting a typical symmetrical houseplant. Because the oncidium moves forward as it grows, placing the plant in the dead center of the pot is a mistake that limits its future expansion. You need to practice directional repotting by placing the oldest back bulbs right up against the back edge of the new pot. This specific positioning leaves the maximum amount of open potting medium in front of the newest growth, giving the plant ample room to produce new pseudobulbs for the next two or three years. Hold the plant at the correct height so the horizontal rhizome sits exactly level with the rim of the pot, never buried beneath the medium. Burying the rhizome invites trapped moisture and rot, which will quickly kill the new developing shoots before they can mature. While holding the plant in this position with one hand, use your other hand to scoop the medium bark mix into the pot. Tap the sides of the pot firmly against your work surface as you fill, which helps the loose bark pieces settle into the gaps between the fine roots.
Securing the plant and post-repotting care
After you fill the pot, the orchid might feel a bit wobbly in its fresh, loose medium. A wobbly plant struggles to establish because every tiny movement from a breeze or a watering can chafes the delicate new root tips against the rough bark, damaging them before they can grow. To stabilize the plant, you can push a bamboo stake into the medium and loosely tie the tallest pseudobulb to it until the roots take a firm hold. Wait a few days before watering the newly potted plant to allow any broken roots to heal over, which prevents fungal infections from entering fresh cuts. During this dry period, keep the plant in a shaded spot away from direct sun to reduce stress and prevent excess moisture loss. When you do water, flush the pot thoroughly until water streams freely from the drainage holes, ensuring the new bark absorbs adequate moisture. Just as you would observe with a repotted common moth orchid, you might notice the oldest parts of the plant shriveling slightly over the next few weeks as it redirects energy to establish its new root system. Soon, you will see thick green root tips diving down into the fresh bark, followed by the new pseudobulb plumping up and eventually sending out a long wire of flower buds.
More About Oncidium Orchid
How to grow oncidium orchids for cascading sprays of tiny dancing flowers
Why oncidium orchid leaves are wrinkled and the watering balance these orchids need
Best oncidium orchid varieties from yellow Twinkle to dramatic Wildcat
Oncidium orchid meaning and why the dancing lady brings joy and positive energy

How to trigger oncidium orchids to bloom with the right temperature and light changes
Oncidium Sharry Baby the chocolate-scented orchid that fills rooms with cocoa fragrance
Oncidium orchids as long-lasting cut flowers for exotic spray arrangements
Tolumnia orchids the miniature oncidium relatives perfect for small spaces