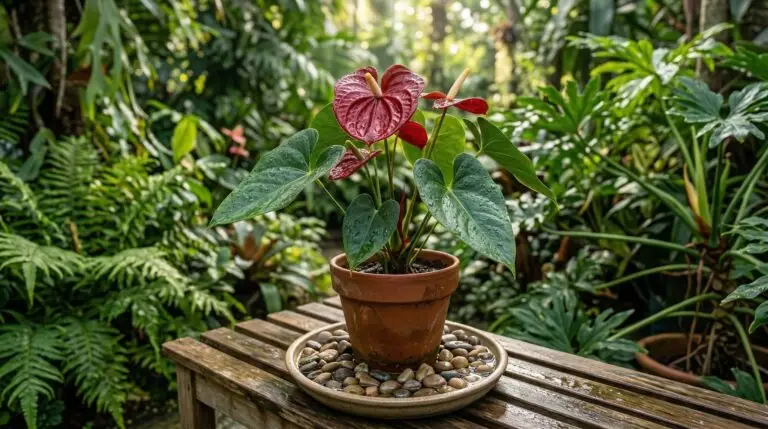
Anthuriums grow as epiphytes in their native habitats, clinging to trees and developing thick, fleshy roots that seek out moisture and air. When we grow them in our homes, they eventually outgrow their pots or become tall and leggy as they shed older leaves. This natural growth habit makes anthurium propagation a practical skill for anyone looking to refresh an aging plant or multiply a favorite specimen. You can approach this task in two distinct ways depending on how your plant looks right now. If your pot is bursting with multiple crowns and crowded leaves, root division is the most straightforward path to creating new, full-sized plants. If your plant has grown a long, bare stem with a tuft of leaves at the very top, taking an anthurium stem cutting will help you start fresh while encouraging the old base to branch out.
Timing your propagation correctly gives your new plants the best chance of survival and rapid root development. You should plan to tackle this project when daytime temperatures consistently stay above 70 degrees Fahrenheit and the days are getting longer. This period of active growth provides the energy your anthurium needs to heal its wounds and push out new roots. Before you begin, gather a pair of sharp pruning shears, rubbing alcohol to sterilize your blades, and a fresh batch of chunky potting mix. Anthuriums need an incredibly airy medium to thrive, so mixing standard potting soil with generous handfuls of orchid bark and perlite prevents the dense, soggy conditions that lead to root rot. You might even use a mix similar to what you would prepare for a moth orchid, since both plants share a love for excellent root aeration. Preparing your workspace and materials in advance keeps the roots from drying out while you work.
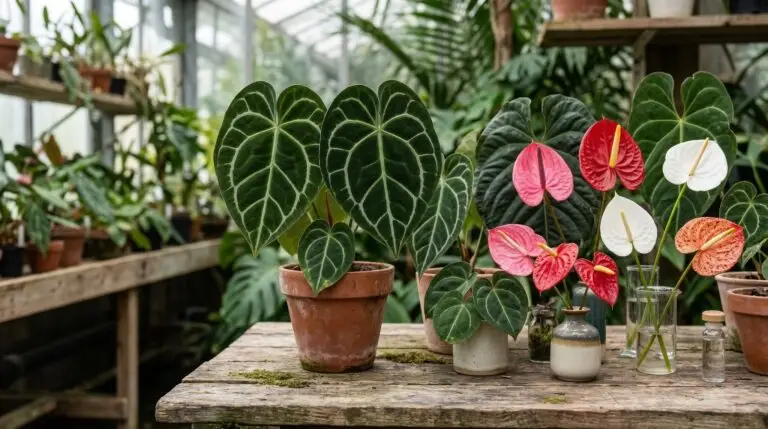
Understanding anthurium division for mature plants
Anthurium division works beautifully when you have a large, bushy plant that has naturally produced side shoots or pups around the base of the main stem. To start, lay down some newspaper and gently slide the entire plant out of its current pot. You will likely see a thick, tangled mass of noodle-like roots circling the bottom of the soil block. Use your fingers to slowly loosen the old potting mix, working from the bottom up to free the roots without snapping them. As the soil falls away, you can clearly see where the individual crowns connect to the main root system. Look for natural separation points where a side shoot has developed its own distinct set of thick roots. If the roots are heavily intertwined, you can gently massage the root ball under room-temperature running water to wash away the remaining soil and untangle the strands.
Once you have identified a distinct section with at least three healthy leaves and a solid cluster of roots, begin pulling it away from the mother plant. Sometimes the sections will easily pull apart in your hands, but you will often need your sterilized pruning shears to cut through the tough connecting tissue. Make a clean, decisive cut through the horizontal rhizome that links the pup to the main plant. At this point you might notice some older, squishy, or hollow roots in the center of the root ball. That is normal and means those older roots have naturally died off, so simply snip them away until only firm, whitish-green roots remain. Pot each newly separated section into its own container using your chunky, well-draining soil mix. Choose a pot that is only slightly larger than the root mass, as anthuriums prefer a snug fit and will dry out much faster in a smaller volume of soil.
Settle the plant into its new pot so that the base of the stems sits exactly at the soil line, just as it did in the original container. Burying the stems too deeply traps moisture against the plant tissue and invites stem rot. Water the newly potted divisions thoroughly until water streams freely from the drainage holes, settling the chunky mix around the roots. Place the pots in a warm spot that receives bright, indirect light, keeping them away from direct sun rays that could scorch the stressed leaves. The plants will spend the next few weeks focusing entirely on repairing their root systems rather than pushing out new foliage. You might see the oldest leaf on your new division turn yellow and drop off during this transition period. This happens because the plant is reallocating energy to root production, and it is no cause for alarm as long as the center leaves remain firm and green.
Taking an anthurium stem cutting from leggy growth
Not every anthurium forms a neat cluster of pups suitable for division, especially as the plant ages and naturally drops its lower leaves. You are often left with a long, bare trunk topped with foliage, making the plant top-heavy and difficult to keep upright. This is the perfect candidate for an anthurium stem cutting, a method that utilizes the knobby bumps visible along that bare stem. Those bumps are aerial roots waiting for the right conditions to grow into active, water-absorbing roots. To take your cutting, locate a spot on the stem that sits a few inches below the lowest healthy leaf and includes at least two or three visible aerial root nodes. Use your sterilized shears to cut straight across the main stem. You are now left with a leafy top cutting and a bare bottom stump still potted in the soil.
The leafy top cutting needs a brief resting period before you place it into a rooting medium. Set the cutting aside on a dry paper towel for a few hours to let the freshly cut wound dry out and form a callous. Skipping this step leaves the raw tissue vulnerable to bacterial rot once you introduce moisture. While the cutting heals, you can decide whether you want to root it in plain water or moist sphagnum moss. Water propagation lets you easily monitor root growth, but the roots produced in water are often brittle and take time to adapt to soil later. Sphagnum moss propagation closely mimics the anthurium’s natural epiphytic environment and produces strong, soil-ready roots right from the start. Both methods are effective, but sphagnum moss generally yields a stronger root system for these tropical plants.
If you choose sphagnum moss, soak a handful of the moss in water and then squeeze it out completely until it feels like a damp sponge. Loosely pack the damp moss into a small plastic cup or pot, and nestle the calloused stem cutting into the moss so the aerial roots are covered. For water propagation, simply place the cutting into a heavy glass jar and fill it with enough room-temperature water to submerge the nodes without touching the leaf petioles. Change the water completely every few days to keep it oxygenated and prevent algae buildup. Whether in water or moss, your cutting requires high humidity to prevent the large leaves from losing too much moisture before new roots can form. You can increase the local humidity by placing a clear plastic bag loosely over the cutting, making sure it does not sit in direct sunlight where it could easily overheat. Much like you would when rooting a begonia cutting, keeping the environment humid and bright without direct sun will reliably trigger root development.
Managing the transition and recognizing success
The original bare stump left behind in the pot should not be discarded, as it holds a massive, established root system and plenty of stored energy. Continue to water the stump exactly as you did before, allowing the top few inches of the chunky potting mix to dry out between waterings. Within a few weeks, you will notice small green bumps swelling along the sides of the bare stem. These bumps will eventually break through the old tissue and unfurl into brand-new leaves, effectively creating a second, bushier plant from your original specimen. This regenerative process requires patience, as the stump has no leaves to harvest sunlight and must rely entirely on its energy reserves. Keeping the pot in a warm, brightly lit location will encourage these dormant buds to wake up much faster.
Meanwhile, your new divisions and stem cuttings will slowly establish themselves in their respective containers. You will know your stem cutting has successfully rooted when you give the stem a very gentle tug and feel resistance anchoring it in the moss. If you rooted the cutting in water, wait until the new roots are at least two inches long and have developed secondary branch roots before moving the plant into your chunky potting mix. Keep the newly potted cuttings slightly more moist than a mature plant for the first two weeks to help the roots transition to their new environment. True success becomes visible when you see a tightly rolled, dark red or bronze spike emerging from the center of the crown. This new leaf confirms that your anthurium propagation has worked, the root system is fully functional, and your plant is ready to resume its normal growth cycle.