How to Grow and Care: Daffodils (Narcissus)
Contents
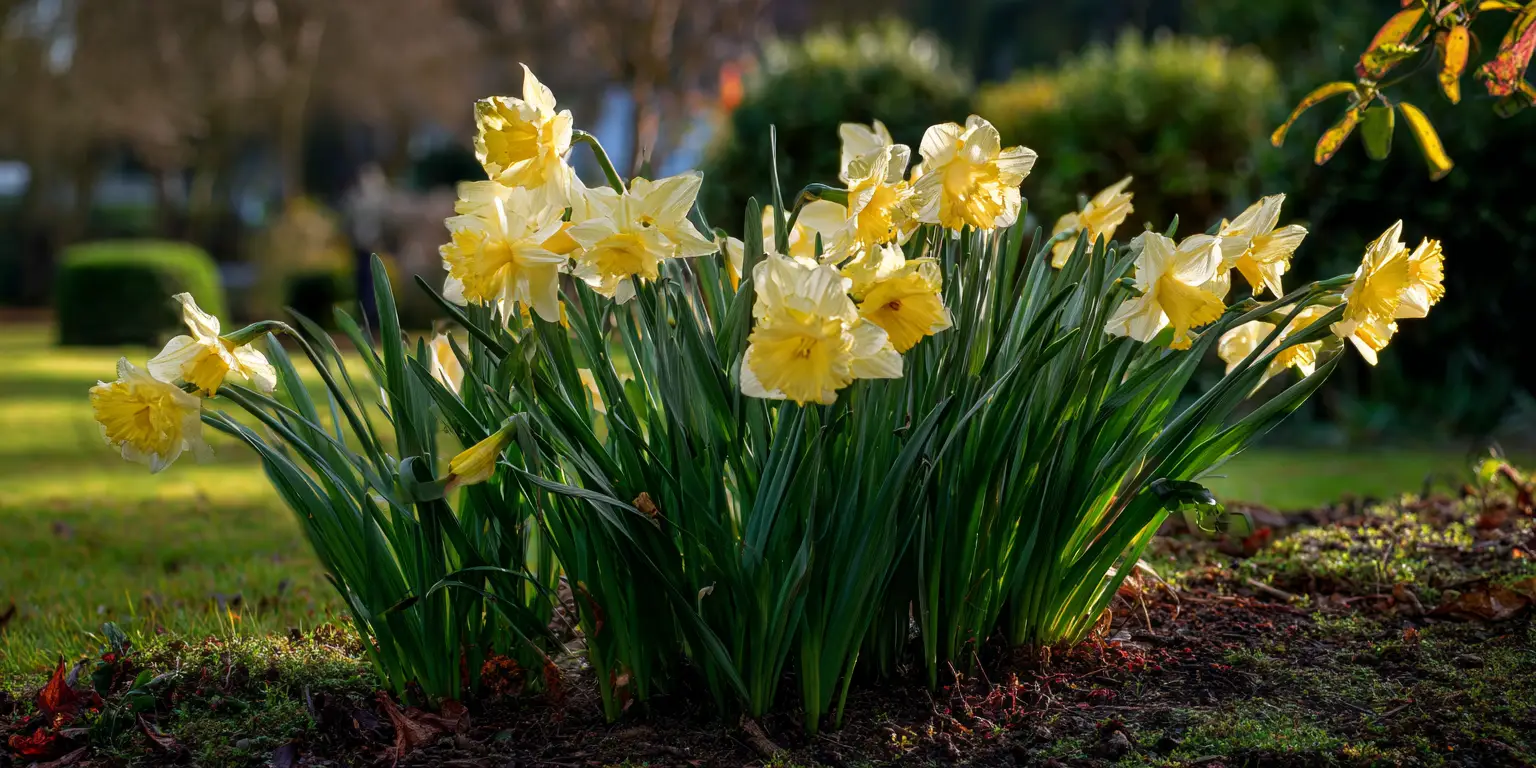
Daffodils are hardy, clump‑forming bulbs valued for their trumpet or cup shaped flowers and grassy leaves. Most modern garden selections are hybrids, but they all share the same basic cultural needs. In most regions daffodils are reliably perennial and naturalize slowly by forming offsets. Typical hardiness is USDA Zones 3 to 8, with some selections and species adapted to Zone 9 in warm winter areas and a few suited to colder microclimates with extra winter cover. Aim for full sun in spring with at least six hours of direct light, although light afternoon shade helps in warm southern or coastal climates.
Success with daffodils comes down to a few simple habits. Plant high quality bulbs in cool fall soil. Provide sharp drainage and steady moisture during fall root growth and spring bloom. Feed lightly with a low nitrogen fertilizer at the right times. Allow foliage to photosynthesize for several weeks after bloom. These steps keep bulbs strong and flowering.
Soil & Bed Preparation
Daffodils thrive in a loose, well aerated loam that holds moisture yet drains freely. Heavy clay soils can be improved by working in two to three inches of finished compost plus a coarse mineral amendment such as sharp grit or crushed gravel to open the pore spaces. Very sandy soils benefit from generous organic matter to improve water and nutrient holding capacity. Avoid fresh manure since it can burn tender new roots and introduce weeds.
Standing water during fall, winter, or early spring is the fastest way to lose daffodil bulbs to rot. If you garden on dense clay or in a low area, use raised beds that are at least 8 to 12 inches tall. Berms are another option where a long bed is mounded above the surrounding grade to shed water. In regions with high rainfall, avoid planting directly below roof drip lines unless you can redirect excess water.
Daffodils prefer soils that are modestly fertile rather than rich. Too much nitrogen pushes foliage at the expense of flowers. Aim for a soil rich in organic matter with balanced nutrients and adequate phosphorus and potassium. If you have not tested your soil in the last two to three years, make that your first step before adding fertilizer. Soil testing helps prevent unnecessary inputs and keeps pH and nutrients in the target range.
Dig a hole about 12 inches wide and 12 inches deep where you plan to plant. Fill it with water and let it drain completely, then refill it. If the second filling drains within one to two hours, drainage is adequate for bulbs. If water lingers longer than two hours, create a raised bed or amend more aggressively. The best pH range is about 6.0 to 7.0. If a soil test shows pH below 6.0, add finely ground limestone at the rate recommended by the lab. If pH is above 7.0, incorporate elemental sulfur in small, tested amounts and retest after the recommended interval. Adjustments are easier several months before planting so plan ahead when possible.
Because daffodils are bulbs, the planting zone must drain well and have a friable surface layer for roots to explore in fall. Avoid compacted subsoil and avoid tilling when soil is wet. Where squirrels dig, consider installing discrete wire bulb baskets or laying a sheet of half inch hardware cloth over the bed and covering it with soil until shoots emerge in spring.

Planting Calendar by USDA Zone
Plant daffodils in fall when soil cools to roughly 50 to 55°F and before the ground freezes. That window allows roots to establish through fall and early winter. In the warmest zones where the ground seldom freezes, plant when nights are consistently cool and soil has shed late summer heat.
Zones 3 to 4. Plant in early to mid fall. In Zone 3, early September to late September is typical. In Zone 4, mid September to early October works well. Provide two to three inches of winter mulch after the ground freezes to reduce freeze to thaw heaving. Choose the hardiest divisions and species when possible.
Zones 5 to 6. Plant in mid fall. Late September to late October is a good guide in Zone 5. October to early November suits Zone 6. In both zones you can continue planting as long as the soil is workable and not frozen. If a warm spell follows planting, bulbs will wait and root as the soil cools.
Zones 7 to 8. Plant in late fall to early winter. Late October through December is common depending on your first frost date and soil temperature. In hot and humid southeastern locations, seek cultivars that tolerate warm winters and plant where they receive morning sun with light afternoon shade.
Zones 9 to 10. In many Zone 9 areas the safest strategy is to prechill standard daffodil bulbs for about 12 to 14 weeks at 40 to 45°F, then plant outdoors in late December to January once soils are cool. Some groups such as tazettas and certain jonquilla types handle mild winters without chilling and are good options for warm coastal or desert climates. In Zone 10, treat daffodils as cool season accents and rely on warm adapted selections.
Regional caveats. In arid regions, time planting to take advantage of winter rains and use mulch to conserve moisture. In coastal locations with salt spray, site plantings behind wind breaks or several yards inland. In high elevation gardens where winters are long, choose early to midseason bloomers and delay planting until the soil cools yet is still workable.
Planting: Depth & Spacing
Daffodils are true bulbs. A classic rule of thumb is to plant at a depth that is about three times the bulb height as measured from the base to the nose. For standard garden daffodils that means placing the base of the bulb about 6 inches below the soil surface in average loam, which is 15 cm. In lighter sandy soils, 7 to 8 inches to the base provides stability and moderates temperature swings. In heavier clay, 5 to 6 inches is often sufficient so long as drainage is improved. Set the pointed end up and the basal plate down. Space bulbs 4 to 6 inches apart, which is 10 to 15 cm. Closer spacing creates an instant display but will require lifting and dividing in three to five years. Wider spacing rewards patience and reduces the frequency of division. For naturalistic sweeps, arrange bulbs in scattered clusters rather than rows. Avoid crowding bulbs against hard edges where heat and dryness can stress roots. If you divide mature clumps, do it after the foliage yellows in late spring or early summer, then replant promptly so the bulbs do not dry out. Separate offsets gently and replant at the same depths listed above. Water once to settle soil around the bulbs. If you must store divisions for a short period, keep them in a cool, dry place with good air movement and replant within a few weeks.
Potted daffodils from garden centers can be planted into the ground after bloom once the soil can be worked. Plant so that the bulbs are at their normal outdoor depth and keep the leaves for at least four to six weeks. Forced indoor bulbs may skip the first outdoor bloom the following spring while they rebuild reserves. Acclimate any pot grown plant by setting it outdoors in bright shade for a few days, then move it into more sun.
Handle bulbs gently to avoid bruising the scales. Do not peel dry outer tunics since they protect the bulb. Water after planting to settle soil. In windy sites, a light mulch stabilizes surface temperatures and reduces frost heaving. Label groupings so you can locate and divide them in future years without disturbing nearby plantings.

Watering & Mulching
Water once after planting to eliminate air pockets around the bulbs. In fall and winter, nature usually provides enough moisture. In dry regions or during prolonged dry spells, supply about 1 inch of water per week, which is 25 mm, from planting until the ground freezes. Resume watering in early spring if rainfall is scarce while leaves and flowers develop. Daffodils need steady moisture from the time leaves emerge until about six weeks after bloom. After that point, taper off irrigation so the soil can dry to the depth of the bulbs as they enter dormancy. Avoid frequent shallow sprinklings. Deep watering less often builds stronger roots and helps prevent fungal problems. Apply a 2 to 3 inch layer of organic mulch such as shredded leaves, pine needles, or finely chipped bark after planting. Keep mulch a couple of inches back from emerging shoots in spring so the crowns are not kept wet. In cold climates, add an extra layer of mulch after the ground freezes to buffer freeze to thaw cycles. Remove that winter cover gradually as soils warm. Do not allow irrigation or downspouts to saturate daffodil beds for long periods. If you use hard water in containers, salts can build up in the potting mix. Every few weeks, water thoroughly until excess drains from the pot to flush salts. Along salty coasts, avoid the most exposed locations since salt spray can scorch leaves. Where reclaimed water is used, check sodium levels and leach containers periodically. During an unseasonal heat spike in spring, extra mulch can reduce surface temperatures and conserve moisture. In extended drought, keep plants at the one inch per week guideline until foliage begins to yellow after bloom. Daffodils tolerate summer dryness while dormant, so once leaves are down you can reduce or stop watering beds that are dedicated to bulbs.
Feeding
If a recent soil test shows adequate nutrients and organic matter, you may not need fertilizer at all. Where feeding is appropriate, apply a low nitrogen, higher phosphorus and potassium fertilizer once in fall at planting time and again in early spring as shoots emerge. Examples include 5 to 10 to 10 or similar analyses. Lightly scratch fertilizer into the top inch of soil and water it in. Use slow release granular formulas for even supply. Organic options such as compost and aged leaf mold improve soil structure and biology, which supports bulb health. Bone meal supplies phosphorus slowly but can attract digging animals and it provides little nitrogen or potassium, so it is not a complete fertilizer. A balanced bulb food or a custom blend based on a soil test is more reliable. Avoid high nitrogen lawn fertilizers near bulb beds because lush leaves at the wrong time reduce flower production. Do not fertilize while bulbs are fully dormant in summer. If clumps have grown crowded and bloom is declining, division is more effective than extra fertilizer. Aim for two to three inches of organic matter incorporated into the top 8 to 12 inches at bed preparation. Recheck soil every two to three years or when performance changes. Healthy soils with stable pH and moderate fertility produce sturdy stems and flowers.
Pruning & Support
Remove spent flowers promptly by cutting or pinching the flower stalk below the seed capsule. This prevents energy from going into seed and helps keep plantings tidy. Leave leaves in place for at least four to six weeks after bloom so they can store carbohydrates in the bulbs. Do not braid or tie foliage because that reduces leaf area and slows food production. Once the leaves yellow, you can remove them at ground level. In late fall, remove any surface debris before mulching. In spring, pull mulch back slightly from the crowns as shoots emerge to improve air flow. During bloom, remove fallen petals and any damaged stems to reduce disease pressure. Most daffodils are self supporting. Very tall or top heavy selections can lean in heavy rain and wind. Plant those in sheltered spots or among sturdy perennials that act as living supports. Grouping bulbs in clusters also provides mutual support. Clean pruners and knives with 70 percent isopropyl alcohol or a 10 percent bleach solution, then rinse and dry. Disinfect tools before moving from one bed to another to limit the spread of fungi or viruses. Avoid working in beds when foliage is wet since that spreads spores.
Overwintering
In cold winter regions, wait until the ground surface begins to freeze, then add a 2 to 3 inch layer of loose mulch over bulb beds. This does not keep bulbs warm. It prevents repeated thawing and refreezing that can push bulbs upward and damage roots. In late winter or early spring, gradually pull mulch back as temperatures moderate. Daffodil bulbs contain alkaloids that make them unpalatable to many rodents and deer, which is a welcome bonus. If you have persistent voles that tunnel through beds, use wire mesh bulb cages or line the planting hole with hardware cloth. In areas with digging squirrels, covering beds with temporary netting or hardware cloth after planting and removing it as shoots emerge is effective. In Zones 7 to 8 and warmer, shift containers under a roof, into an unheated garage, or along a sheltered wall to limit waterlogging in winter rains. The goal is cool and moist but not saturated. In colder zones, containers will freeze solid if left exposed. Move them into an unheated space that stays around 35 to 45°F. Check occasionally and water just enough to prevent the potting mix from going bone dry. Once consistent thaw begins and soil temperatures rise, remove winter mulch and any temporary barriers so shoots can grow without obstruction. If a late cold snap is forecast during active growth, a light layer of mulch or frost cloth overnight provides protection.
Growing Environments
Use a pot that is at least 8 to 10 inches deep with a drainage hole. A 12 inch diameter container will comfortably hold 7 to 10 standard bulbs when spaced evenly. Use a peat free or peat reduced potting mix that drains well and includes coarse material for aeration. Set bulbs so the tips are 4 to 5 inches below the potting mix surface, then top dress with one inch of mulch. Water thoroughly after planting and keep the mix moist, not soggy, while roots form in cool weather. In early spring water when the top inch of mix is slightly dry. Feed lightly with a slow release bulb food at planting and again as shoots emerge. Leach the container occasionally to flush salts, especially if your tap water is hard. Daffodils want full sun in spring. In warmer regions, provide morning sun with light afternoon shade to extend bloom time. Avoid pockets of reflected heat against south facing walls, which can shorten bloom and exhaust bulbs. In windy exposures, position containers where buildings or shrubs break the gusts. In partial shade under open deciduous trees, daffodils perform well because they receive sun before leaves fully expand. For weeks of color, combine early, mid, and late blooming divisions. Plant a mix of trumpet, large cup, small cup, jonquilla, triandrus, cyclamineus, and tazetta types as your climate allows. This approach ensures a long show even when spring weather swings from cool to warm.
Companion Planting & Design
The simplest design strategy is to plant daffodils among perennials that leaf out a little later and then cover the ripening foliage. Daylilies, hostas, hardy geraniums, catmint, and ornamental grasses are useful. In small spaces, clumping perennials right in front of bulb clumps hide yellowing leaves while keeping air moving around the crowns. Pair daffodils with early pollinator friendly plants such as grape hyacinths, Siberian squill, Virginia bluebells, creeping phlox, and early salvias. Many of these offer blue to violet tones that set off yellow and white daffodils beautifully. Plan for staggered bloom times so bees and other pollinators find consistent resources from late winter into late spring. Classic spring borders mix daffodils with tulips for contrast, or weave soft whites with blush tones and companion plants for a wedding like effect that fits your wedding flowers guide hub. For a fragrant path edge, combine jonquilla types with lavender where the climate allows. If you curate color collections on your site, position daffodils within yellow and white flowers galleries. For evergreen educational hubs, daffodils belong in types of flowers as a cornerstone spring bulb. Avoid cramming bulbs and companions so tightly that leaves remain damp after rainfall or irrigation. Maintain a few inches of space between crowns and allow air to move freely. Good airflow, along with morning sun, keeps foliage dry and reduces the odds of fungal issues.
References
- Penn State Extension. Narcissus: The Daffodil.
- University of Minnesota Extension. Planting bulbs, tubers and rhizomes.
- University of Wisconsin–Madison Division of Extension. Plant Bulbs Now for Spring Color.


Written by: Your Flowers Guide editorial team
We are a small independent group of flower lovers who research and review each guide using trusted horticultural and educational sources. Learn more about us