How to Grow and Care for Clematis
Contents
What clematis are and how they grow.
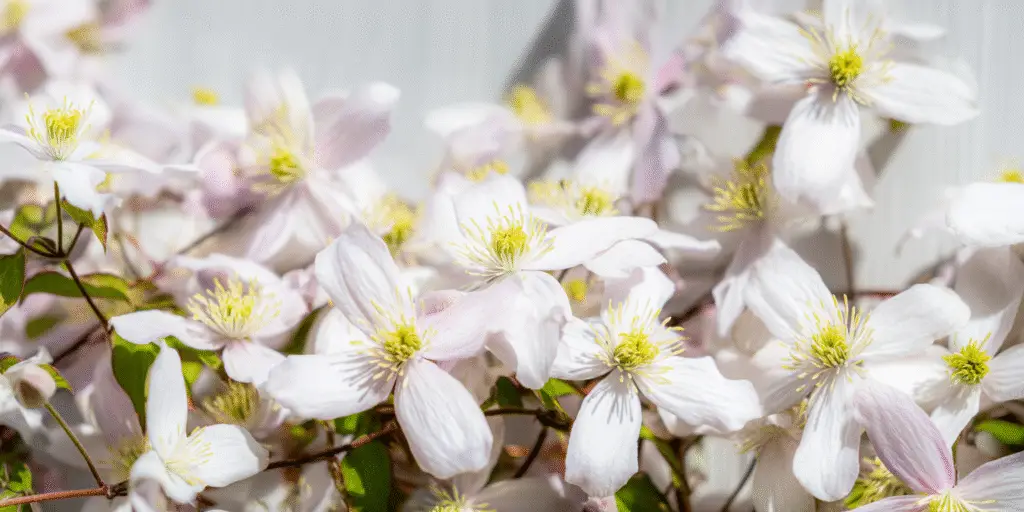
Clematis are woody, twining vines that wrap their leaf petioles around slender supports. Shoots are flexible when young and become woody with age. Flowers can be single, semi‑double, or double, and range from nodding bells to wide, starry plates. Color runs from white and soft pastels to saturated purples and reds, with some species offering charming seedheads that shimmer late in the season. Most garden types are hardy deciduous vines. A few are evergreen in mild regions. Plant vigor varies by species and cultivar. Some stay small enough for containers while others can cloak an arbor. All benefit from a permanent support that they can grip with those curling petioles rather than heavy ties.
Hardiness overview and ideal sunlight.
Many clematis grow well in USDA Zones 4 to 9. A small number manage Zone 3 with protection, while evergreen species like Clematis armandii prefer Zones 7 to 9. Sunlight needs differ by type, yet a practical rule works for most gardeners. Aim for at least 6 hours of direct sun, with dappled afternoon shade in hotter regions. Northern gardens can give more sun. Gulf Coast and interior Southwest gardens should provide midday protection. The old saying head in the sun and feet in the shade is useful. Keep the crown and roots cool with mulch and neighboring plants while giving the vine itself enough light to form flower buds and ripen wood.
A quick snapshot for success.
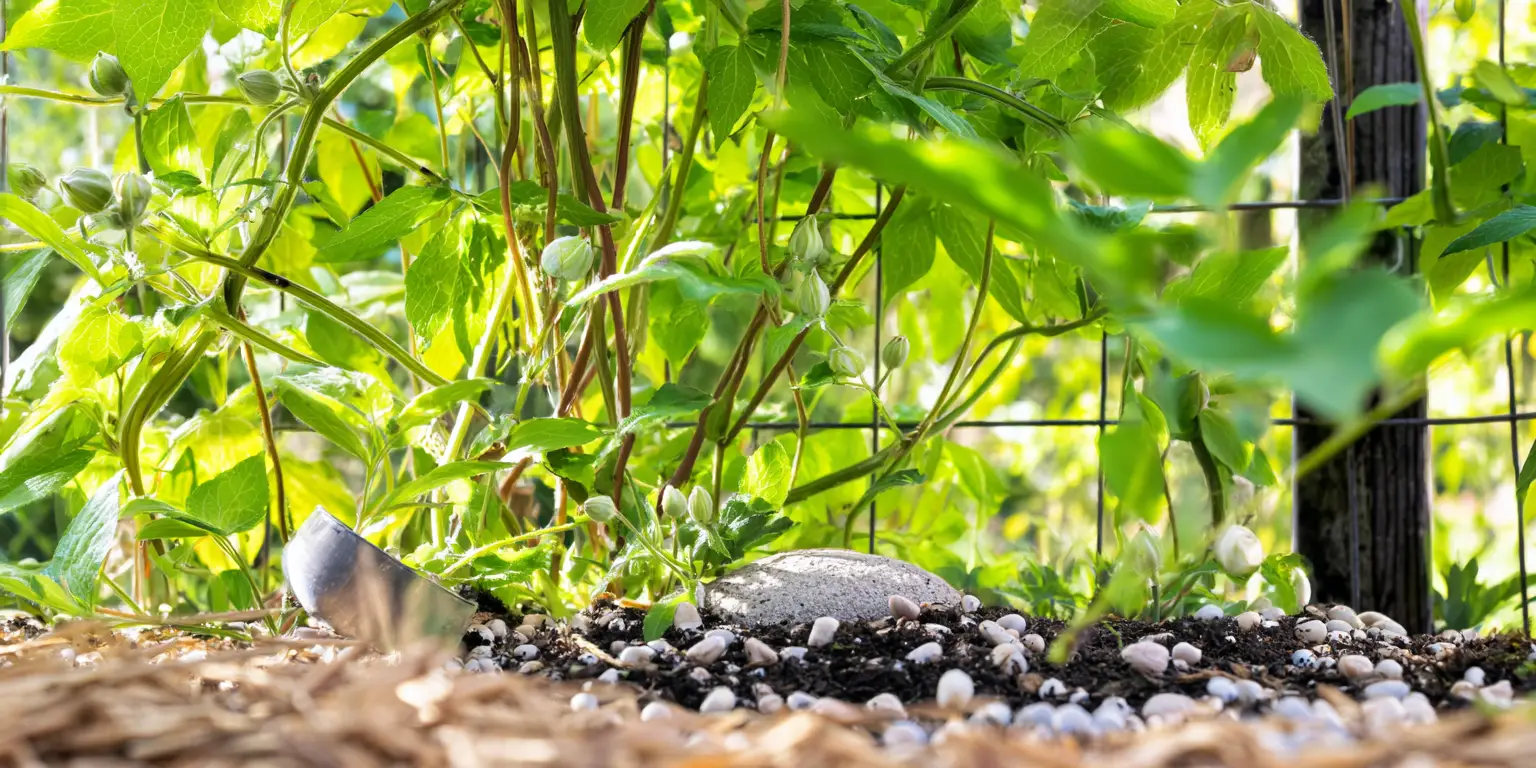
Choose a site with rich, well‑drained soil and strong vertical support. Plant slightly deeper than the nursery level so one or two nodes are below the soil. Water deeply during establishment, then keep soil evenly moist through summer. Mulch 2 to 3 inches thick to cool roots and hold moisture, keeping it pulled back from the stem. Feed modestly in spring and again after the first bloom flush if needed. Prune according to your vine’s bloom group, and sanitize your tools. In cold regions, add winter mulch after the ground freezes. In hot regions, emphasize afternoon shade and regular watering. With these basics, Clematis care becomes reliable and rewarding.
Safety note and pets.
All parts of clematis contain irritant compounds. Ingestion by pets or people can cause mouth irritation and gastrointestinal upset. Keep inquisitive pets from chewing vines and do not use flowers as edible garnishes. Teach children not to sample ornamental plants. Handle routine care with gloves if your skin is sensitive, and wash hands after pruning or deadheading.
Soil & Bed Preparation
Texture, drainage, and organic matter.
Clematis thrive in loamy soil that drains freely yet holds consistent moisture. Work 2 to 3 inches of finished compost into the top 8 to 12 inches of soil across a wide planting area, not just the hole. Compost improves tilth, moderates moisture swings, and supports beneficial soil biology. In sandy soil, add additional organic matter to slow drying. In heavy clay, blend compost with coarse pine bark fines to open pore space. Avoid burying raw wood chips in the root zone since they can tie up nitrogen while decomposing. If your site puddles after rain or irrigation, plan a raised bed and run the vine up a trellis or post set in that mound to keep the crown above seasonal wetness.
pH range and adjustments.
A slightly acidic to neutral pH supports nutrient uptake for most clematis. Target pH 6.5 to 7.0. If soil tests lower than that, incorporate garden lime per test recommendations to raise pH gradually. If soil tests higher, elemental sulfur can bring the number down over time. Always retest several months after amendments to confirm progress. Because clematis prefer calcium at moderate levels, a neutral pH often produces sturdy growth and good flower display. Be cautious with wood ash and avoid repeated heavy liming unless a soil test indicates need. Balanced fertility and a living soil will matter more than chasing a single perfect number.
Drainage Test and pH Targets.
Dig a hole 12 inches wide and 12 inches deep. Fill with water and let it drain completely. Refill and time the drop. An ideal rate is roughly 1 to 2 inches per hour which is 2.5 to 5 cm per hour. Faster than that means you will need more organic matter and thicker mulch to hold moisture. Slower than that calls for a raised bed or a new location since waterlogged soil encourages root diseases. While the hole is open, scoop a sample for a pH test. Use a cooperative extension soil test for the most accurate read. Amend based on the report, then prepare the bed at least a few weeks ahead of planting if possible so the soil can settle.
Raised beds versus in‑ground notes.
Raised beds help in cold and wet soils because they warm earlier in spring and drain well. Build beds at least 8 to 12 inches high and 24 inches wide so roots have both depth and lateral room. In arid regions, in‑ground planting often holds moisture better and buffers heat. If you garden in reflected heat zones near south facing walls, add a light colored stone or board at the base to shade the crown. Consider porous landscape stones that do not overheat. Whether raised or in ground, avoid fresh manure or heavy doses of quick‑release fertilizer at planting time. Organic matter and a light touch on nutrients are safer.

Planting Calendar by USDA Zone
Zones 3 to 4.
Plant container‑grown clematis in late spring once the soil has warmed to roughly 50°F which is 10°C. Late frosts can nip new shoots, so be ready with a cloth cover on cold nights. Bare‑root plants are best set in spring because fall planting may not allow enough root growth before freeze. If you must plant in fall, do it early and mulch well after the ground freezes. Choose hardy species like Clematis alpina and Clematis macropetala which bloom on old wood and tolerate cooler conditions. Train vines promptly so new growth is not damaged by wind. Water consistently through the first summer because shallow roots dry quickly.
Zones 5 to 6.
Spring and early fall are both good windows. Plant bare‑root clematis in early spring as soon as the ground can be worked. Plant container vines from mid spring through early summer, then again in early fall about 6 to 8 weeks before your average hard freeze. Fall planting is excellent where soils stay workable into November. Roots will grow until soil temperatures fall into the upper 30s Fahrenheit which is about 3°C. Provide a windbreak for very exposed sites. Mulch after the ground freezes to reduce freeze to thaw cycles. Mark the planting site so it is easy to find for late winter pruning.
Zones 7 to 8.
Favor fall planting from October to November so roots establish in cool soil. Container vines can also be planted in late winter to early spring from February to March if soil is workable. Afternoon shade improves flower color and reduces stress in long hot summers. In the Southeast and Gulf Coast, pick disease tolerant groups like Clematis viticella and Clematis texensis types. These often bloom on new wood and handle heat better. Avoid late summer planting since heat can stall root growth. Keep soil moisture steady and refresh mulch before heat arrives.
Zones 9 and warm coastal areas.
Plant from late fall through winter when nights are cool and soils are mild. Aim for November through January. Provide bright morning sun with high shade in the afternoon. Evergreen species like Clematis armandii suit these climates. Large‑flowered hybrids can struggle with nights that remain warm, so select cultivars known to flower in heat or consider small‑flowered species that are less demanding. Avoid planting during peak summer heat. Protect from salt spray and desiccating winds near the ocean. Use drip irrigation to keep foliage dry and reduce disease pressure.
Planting: Depth & Spacing
Bulbs or Tubers.
Clematis are not bulbs, tubers, corms, or rhizomes. They are woody vines with a crown and nodes that produce shoots. If you see the terms eyes or buds in planting guides, these refer to leaf nodes on the stem. Focus on crown placement and node depth rather than a specific bulb depth chart. You will set the plant a little deeper than its nursery level to encourage sprouting from below soil grade. That practice helps with recovery from wilt and protects the crown from freeze to thaw stress in winter. Keep the planting hole wide, amend the whole area, and add support before you set the plant.
Bare‑Root or Divisions.
Soak bare‑root clematis in room temperature water for 30 to 60 minutes before planting. Trim torn roots cleanly with sanitized pruners. Dig a hole 18 inches wide and 18 inches deep which is 45 by 45 cm. Backfill with native soil improved by compost. Set the crown so the first node sits 2 inches below the final soil level which is 5 cm. Spread roots outward, backfill gently, and water to settle. Space plants 24 to 36 inches apart which is 60 to 90 cm, giving vigorous types more room. If you are setting a division from a mature vine, keep several strong shoots with roots attached and plant at the same depth rule with one to two nodes buried. Stake immediately to prevent wind rock.
Container‑Grown.
Water the pot thoroughly, then slide the root ball out and loosen outer roots. Do not break the core if it is densely rooted. Set the plant so the soil line from the pot ends up 2 inches below the surrounding grade. Bury one or two nodes. Backfill, firm gently with your hands, and water until you see moisture at the base of the hole. Add a 2 to 3 inch mulch layer which is 5 to 7.5 cm, keeping mulch a couple of inches back from the stem to prevent rot. Space as for bare‑root plants. For a trellis against a wall, leave at least 6 to 12 inches which is 15 to 30 cm between the crown and the wall so rain can reach the roots and air can circulate.
Transplant shock and acclimation.
Harden off mail‑order plants by giving them bright shade for several days, then increasing morning sun exposure. Tie new shoots loosely with soft ties and set a temporary bamboo cane if the permanent trellis is a few inches away. Water deeply after planting and again two to three days later. In windy locations, use a simple windbreak for the first week. Remove flower buds on very small first year plants so energy goes into roots and framework. Keep the first season focused on structure. You will earn many more flowers in year two.

Watering & Mulching
Establishment versus mature schedules.
During the first growing season, aim for about 1 inch to 1.5 inches of water per week which is 2.5 to 3.8 cm, split into two deep soakings if possible. Adjust up in sandy soils and down slightly in heavy soils to avoid saturation. After establishment, water when the top 2 inches of soil feel dry. Deep, infrequent water encourages deep roots and steadier performance. Drip irrigation or a slow hose trickle works well. Avoid frequent light sprinklings that leave the crown damp and promote disease. Early morning watering allows foliage to dry quickly. Always check soil under mulch rather than judging by the surface.
Mulch types and thickness.
Mulch is essential for clematis because it cools the crown and maintains even moisture. Apply 2 to 3 inches of shredded leaves, leaf mold, fine bark, or compost which is 5 to 7.5 cm. Keep a 2 inch gap around the stem. In cold regions, maintain mulch through summer and add a winter layer after the ground freezes. In hot regions, use lighter colored mulches that reflect heat. You can also shade the base with clumping perennials or small shrubs that do not compete heavily, such as hardy geraniums, heuchera, or dwarf boxwood. The goal is cool roots with free air movement.
Heat, drought, and water quality notes.
During heat spikes above 90°F which is 32°C, provide temporary shade cloth at midday, increase watering frequency slightly, and refresh mulch. In prolonged drought, add a weekly deep soak even for established vines. If your tap water is very hard or saline, leach containers and raised beds periodically by watering until excess drains out, then allow full drainage. Avoid overhead irrigation in humid climates during evening hours since foliage that stays wet into the night can invite leaf spots. If you spot sudden blackened shoots on a large‑flowered hybrid, suspect clematis wilt. Cut back into healthy green tissue at once, sanitize tools, and rely on those buried nodes to reshoot.
Feeding
Timing and N‑P‑K ranges.
Clematis are modest feeders. In early spring as new growth reaches a few inches, apply a slow‑release or organic fertilizer with a balanced or slightly higher phosphorus analysis, such as 5‑10‑10 or 10‑10‑10, at label rates. Scratch it lightly into the soil around the dripline and water in. In rich beds, compost alone is often enough. After the first heavy bloom, a light side‑dress of compost or a half dose of the same fertilizer can support a second flush. Stop fertilizing by midsummer in cold regions so shoots can harden before frost. Skip feeding entirely if growth is lush and flowering is strong since excess nitrogen can reduce bloom.
Soil biology and retesting.
Top up organic matter each year with 1 inch of compost which is 2.5 cm. A living soil food web supports micronutrient cycling and improves structure. If leaves pale or flowering drops despite good culture, run a soil test rather than guessing. Micronutrient imbalances or a drifting pH may be at fault. Correct based on test results, then retest in the next season to confirm. In containers, refresh the top few inches of mix each spring and consider repotting vigorous vines every 3 to 4 years into a fresh, bark‑based potting mix.
Pruning & Support
Know your pruning group.
Clematis fall into three practical pruning groups based on when they bloom. Group 1 blooms on old wood in early spring, including C. alpina and C. macropetala. Group 2 large‑flowered hybrids bloom on old wood in late spring and again on new wood in summer. Group 3 late bloomers like C. viticella and C. texensis flower on new wood from midsummer to fall. If you are unsure, let your vine bloom for a season and observe. Wrong pruning rarely kills a plant. It only delays flowers for a cycle. Label the group on a weatherproof tag when you know it, then prune on that schedule every year.
Seasonal directions.
For Group 1, prune after flowering, removing only dead, weak, or tangled stems and shaping lightly. For Group 2, in late winter or very early spring, remove dead or weak wood, reduce a few old stems to strong pairs of buds at 12 to 18 inches which is 30 to 45 cm, and shorten other stems to a framework that suits your support. After the first bloom, deadhead and tip prune to encourage rebloom. For Group 3, in late winter, cut all stems to a low framework at 12 to 18 inches which is 30 to 45 cm. This hard prune gives vigorous, floriferous growth on new wood. If your vine has suffered wilt, an even lower cut into firm green tissue can restart it.
Support and training.
Provide slender supports 0.25 to 0.5 inch thick which is 6 to 12 mm so petioles can grip. Wire mesh, netting, twine, or a lattice of small battens works better than a single thick post. For larger structures, run a grid of wire or nylons that the vine can climb. Train young stems horizontally as well as upward to create more flowering spurs. Tie loosely with soft ties and adjust as stems thicken. Keep the crown a few inches from hot walls. Where vines must be guided to a distant support, use canes at an angle to bridge the gap. Avoid tight ties and abrasive materials that girdle stems.
Tool hygiene to limit disease.
Prune on a dry day. Disinfect blades between plants and after any cut through suspect tissue using 70 percent alcohol or a fresh 10 percent bleach solution. Wipe clean and oil tools after work to prevent rust. Remove and trash infected debris rather than composting it. Keep mulch pulled back from the stem to reduce constant dampness. Healthy airflow, sun, and sanitation together do more to prevent disease than any spray schedule.
Overwintering
Mulch strategy and freeze to thaw management.
In cold regions, when the ground has frozen, add a fluffy winter mulch 3 to 4 inches thick which is 7.5 to 10 cm over the root zone. Straw, pine needles, or shredded leaves are good choices. The goal is to keep soil temperatures even so the crown is not heaved by freeze to thaw cycles. Pull the mulch back to the summer depth of 2 to 3 inches in early spring as buds swell. Replace or refresh after you finish late winter pruning. Mark the location of young vines with a stake so you do not disturb them during spring cleanup.
Rodent protection and wind.
Where voles or rabbits feed in winter, guard the base with hardware cloth set a couple of inches into the soil and formed in a cylinder around the crown. Check ties and supports before winter storms to prevent whipping damage. If your vine is trained on an arbor, inspect fasteners and replace any brittle twine. Snow load can break brittle stems. Do not worry if some stems die back. Most clematis reshoot from below if the crown is protected and one or two nodes were buried at planting.
Tender and container plants.
In Zones 6 and colder, overwinter container clematis in an unheated garage or shed where temperatures stay roughly 25°F to 40°F which is minus 4°C to 4°C. Water only enough to keep the root ball from going bone dry, about once per month. In Zones 7 to 8, set the container in a protected corner out of north winds and wrap the pot with bubble wrap or burlap for insulation. Resume regular watering when growth begins. In Zones 9, evergreen species may keep foliage all winter. Protect from cold snaps with a light cover and avoid waterlogged soil during cool, wet periods.
Growing Environments
Containers and minimum soil volume.
Clematis grow well in large containers if you choose a generous volume and a sturdy support. Use at least 18 inches diameter and depth which is 46 cm for compact cultivars and 24 inches which is 60 cm for vigorous types. That is roughly 7 to 10 gallons for smaller vines and 15 to 20 gallons for larger ones which is 26 to 38 liters and 57 to 76 liters. Fill with a bark‑based potting mix that drains well and retains moisture without compaction. Set a trellis or obelisk in the pot at planting so roots do not get disturbed later. Fertilize lightly and water deeply since containers dry faster in wind and sun.
Drainage and potting mix.
A high‑quality potting mix with composted bark, perlite, and peat or coir strikes the right balance. Avoid garden soil in pots because it compacts and suffocates roots. Raise the pot slightly on feet so water can exit freely. In very hot settings, choose light colored containers that reflect heat. Shade the base with low perennials, a small shrub, or a decorative screen. Refresh the top few inches of mix annually and repot into fresh mix every few years. When repotting, bury one or two nodes again to maintain a strong base.
Microclimates for shade, wind, and reflected heat.
Use buildings, fences, and trees to create morning sun with afternoon shade where summers are intense. Where sea breezes or mountain winds are common, give a windbreak so new stems do not snap. Avoid baking sites near dark masonry that reflects heat onto the crown. In cooler regions, a south or west exposure can improve bud formation. Testing a spot with a less expensive plant for a season can help you learn how it behaves before moving a treasured cultivar. Flexible training and careful watering let you fine‑tune microclimates to match the vine.
Companion Planting & Design
Companions that hide die‑back and extend color.
Plant shallow‑rooted companions to shade the base and provide a pleasing skirt. Hardy geraniums, heucheras, hostas, and lady’s mantle are classic choices. Low ornamental grasses soften the look and move in the breeze. In borders, clematis weave beautifully through climbing roses, where the rose framework supports the vine and extends the bloom season. You can coordinate flower color with nearby shrubs like hydrangea macrophylla or ground the vignette with aromatic perennials such as lavender. If you are building a color‑themed bed, explore our hubs on blue, pink, white, and purple flowers for ideas that blend with your vine. For broad selection and planning basics, see types of flowers and the seasonal pairings in the wedding flowers guide.
Pollinator‑friendly choices and spacing for airflow.
Small‑flowered species and viticella types offer abundant nectar and are easy for bees to work. Give each vine enough room for air to move through the foliage. Space plants 24 to 36 inches apart which is 60 to 90 cm and do not crowd the base with aggressive groundcovers. When weaving clematis into shrubs, tie the vine so it does not girdle the host plant. Deadhead spent flowers on reblooming cultivars to reduce seed set and extend display. In mixed borders, a few well‑placed companion shrubs also help to disguise seasonal pruning of Group 3 vines, keeping the structure attractive year round.
Design tricks with structures.
Give clematis structures that show off the flower face. On arches and pergolas, train some stems horizontally so blooms face toward eye level rather than only at the top. On trellises, aim for a diamond or fan pattern as you tie new growth, which encourages short flowering spurs. On fences, run horizontal wires every 8 to 12 inches which is 20 to 30 cm so there is always a grip point. Where you need quick cover, pair a fast annual vine for the first summer while the clematis builds roots. Remove the annual before it smothers the young framework. Good structure and patient training are the quiet secrets to abundant clematis flowers.
References
- North Carolina State University Extension. Clematis, Clematis spp.
- Clemson University Cooperative Extension. HGIC 1136 Clematis.
- American Society for the Prevention of Cruelty to Animals. Toxic and Non‑Toxic Plants: Clematis.


Written by: Your Flowers Guide editorial team
We are a small independent group of flower lovers who research and review each guide using trusted horticultural and educational sources. Learn more about us