How to Grow and Care for Love‑in‑a‑Mist
Contents
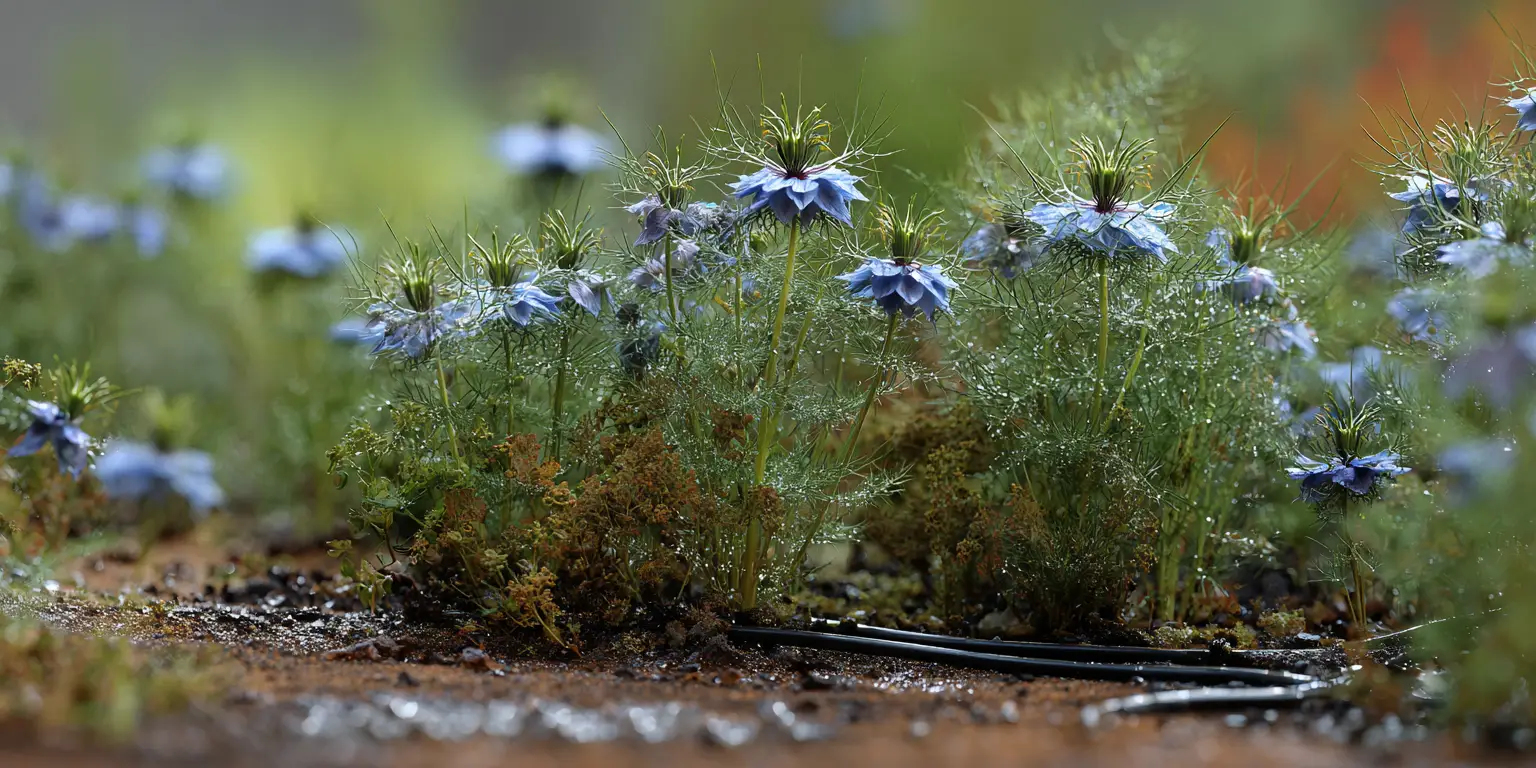
Love‑in‑a‑Mist is the common name for Nigella damascena, a cool season annual in the buttercup family. It is treasured for starry flowers cradled by lacy bracts that create a soft haze in borders and cutting patches. You may also see it called devil in the bush or ragged lady. Plants are typically 15 to 24 inches tall (38 to 61 cm) with fine, fernlike foliage and showy seed pods that dry well. In most of the United States, Love‑in‑a‑Mist thrives in full sun with afternoons that are not scorching. In regions with very hot summers, a touch of light afternoon shade helps protect blooms and foliage from stress and extends the display. A quick success snapshot: direct sow shallowly in well‑drained soil as soon as the ground can be worked, keep evenly moist through establishment, thin for airflow, and make a second sowing a few weeks later to carry color deeper into the season. This compact profile captures what makes Love‑in‑a‑Mist care straightforward for home gardeners and cut‑flower growers.
Love‑in‑a‑Mist is most at home in average garden beds that drain well. It rewards consistent care during its first weeks, after which it asks very little. Flowers open from late spring into early summer, particularly in climates with long, cool springs. Success improves markedly when soil does not stay soggy, when beds receive full morning sun, and when sowings are timed around frost dates. Because the plants resent root disturbance, nearly all gardeners get the best results by sowing where the plants will bloom. That habit makes Love‑in‑a‑Mist an easy and charming choice for informal borders, pathways, and cottage plantings.
Soil & Bed Preparation
Love‑in‑a‑Mist prefers open, well‑drained loam or sandy loam with moderate fertility. It tolerates a range of textures, including clay that has been loosened with organic matter so water can move freely. Work two to three inches of finished compost into the top 8 to 10 inches of soil to improve structure if your bed is compacted. Avoid fresh manures and heavy doses of nitrogen, which push lush foliage at the expense of flowers and can lead to flopping. Level and rake the surface smoothly before sowing so shallowly planted seed makes firm contact with the soil. That firm contact, plus steady moisture through germination, is the foundation of strong stands that do not topple in wind or irrigation.
Drainage Test and pH Targets.
Love‑in‑a‑Mist grows well in neutral soil and tolerates slightly alkaline conditions. A practical target is pH 6.0 to 7.5, with neutral soils often performing best. To check drainage, dig a hole about 12 inches deep and wide, fill it with water, let it drain, then refill it the next day and time the drawdown. Water should disappear within about eight hours. If water lingers longer, lighten the bed with compost and coarse mineral material and consider mounded rows or low raised beds to keep crowns above periodic saturation. For pH, send a sample to your state Cooperative Extension lab so recommendations match your soil and water. To raise pH, use garden lime at the rate recommended by your test. To lower pH, soil sulfur is used sparingly, again only at the rates printed on your lab sheet. Retest soil every two to three years in intensively planted beds to keep nutrients and pH on target for dependable bloom.
Raised beds help where soils are heavy or foot traffic compacts the surface. A simple six to eight inch rise is enough to improve drainage for shallow‑sown annuals. In ground beds remain perfectly suitable where water percolates freely after storms. The goal in both cases is the same: moisture that soaks in evenly and moves through the root zone without pooling. That one condition prevents the root stress that weakens Love‑in‑a‑Mist during sudden heat spells.

Planting Calendar by USDA Zone
Love‑in‑a‑Mist is a hardy annual for most gardens. It tolerates light frost and performs best in cool weather. Because it is not a long lived perennial, timing is built around your local last spring frost and the onset of summer heat in your area. Use the windows below as a practical guide and adjust to your microclimate. Successive sowings two to four weeks apart extend bloom in every zone. Where spring warms quickly, fall or very early spring sowing yields the finest stands.
Zones 3 to 5. Direct sow outdoors as soon as the soil can be worked and daytime highs are consistently above the upper 40s to low 50s °F. This is typically late April to May in many parts of these zones. Make a second sowing in late spring to replace early plantings as weather turns hot. In short seasons, an optional final sowing in early June still produces bloom, though stems and flowers may be smaller once heat arrives. Fall sowing is possible in protected sites but can be unpredictable when winters swing from bare ground to deep freeze.
Zones 6 to 7. Direct sow from late winter to early spring, often from late February through April depending on local frost dates. The coolest sowing window produces the strongest stems and richest color. A second sowing in late spring keeps cut stems coming into early summer. In parts of these zones with mild winters and steady snow cover, late fall sowing allows seeds to sit in cold soil and germinate as soon as conditions favor them, giving an early spring display.
Zones 8 to 9. Use the climate’s cool season. In much of the South and lower West, sow in fall once nights regularly dip into the 50s °F. Fall sowings overwinter as seedlings and bloom strongly in spring. In early spring you can also make a quick second sowing for a later wave of flowers before heat sets in. In areas with erratic winter warm spells, light mulch helps prevent premature sprouting during warm breaks.
Zones 10 to warm coastal 11. Treat Love‑in‑a‑Mist as a winter to spring annual. Sow from late fall to midwinter during your mild rainy season and expect bloom from late winter into spring. In desert and arid coastal climates, use afternoon shade and consistent moisture to buffer wind and hot, reflective surfaces. If spring heat arrives early, blooms finish quickly, so plan sowings for the earliest practical cool spell.
In all zones, transplanting is possible but not ideal because Love‑in‑a‑Mist develops a taproot and resents disturbance. Where you must start indoors, sow into deep cells or biodegradable pots and transplant very gently before roots knit the pot, hardening seedlings for seven to ten days so they adjust to sun and wind without checking growth.
Planting: Depth & Spacing
Direct‑sown seed.
Prepare a fine seedbed and broadcast or sow in shallow rows. Cover seed about one eighth inch deep (3 mm), firm lightly, and water with a gentle shower so seeds are not displaced. Keep the surface evenly moist until you see a fine green haze that marks germination. Thin to 8 to 10 inches apart (20 to 25 cm) for robust branching and airflow. In cutting patches, a grid spacing of 9 by 9 inches balances stem length and flower size for home use. For borders, cluster three to five seedlings per spot to make informal drifts. Crowding produces taller stems but can increase lodging in wind or heavy rain, especially in rich soil.
Transplanted seedlings.
If you raise starts, use deep 50‑ or 72‑cell trays or biodegradable pots and sow two seeds per cell, thinning to one. Transplant when seedlings have two to three true leaves and before roots coil strongly. Set the crown level at the soil surface and water in well to settle soil around the root zone. Provide light shade cloth or a temporary crate for two or three days if the sun is intense to minimize shock. Handle by the root ball, not by stems, and avoid disturbing the root plug. Hardening for a week outdoors in a sheltered spot greatly reduces transplant stress.
Container‑grown plants.
Love‑in‑a‑Mist can be grown in containers for a portable display and for easy cutting. Choose a container at least 10 to 12 inches wide and 8 to 12 inches deep, which will hold roughly 2 to 4 gallons of potting mix. Ensure firm drainage holes and use a high quality soilless mix that drains freely but retains even moisture. Sow directly into the container and thin to spacing similar to bed culture, allowing a bit more room at the rim so foliage can billow and seed pods can form without crowding.

Watering & Mulching
Love‑in‑a‑Mist needs consistent moisture during germination and establishment, then steady but not excessive watering through bloom. As a rule of thumb for mixed flower beds, supply about 1 to 1.5 inches of water each week from rain or irrigation, increasing toward two inches during prolonged hot spells. Water deeply to encourage roots to explore below the surface and let the top half inch of soil dry slightly between waterings. In containers and raised beds, check more often because potting mixes and elevated beds dry faster than in‑ground soil. A simple rain gauge and a weekly look at the soil with your fingers are enough to keep moisture on track without guesswork.
Mulch helps regulate surface moisture and suppress weeds but should be used thoughtfully with annuals. In seasonal color beds and cutting patches, apply a thin layer of fine textured organic mulch about 1 to 2 inches thick after seedlings are established. Pull mulch a few inches back from the plant crowns so collars do not stay damp. Leave small gaps in mulch if you want plants to self sow for the next season. Coarse mulches or heavy layers can keep the topsoil too cool and too wet for shallow sowings and can block self sown seed from reaching soil. In very hot regions, mulch protects roots from radiant heat, keeps bloom color truer, and reduces water use.
During sudden heat spikes, water early in the morning so foliage is dry by midday and the root zone is fully charged before afternoon heat. Where tap water is very hard, surface alkalinity can creep upward across a season; a periodic soil test will tell you whether adjustments are needed before the next planting.
Feeding
Love‑in‑a‑Mist is not a heavy feeder. In average garden beds with fresh compost incorporated at planting, fertilizer is often unnecessary. If a soil test shows low fertility or you are growing a dense cutting patch on lean ground, a light application of a balanced fertilizer works well. In ground, many gardeners use a low to moderate nitrogen analysis such as 5‑10‑5 or 5‑10‑10 at about one half to one pound per 100 square feet every four to six weeks during active growth, adjusting for any nutrients already present per your soil report. In containers, mix a slow release fertilizer into the potting medium at planting at label rates, or feed with a diluted water soluble product every two to three weeks once plants are actively growing.
Too much nitrogen yields leafy stems with fewer flowers and can make plants sprawl. Organic matter in the 3 to 5 percent range in beds supports soil life and water balance without pushing excessive growth. Retest garden soil every two to three years in intensively planted borders, or every three to five years in less intensively managed beds, so you apply only what is needed and keep pH within the recommended range.
Pruning & Support
Pruning is minimal. Pinch or lightly tip the main stem of young plants at 6 to 8 inches tall if you want extra branching for cutting, though unpinched plants also branch naturally. Deadhead spent blooms to extend the floral period, taking stems down to a strong side shoot. If you love the papery, inflated seed pods for drying, allow the last wave of blooms to set seed and harvest pods when the stripes are still visible and the capsule is firm. For continuous color, a practical rhythm is to deadhead the first two waves and then let the final wave mature pods.
Support is generally not required for standard border varieties, which stand well at 15 to 24 inches tall. Taller strains in fertile soil can lean after heavy rain. Where you expect summer storms, a low ring support or an unobtrusive stretch of string on short stakes woven through the planting keeps stems upright without visual clutter. Keep snips and stakes clean. When moving through the patch, sanitize shears between plants if you encounter any disease, using 70 percent rubbing alcohol or a fresh 10 percent bleach solution, and remove spent or fallen foliage promptly so air can move and leaves dry quickly after rain.
Overwintering
Love‑in‑a‑Mist completes its life cycle within a single growing season, so there is no true overwintering of mature plants. In much of the United States, fall or very late summer sowings in mild winter regions germinate, make low rosettes, and overwinter as small seedlings. These plants bloom earlier and often more robustly than spring sowings. If frost heave is common in your garden, a light winter mulch of shredded leaves sprinkled loosely around but not on top of the seedlings helps moderate freeze to thaw swings. Remove that cover gradually as the soil thaws and days lengthen.
Self sowing is easy to encourage and can be managed neatly. After pods dry and seeds rattle, shake them across open soil where you want next year’s drifts. If you use mulch, rake a few bare patches so seed contacts soil. In cold regions, leave seed on the surface for winter and let nature stratify it. In warm winter areas, seed sown in fall often germinates promptly and holds as seedlings until spring. Where rodents are persistent, bring a few stems indoors to dry so you have clean seed to sow later. Label envelopes clearly to avoid mixing seed of white flowers and blue flowers forms if you want distinct color blocks.
Growing Environments
Love‑in‑a‑Mist grows happily in pots if you respect its needs. Use a soilless potting mix that includes ingredients such as peat moss, composted bark, and perlite or vermiculite for drainage and aeration. Avoid garden soil in containers because it compacts and holds water around roots. Choose a container that holds at least 2 gallons of mix for a small cluster or 4 gallons for fuller groupings, with a depth of 8 to 12 inches so roots can run. Ensure several drainage holes and use a saucer only for short periods; do not allow pots to stand in water. Place containers where they receive morning to early afternoon sun and are shielded from blasting wind. Rotate the container weekly for even growth if light is directional.
Microclimates.
Bed edges near sidewalks and stucco walls can reflect heat that shortens the bloom period. In hot summer regions, pull Love‑in‑a‑Mist a foot or two away from hard surfaces and give brief afternoon shade from an open‑branched shrub or a taller perennial. In windy sites, plant in the lee of low hedging, or interplant among sturdier perennials that break gusts without casting heavy shade. Along coastal sites with salt spray, choose inland beds or provide a low fence to blunt wind. These small moves keep flowers bright and foliage fine textured, and they simplify wedding flowers guide decisions when you want clean stems for bouquets.
Companion Planting & Design
Love‑in‑a‑Mist threads beautifully through cottage plantings and mixed borders. It pairs with early and mid‑season bloomers that prefer the same cool start, including larkspur, lavender in dry lean soils nearby, cornflowers, and Iceland poppies. The lacy texture is a foil for solid leaves on roses, peonies, or dianthus. As the annuals fade in early summer, later perennials hide the dieback gracefully. In cutting gardens, plant in generous drifts so you can harvest freely and still enjoy a full display, and let a portion set pods for dried work. The seed pods add structure beside airy grasses and are striking beside spires of salvia or veronica.
For color design, blue forms cool a border and harmonize with purple flowers while white forms sparkle at dawn and dusk, where the bracts catch low light. Pink tones play well with soft pink flowers themes. Group colors in clusters of five to seven plants for visual impact, then repeat the groups down a border so the haze appears in deliberate intervals. Maintain 8 to 10 inch spacing for airflow in humid climates. In arid areas, slightly tighter spacing knits a living mulch that shades soil while still allowing air to pass. Where self sowing is welcome, leave a few pods at the back of the bed as seed sources and deadhead in the front to keep things tidy.
References
- University of Wisconsin – Madison Division of Extension. “Love‑in‑a‑Mist, Nigella damascena.”
- NC State Extension. “Nigella damascena.”
- University of Illinois Extension. “Plant of the Week: Love in a Mist.”
- Iowa State University Extension and Outreach. “Testing and Improving Soil Drainage.”
- University of Maryland Extension. “Soil Health, Drainage, and Improving Soil.”
- NC State Extension. “Plan Before You Plant: Mulch in Seasonal Color Beds.”


Written by: Your Flowers Guide editorial team
We are a small independent group of flower lovers who research and review each guide using trusted horticultural and educational sources. Learn more about us