
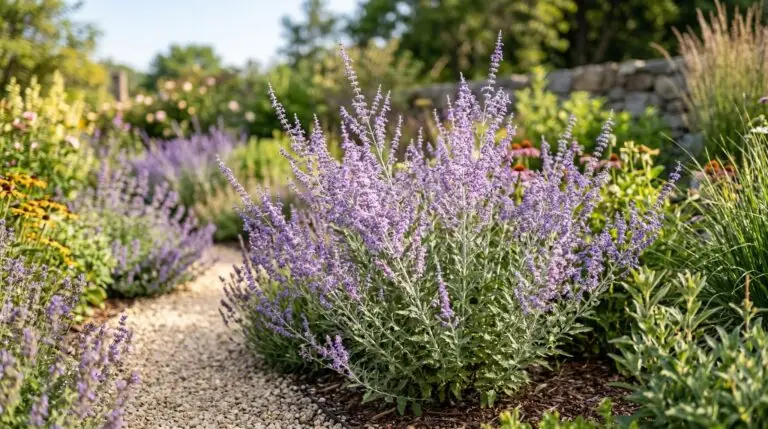
Russian sage is a vigorous grower that can quickly become an unruly thicket if left to its own devices year after year. The natural growth habit of this plant involves sending up tall silvery stems that bloom prolifically, but the base of the plant gradually turns into tough, unproductive wood. Many gardeners make the mistake of cutting the entire plant down to the ground in the autumn just to tidy up the garden bed before winter arrives. This fall cleanup approach actually exposes the hollow stems to freezing moisture, which can easily rot the crown and kill the entire plant. Leaving the old stems standing through the winter provides essential insulation for the root system against harsh winds and fluctuating temperatures. The dried silver stems also add welcome texture and structure to a dormant garden when most other perennials have completely disappeared. You should always wait for the changing seasons to signal the right moment for intervention rather than rushing to clean up in the autumn.
The question of when to cut back Russian sage depends entirely on the warming weather patterns in your specific region rather than a date on the calendar. You want to wait until the days are consistently mild and the threat of hard overnight freezes has completely passed. The clearest signal comes from the plant itself, as you will start to see tiny gray-green buds swelling along the lower woody stems. Before you head out to the garden, you need to gather a pair of sharp bypass pruners and some heavy gloves to protect your hands from the rough bark. Bypass pruners work like scissors and make clean cuts, whereas anvil pruners crush the hollow stems and invite disease into the plant tissue. You might also want a small pruning saw or heavy loppers if your plant is several years old and has developed thick, trunk-like bases that standard hand pruners cannot handle. Having the right tools ready ensures you can make smooth cuts that heal quickly as the plant pushes out its spring foliage.
Timing the cutback with spring growth
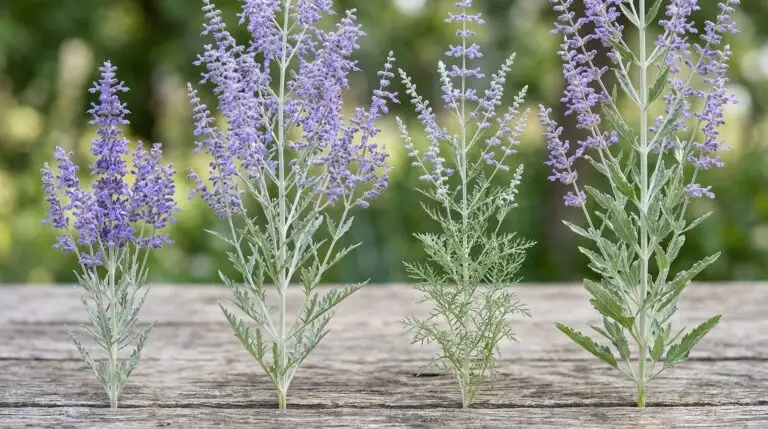
Approaching the plant in early spring requires a bit of patience because Russian sage is notoriously slow to wake up compared to early bloomers. If you look closely at the base of the stems, you will eventually notice small nodes beginning to turn green and push out tiny leaves. This new growth is your exact guide for where and how to proceed with Russian sage pruning. The goal is to cut the old stems back to just above these lowest active buds, usually leaving about six to twelve inches of old wood standing above the soil line. If you cut completely flush with the ground, you risk removing all the active growth nodes and severely stunting the plant for the entire season. The plant relies on that short framework of sturdy older wood to support the massive flush of tall new stems that will emerge over the coming months. Leaving a foot of old wood creates a structural foundation that keeps the plant upright and prevents the classic “flopping” problem that happens when the stems get top-heavy in late summer.
Start your pruning process by working from the outside of the plant and moving inward toward the center crown. Take your bypass pruners and cut each stem individually about a quarter inch above a healthy, swelling bud. Angling the cut slightly away from the bud allows spring rain to run off the stem rather than pooling on the cut surface and causing rot. As you work your way through the thicket, you will inevitably find some stems that appear completely dead, dry, and brittle, with no signs of green buds anywhere. You should cut these entirely dead stems all the way down to the ground to clear them out of the way. Removing this dead material opens up the interior of the plant to sunlight and fresh air, which prevents fungal diseases from taking hold in the dense foliage later in the summer. Taking the time to evaluate each stem rather than blindly shearing the whole plant down ensures a much healthier and more vigorous response.
Managing old plants and tangled centers
After several years of growth in the garden, the base of a Russian sage can become a dense, woody mass that chokes out its own center. When you look down into the crown of an older plant, you might see a tangled mess of crossing branches rubbing against each other and creating wounds in the bark. This is the perfect time to do some structural thinning, which involves removing about a third of the oldest, thickest stems right down to the soil line. Thinning out the center relieves the congestion and encourages the roots to send up fresh, flexible shoots from the base. You might notice that the center of an old plant has died out completely, leaving a ring of growth around a barren middle. This is a normal aging process for many perennial sub-shrubs, and it is a clear sign that the plant needs dividing or aggressive rejuvenation. If you have experience managing the woody bases of lavender, you will find this process very familiar, as both plants require similar tough love to prevent them from becoming leggy and sparse.
The way you handle the soil around the base after cutting back is just as important as the cuts themselves. Russian sage thrives in lean, well-drained soil and actually produces weaker, floppier growth if given too much fertilizer or rich compost. Poorly drained soil holds water against the woody crown, which easily leads to root rot during the wet spring months. If you notice the soil around the base stays soggy days after a rainstorm, you need to mix in some coarse sand or gravel to improve the drainage profile. You should also resist the urge to pile heavy wood mulch around the stems, as this traps moisture exactly where the plant needs dry air. Just like the low-growing mounds of catmint, these drought-tolerant plants prefer a topdressing of small gravel or simply bare mineral soil. Keeping the crown dry and the soil lean guarantees the new stems will grow strong, stiff, and capable of holding themselves up without staking.
What to expect as the plant recovers
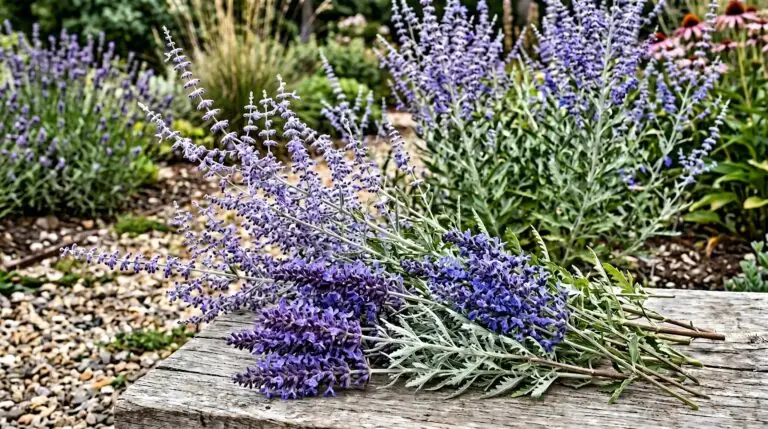
Once you finish pruning Russian sage, the plant will look quite bare and somewhat severe, resembling a collection of short dead sticks poking out of the ground. You might even worry that you have cut away too much and ruined the plant for the season. This feeling of doubt is completely normal, but you must trust that the aggressive cutback is exactly what the plant needs to perform its best. Over the next few weeks, as daytime temperatures rise and the soil warms, those tiny green buds will rapidly expand into vigorous silver-green shoots. Because you left a solid framework of old wood at the base, these new stems will have a sturdy anchor to support their rapid upward growth. By mid-summer, the plant will have transformed into a dense, upright cloud of fragrant foliage topped with thousands of small purple flowers. You will see that taking the time to make careful, deliberate cuts in the spring pays off with a neatly structured plant that commands attention in the garden without sprawling over its neighbors.
More About Russian Sage

Companion plants for Russian sage in a billowy blue and purple perennial border
How to grow Russian sage for airy lavender-blue clouds that float above the summer border
Russian sage versus lavender and which silver-stemmed blue bloomer is right for your garden

Russian sage as a drought-tolerant superstar for waterwise and xeriscape gardens
Best Russian sage varieties from compact Little Spire to silvery Blue Jean Baby

Growing Russian sage in containers for silver-blue drama on sunny patios

Russian sage in winter and the silver-white stems that bring structure to the frozen garden