How to Grow and Care: Hellebore
Contents
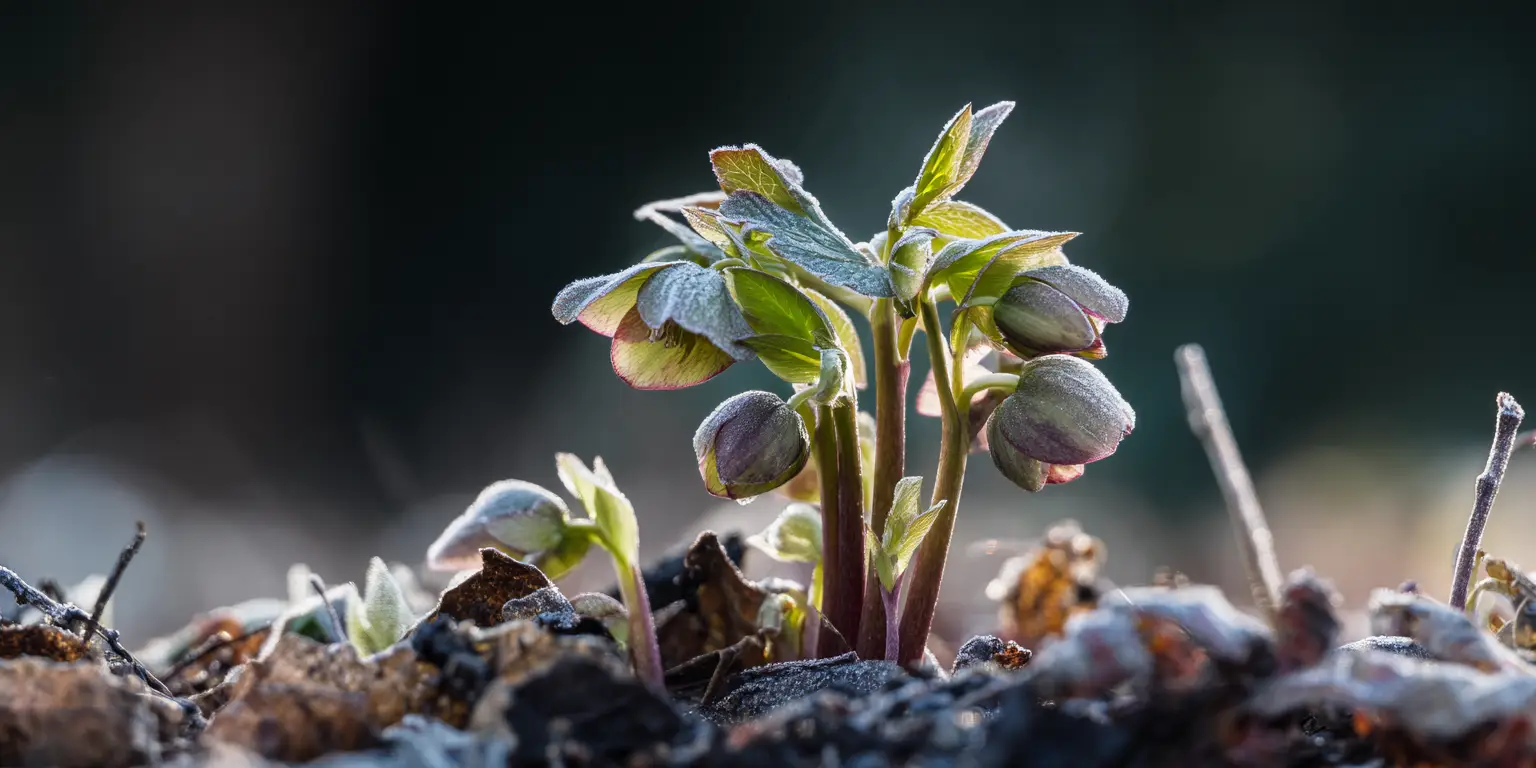
Hellebore is the common name for a small group of shade tolerant perennials grown for winter to earliest spring bloom and handsome foliage. The most widely planted garden types are hybrids grouped under Helleborus × hybridus. They are often sold as Lenten rose. The white blooming Helleborus niger is known as Christmas rose in milder regions. A few other species appear in gardens, including H. foetidus and H. argutifolius. In U.S. landscapes, hellebores are long lived evergreens or semi evergreens in cool climates. They thrive in partial shade with bright winter light and dappled afternoon shade from late spring to summer. As a quick snapshot for success, give them evenly moist but well drained soil rich in organic matter, keep the crown at soil level when planting, mulch lightly every year, and remove weather worn leaves just before buds push. That simple rhythm captures the core of practical Hellebore care for most gardens.
Hellebores are hardy in broad parts of the country, commonly USDA Zones 4 to 9 depending on species and snow cover. Flowers open during warm spells from late winter into early spring, then sepals persist for weeks so the display seems to last much longer than an ordinary perennial bloom. Plants form slowly expanding clumps about 12 to 24 inches tall and 18 to 30 inches wide, so they fit neatly into shade borders, under open shrubs, and along paths where their nodding flowers can be admired up close. The plants are deer and rabbit resistant and tolerate dry shade once established, which makes them unusually valuable for shady front yards and narrow side gardens. To plan color families and combinations that suit your beds, browse your own guides to types of flowers, purple, white, and pink flowers for palette ideas you can echo with hellebores.
Soil & Bed Preparation
Texture and organic matter: Hellebores grow best in a crumbly loam that holds moisture yet drains freely. That sounds like a contradiction, but you can build it by mixing two to three inches of finished compost into the top 8 to 12 inches of planting soil and repeating with a lighter top up every fall. Avoid turning or loosening soil deeply once plants are established because hellebores dislike frequent disturbance. In heavy clay, do the improvement before you plant. Blend compost and a small portion of fine pine bark or similar woody material into a broad area so roots can travel. In very sandy soils, the same compost improves water retention, which is just as important as drainage for summer resilience.
Drainage Test and pH Targets: Before planting, test percolation to confirm drainage. Dig a hole about 12 inches deep and 12 inches wide, fill it with water, let it drain, then refill and time the drop for one hour. One to three inches per hour is a good rate. Much slower indicates compacted or clayey soil that should be improved or elevated as a raised bed. Much faster than four inches per hour suggests very sandy soil that will need extra organic matter and mulch to hold moisture. For pH, aim for neutral to slightly alkaline. A range near 6.8 to 7.8 suits most hellebore hybrids, with many performing well around 7.0. If your soil is more acidic, typical limestone applications can nudge pH upward. If your soil is already alkaline, do not fight it. Focus instead on organic matter and even moisture, which support steady growth in those conditions.
Raised beds versus in ground: When drainage is poor or tree roots dominate, a raised bed only 6 to 8 inches high will improve aeration and speed soil warming each spring. In windy or arid sites, raised beds dry faster, so budget for drip irrigation or regular deep watering during the first two summers. In climates with strong afternoon sun, orient beds to capture morning light and provide shade from noon to late day. Where native soil is already well structured, plant directly in ground without creating a bathtub effect. That means amending broadly, not just the hole, so excess water can move laterally away from the crown.

Planting Calendar by USDA Zone
Zones 3 to 4: In the coldest gardens, hellebores do best when planted in spring once soil is workable and the worst freeze–thaw has passed, or in early fall with a protective leaf mulch. Spring planting lets roots knit in before the first winter. Early fall planting works well if you provide two to three inches of loose leaf mold after the soil cools. In both cases, avoid planting during warm snaps followed by deep cold. If you garden at elevation with intense winter wind, set plants in sheltered exposures and mulch lightly after the ground firms.
Zones 5 to 6: Prime planting windows are early fall from September to October and spring from March to April as soon as you can dig. Fall planting usually yields the strongest display the following late winter because flower buds form the previous summer. Spring planting is reliable as well. In humid summers, morning sun with early afternoon shade keeps plants comfortable. In dry continental climates, choose light shade or high dapple under deciduous trees so roots stay cool.
Zones 7 to 8: Plant from October to November and again in late winter or earliest spring. Avoid late spring to early summer planting because warm soils and stronger sun stress new transplants. In coastal heat and humidity, prioritize air movement and excellent drainage to prevent crown rot. In inland heat, place plants where they receive bright morning light and high shade later in the day. Provide extra irrigation during the first two summers so the deep root system develops.
Zone 9 cool summer pockets: In northern California coasts and similar microclimates, fall to winter planting works very well. Choose afternoon shade and avoid reflected heat from walls. In inland Zone 9 with hot summers, hellebores are best treated as seasonal container displays in cool months with an early spring transplant to a protected in ground position if you want long term success.
Planting: Depth & Spacing
Bulbs or tubers: Hellebores are not bulbs or tubers. They grow from rhizomatous crowns. This matters because deep planting that suits some bulbs is harmful for hellebores. Keep the crown near the soil surface.
Bare root or divisions: If you divide a mature clump or receive a bare root start, plant with the crown at soil level. The eyes and emerging buds should sit just at or slightly above the final surface, never buried. Set divisions into a wide hole so roots can spread in a natural pattern. Backfill with the native amended soil, firm gently to remove large air pockets, and water thoroughly. Space plants 18 to 24 inches apart to allow leaf fans to expand and to maintain airflow. After planting, provide light shade for one to two weeks to limit stress. If you must divide, do it in early fall or just after flowering, and be patient since recovery is slow.
Container grown: Most gardeners buy container grown plants. Tease or slice circling roots on pot bound plants so they grow outward. Position the crown at the same height it sat in the nursery pot, level with the surrounding soil. Water deeply to settle the soil and mulch lightly. If your nursery plants are in bloom, you can still plant them, but cut wind exposure and water attentively for several weeks. As a rule, do not bury growth points. Deep placement can reduce flowering.

Watering & Mulching
Establishment watering: In the first growing season, water deeply once or twice per week when rainfall is scarce, soaking the root zone to a depth of 8 to 10 inches. Let the top inch of soil dry slightly between waterings to keep the crown from staying saturated. Morning irrigation is best since leaves dry quickly. Once established, hellebores handle ordinary dry spells, but they flower and bulk up faster with steady moisture from fall through spring. During summer heat, check soil with your finger under the mulch; water when it feels dry at knuckle depth. In very sandy soils, smaller but more frequent drinks may be necessary to keep roots comfortable.
Mulch strategy and crown safety: Spread two inches of leaf mold, shredded leaves, or fine bark in late fall after the soil cools. Pull mulch a couple of inches back from the crown so the leaf bases and buds are not buried. That space discourages rot and gives buds room to push. In cold regions, the mulch buffers freeze–thaw so the plant does not heave. In hot climates, the same mulch moderates summer soil temperatures and reduces evaporation. Avoid fresh wood chips against the crown and avoid thick sour compost that can mat and stay wet. Refresh the mulch annually as it breaks down to feed soil life.
Feeding
When and how much: Hellebores are modest feeders. In average garden soil, an annual topdress of compost in fall or early spring is often enough. If growth looks pale or sparse, you can apply a light dose of a balanced slow release fertilizer in early spring as new leaves emerge. Follow label rates on the low end for perennials. Skip fertilizer during late summer and early fall because a surge of soft growth can reduce winter hardiness. In containers, nutrients leach faster, so mix a slow release product into fresh potting mix at repotting and supplement lightly in spring.
Soil biology and pH: Strong hellebore clumps come from living soil. Maintain two to five percent organic matter in planting beds by returning shredded leaves, mulching every year, and avoiding needless cultivation that breaks aggregates. Retest pH every few years if your water supply or amendments could shift it. If your soil test shows acidic conditions and you garden hellebores as your main shade perennial, limestone applications can move pH toward neutral. If your native soil is alkaline, do not chase a lower number. Focus on even moisture, mulch, and organic matter that support nutrient availability across seasons.
Pruning & Support
Seasonal clean ups: Each winter leaves become tattered and may harbor leaf spot spores. In late winter, before buds open fully, cut away old foliage at the base and dispose of it with yard waste. This simple step improves the show and lowers disease pressure. After bloom, green sepals persist attractively for weeks, then dry. If you want to prevent self seeding, clip the spent flower stalks at their base once the display fades. If you want volunteers, leave some stalks until pods turn brown and begin to split.
Tool hygiene and staking: Clean pruners before you move to a new clump if you have seen leaf spot or viral symptoms in your plantings. Wash off debris first, then sanitize with 70 percent alcohol or a fresh one to nine bleach to water solution and rinse well afterward to limit corrosion. Most hellebore hybrids hold themselves without support, but taller species such as Helleborus argutifolius can lean after heavy snow or wind. In exposed sites, a discreet ring or short stakes set well outside the crown can steady flower stems without damaging growth buds.
Overwintering
Mulch and freeze–thaw management: In Zones 4 and 5, apply leaf mulch two to three inches deep after the ground firms to buffer heaving, then pull it back gradually in late winter as buds swell. Where snow is reliable, snow acts as a perfect breathable blanket. In places with alternating freeze and thaw, check plant crowns after cold snaps and press any lifted plants back gently when soil thaws. Avoid smothering crowns with heavy, wet mulch. Thin, airy material works best because it protects while allowing the crown to breathe.
Rodent and wind protection: Hellebores are not favorite deer browse, but mice and voles sometimes tunnel in warm mulch. Keep mulch depth moderate around crowns and avoid piling it against stems. In known vole corridors, a low collar of half inch hardware cloth pushed into the soil a few inches can deter gnawing through winter. In windy sites that desiccate leaves, windbreaks made from evergreen boughs or a short snow fence set upwind reduce scorch and help flowers open cleanly in late winter.
Containers in winter: In cold zones, containers freeze more solidly than garden soil. If you grow hellebores in pots for winter display, set the container on the ground in a protected spot out of prevailing wind and cluster pots together to conserve heat. In the coldest regions, slide decorative liners out and park the nursery pot in an unheated garage, cold frame, or sheltered porch where temperatures hover near freezing. Keep the mix just barely moist. In spring, acclimate plants and transplant to the garden for long term vigor.
Growing Environments
Containers and potting mix: Hellebores can decorate winter planters beautifully. Choose a sturdy container with large drainage holes and a heavyweight potting mix that includes bark fines and perlite so water moves freely while roots breathe. These plants are deep rooted and appreciate depth more than width in a pot. Treat container displays as seasonal accents through late winter and early spring, then transplant into beds so roots can run. Refresh containers with new mix each time you reuse them to maintain porosity. Avoid saucers that hold water since a constantly wet base invites crown rot.
Microclimate tips: For peak bloom and long lived plants, aim for morning sun with filtered shade after midday. Under deciduous trees, hellebores receive bright winter light when the canopy is bare and shade once heat returns, which is ideal. Keep them away from south facing walls and reflected heat that can force early growth followed by cold damage. Where summer nights stay warm, choose slightly brighter exposure in winter and use mulch to keep roots cool in July and August. Good air movement reduces leaf spot in humid regions, so give each clump space and avoid dense evergreen shrubs immediately overhead.
Companion Planting & Design
Hide dieback and extend color: Hellebore flowers emerge very early, so partner them with spring bulbs and shade perennials that hide the older foliage you remove each winter and that keep color going as the season turns. Snowdrops, crocus, dwarf tulips, and daffodils weave easily between hellebore crowns. As spring warms, epimedium, brunnera, lungwort, and hardy geranium fill gaps while hostas and ferns build the summer canopy. In woodland edges, tuck plants along paths or on small slopes where you can admire the nodding faces from below.
Pollinator friendly notes and spacing: In warm spells, bees visit hellebores for early nectar. To help them, group clumps in triangles and give each plant 18 to 24 inches on center so flowers are visible and air circulates. Leave a few seedheads if you want gentle self sowing; rogue unwanted seedlings the following spring. For bouquets, cut mature stems when the flower throat shows a ring of seed pods forming and the sepals feel firm. They last well in water at that stage. If you like tonal plantings, echo hellebore colors with cool companions from your guides to purple and white flowers, or choose soft blush partners from pink flowers. For seasonal themes, consult your wedding flowers guide to see how florists use hellebores in early spring arrangements and to borrow those palettes for borders at home.
Color families and shrubs: Evergreen backdrops make hellebore flowers pop in late winter. Use boxwood in colder zones or lepidote rhododendrons in milder ones. Hydrangeas leaf out just as hellebore sepals begin to fade, so a line of hydrangea macrophylla behind a drift of hellebores creates a clean hand off from winter to late spring. In the herb border, edge paths with hellebores and let lavender pick up the sunny season. If you garden where some hybrids show soft chartreuse tones, repeat that color with ferns or euphorbia in dappled light for a restrained, elegant effect.
References
- University of Wisconsin-Madison Division of Extension. Lenten Rose, Helleborus × hybridus.
- Clemson University Home and Garden Information Center. Hellebore.
- North Carolina State Extension Gardener Plant Toolbox. Helleborus × hybridus (Lenten Rose).
- North Carolina State Extension Gardener Plant Toolbox. Helleborus argutifolius (Corsican Hellebore).
- North Carolina Cooperative Extension, Lee County Center. Hellebores in the Landscape.
- University of Vermont Extension. Growing Hellebores.
- University of Minnesota Extension. Clean and Disinfect Gardening Tools.
- Iowa State University Extension and Outreach. Testing and Improving Soil Drainage.


Written by: Your Flowers Guide editorial team
We are a small independent group of flower lovers who research and review each guide using trusted horticultural and educational sources. Learn more about us