Growing lavender is rewarding, but capturing its signature fragrance to use year-round requires precise timing and technique. The scent you experience when harvesting lavender comes from volatile essential oils produced in tiny glands located on the flower buds and stems. If left in the garden, these oils eventually evaporate in the hot summer sun or wash away with rain as the flowers mature and go to seed. The goal of harvesting is to interrupt this natural cycle at the exact moment oil production peaks, trapping that fragrance inside the plant material. Understanding how the plant develops its blooms will change the way you look at your garden and help you secure the highest quality harvest. You want to preserve the plant’s resources before it spends all its energy opening its petals for pollinators.
Reading the buds for harvest timing
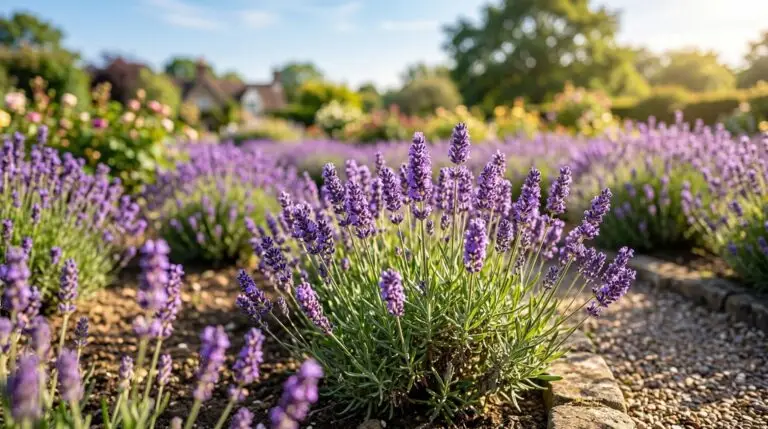
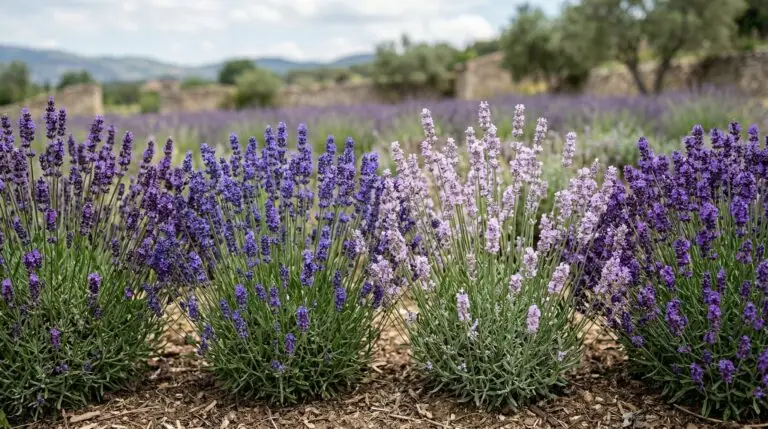
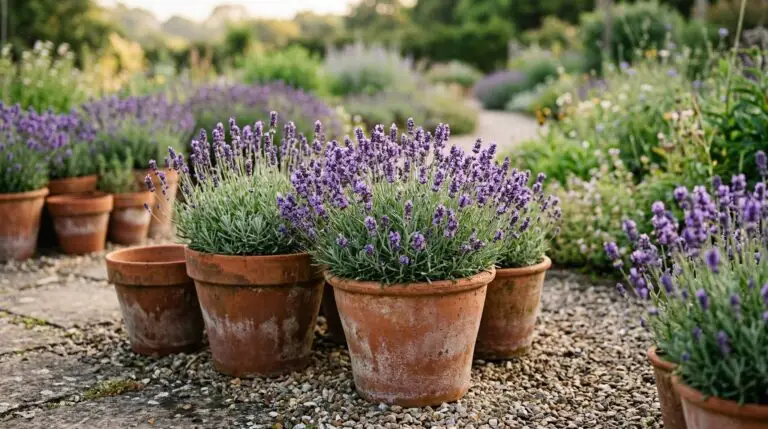
The most common mistake gardeners make is waiting until the lavender field is a mass of fully opened, fuzzy purple flowers. By the time the flowers open completely, the plant has already spent a significant portion of its essential oils to attract bees, and the delicate petals will quickly fall off once dried. You need to harvest lavender when the flower spikes have formed and the buds show clear purple or blue color but remain tightly closed. If you look closely at a single stem, you might see just one or two tiny blossoms beginning to open at the very bottom of the spike. That is your absolute best signal to begin cutting, as the oil concentration inside those closed buds is at its absolute maximum. Waiting too long means the dried product will crumble into dust, while cutting too early results in weak fragrance and stems that shrivel rather than dry.
Beyond the physical development of the buds, the specific time of day and weather conditions dictate your harvesting success. You should plan your harvest for a dry morning after the morning dew has completely evaporated from the foliage but before the midday sun gets too hot. Moisture left on the stems when you cut them encourages mold growth during the drying process, often ruining an entire batch of flowers. As daytime temperatures consistently stay above sixty degrees Fahrenheit, the plant naturally draws essential oils up from the roots into the flower heads. If you cut in the late afternoon, the intense sun will have already vaporized a portion of those surface oils, leaving you with a less fragrant harvest. A cloudy but completely dry morning is usually ideal, giving you plenty of time to work through the plants without rushing against the heat.
Making the right cut
You will need a clean, sharp pair of bypass pruners or a traditional curved harvest knife to make clean cuts without crushing the delicate stems. Grab a handful of stems, trace them down toward the base of the plant, and look for the junction where the soft green growth meets the older, brown woody base. You must make your cut about one or two inches above this woody growth, ensuring you leave plenty of green leaves on the plant to fuel its recovery. Cutting directly into the hard brown wood often prevents that section of the plant from producing new growth, eventually leaving a dead, empty patch in your shrub. As you work, you might notice the stems feeling sticky and leaving a dark, fragrant residue on your hands and tools. That is completely normal and is simply the raw essential oil transferring to your skin, proving you timed the harvest correctly.
Once you have a handful of freshly cut stems, it is time to secure them into bundles for the drying process. A bundle should be no thicker than a standard broom handle, allowing air to circulate freely through the center of the gathered stems. Instead of tying the bundles with standard garden twine, you should wrap the base tightly with a thick rubber band. As the stems lose moisture over the coming weeks, they will shrink significantly, causing traditional string to loosen and stems to slip out onto the floor. The rubber band continues to contract along with the drying stems, holding everything securely in place until you are ready to process them. You can slip a paperclip or an “S” hook under the rubber band to easily hang the bundles from a drying rack or clothesline.
Creating the perfect drying environment
Finding the right location for drying lavender is just as important as the harvest itself, as light and humidity are the enemies of preserved flowers. You need a dark, dry space with excellent air circulation, such as an unused closet, a dry basement, or a shaded corner of a spare room. Hanging the bundles upside down allows the remaining essential oils to pull downward into the flower heads while keeping the stems perfectly straight. Direct sunlight will rapidly bleach the rich purple color from the buds and bake the remaining oils out of the plant, leaving you with brittle, pale straw. If your drying space feels stagnant, running a small oscillating fan on a low setting will keep the air moving and prevent any pockets of moisture from settling around the bundles. This same controlled, dark environment works beautifully for other structural blooms you might want to preserve, whether you are drying globe thistle for winter arrangements or hanging bunches of yarrow for autumn wreaths.
Testing and storing the finished buds
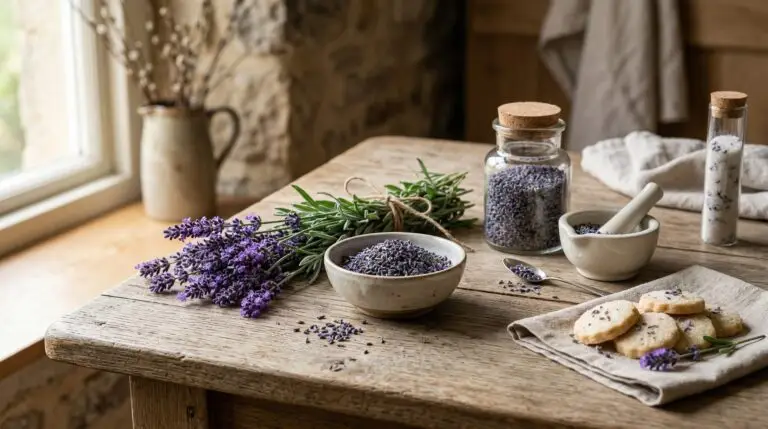
Depending on the humidity in your area, the drying process usually takes between two and four weeks to complete. You will know the lavender is ready when the thickest part of the stem snaps cleanly like a dry twig rather than bending. If the stems still feel pliable or cold to the touch, they hold too much moisture and need more time in the dark. To process the dried harvest, lay out a clean cotton sheet or a large piece of parchment paper on your kitchen table. Hold the bundle by the stem ends and gently roll the flower heads between your palms, applying enough pressure to strip the buds off the stems. The dried buds will rain down onto your paper, while the bare stems can be tossed into the compost bin or saved to use as fragrant kindling for a winter fire.
Proper storage is the final step to ensure your efforts yield a fragrant reward that lasts until the next growing season. Scoop the loose, dried buds into airtight glass canning jars, packing them down gently to minimize the amount of empty air space inside the container. Seal the jars tightly and store them in a cool, dark cupboard away from the stove or heating vents, as ambient heat will cause the oils to degrade over time. Over the coming months, whenever you open a jar to use the buds for baking, crafting, or making sachets, you should be greeted by a robust, sweet, and slightly camphoraceous aroma. If you follow these steps carefully, that summer fragrance will remain strong and true, providing a sensory reminder of your garden even when the ground outside is frozen.
More About Lavender
Lavender flower meaning and why this herb has calmed humanity for thousands of years
How to grow lavender for fragrant purple spikes and the Mediterranean garden of your dreams
Best lavender varieties from English Hidcote to French Provence and Spanish butterfly types
Pruning lavender at the right time to prevent woody bare stems and keep plants compact
Designing a lavender hedge border that lines your garden path with fragrance
Cooking with lavender from herb-crusted lamb to lavender lemonade and shortbread
Growing lavender in containers for fragrant patio and balcony gardens

Lavender sachets potpourri and dried flower crafts using your garden harvest