How to Grow and Care for Blue Salvia
Contents
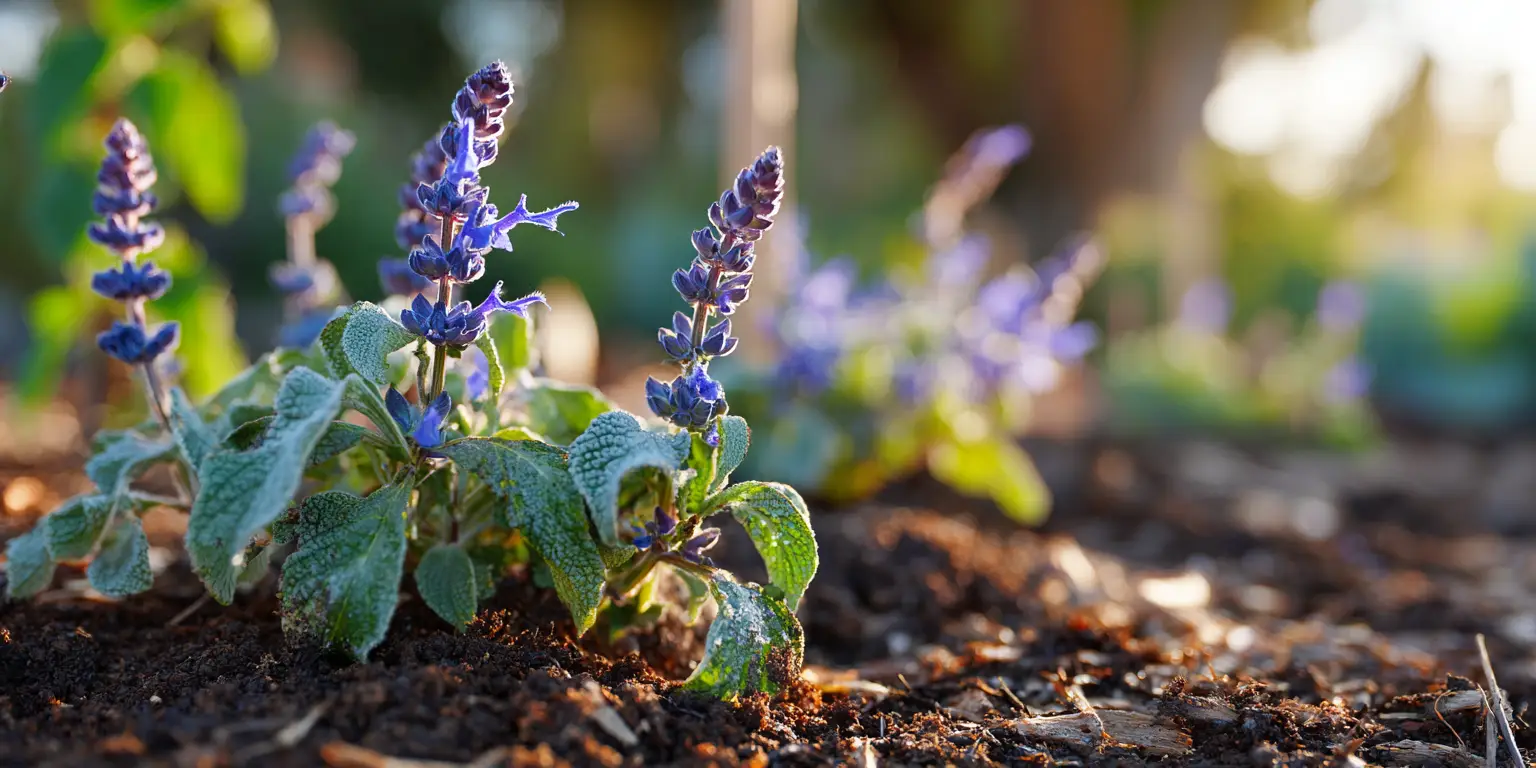
Blue Salvia is a dependable garden workhorse that delivers long spikes of true blue flowers from early summer to frost. The plant most gardeners mean by Blue Salvia is Salvia farinacea, commonly called mealycup sage or mealy sage. It is native to the southern United States and Mexico. In warm parts of the country it behaves as a short lived perennial. In colder regions it is usually grown as a fast blooming annual. Flowers are held above neat mounds of foliage and attract bees, butterflies, and hummingbirds without demanding fussy care. This guide follows our standard Flowers Project PROM1 plant profile format to keep steps clear and practical.
Hardiness overview: Blue Salvia is perennial in much of the Gulf Coast and lower desert Southwest, and it is commonly hardy through roughly USDA Zones 8 to 10 when winters are dry and soils drain very well. In the rest of the U.S. it is treated as an annual that flowers heavily in one season. Plants prefer full sun of at least 6 hours daily. Light afternoon shade helps in the hottest inland locations. Give Blue Salvia a site with excellent drainage, moderate fertility, and room for air to move between plants.
Snapshot of success: Choose full sun. Prepare loose, well drained soil in the neutral to slightly acidic range. Plant after the danger of frost has passed. Water to establish, then water deeply but not often. Feed lightly. Deadhead spent spikes to push new blooms and keep the plant compact. Grow it at the front or mid border where the blue stands out against silver, chartreuse, or yellow companions and where you can enjoy visiting pollinators.
Soil & Bed Preparation
Blue Salvia thrives in soils that balance moisture with air. Aim for a loamy or sandy loam texture that does not puddle after rain. Heavy soils can be loosened with coarse compost and pine bark fines. Avoid peat as the only amendment since it compacts when dry and can hold too much water when wet. Target a pH of about 6.0 to 7.2. This range supports nutrient availability without encouraging excessive vegetative growth at the expense of flowers. For brand new beds, work 2 to 3 inches (5 to 7.5 cm) of compost into the top 8 to 10 inches (20 to 25 cm) of soil. In existing beds, top dress with 1 inch (2.5 cm) of mature compost in spring and again midseason if growth slows.
Raised beds are a smart option where natural soils are clayey or remain wet after storms. A raised bed 8 to 10 inches (20 to 25 cm) deep that is filled with a mix of garden soil, compost, and bark based conditioner improves drainage and root oxygen. In arid regions, an in ground bed that has been amended with organic matter conserves moisture better than a very coarse raised bed. In any climate, avoid spots where downspouts empty or where water collects.
Drainage Test and pH Targets: Dig a hole 12 inches wide by 12 inches deep (30 by 30 cm). Fill it with water and let it drain. Refill it. If the second filling drains in 2 to 4 hours, drainage is in the good range for Blue Salvia. If water lingers beyond 6 hours, incorporate more coarse organic matter and consider raising the bed by 4 to 8 inches (10 to 20 cm). For pH, use a home test kit or send a sample to your county Extension soil lab. If pH is above 7.5, blend in elemental sulfur following the lab rate to bring it down gradually. If pH falls below 6.0, add finely ground limestone at the recommended rate. Retest every 2 to 3 years since pH shifts slowly but steadily with irrigation water and amendments.
Planting Calendar by USDA Zone
Blue Salvia is frost tender, so timing follows your last and first frost dates rather than a single national calendar. If you garden in Zones 3 to 7, think of Blue Salvia as you would other warm season annuals. If you garden in Zones 8 to 10, you can plant earlier and sometimes carry plants across a mild winter with protection.
Zones 3 to 5: Start seeds indoors 6 to 8 weeks before your average last frost. Transplant outside after the soil warms to at least 60°F (16°C) and night temperatures hold above 50°F (10°C). In many northern gardens that lands from late May to early June. Container grown transplants are the most reliable choice at these latitudes. Expect flowering from mid to late summer through frost.
Zones 6 to 7: Sow indoors 4 to 6 weeks before last frost or buy transplants. Set out after danger of frost, often April to May, depending on your local pattern. In warm microclimates you can direct sow after the soil reaches 60°F (16°C), but transplants shorten the path to bloom. Expect flowering from early summer to frost.
Zones 8 to 9: You can plant in spring after the last light frost for summer bloom, or plant in very late summer to early fall for autumn color where falls are long and mild. In coastal areas with cool summers, spring plantings endure well. In hot inland areas, start with spring plantings and provide light afternoon shade to ease heat stress. In Zone 9b with good drainage, well established plants sometimes overwinter.
Zone 10: Plant from late winter to early spring for sustained bloom through spring and early summer. Where summer nights remain warm, flowering may pause in high heat and resume as nights cool. In dry winter areas with excellent drainage, Blue Salvia can act as a short lived perennial.
Regional caveats: In hot humid climates, choose a site with moving air and morning sun. In arid regions, mulch well and irrigate deeply but infrequently to keep roots cool. Coastal wind can dry containers quickly, so check moisture more often. A high elevation site with bright sun and cool nights is ideal if you plant after frost and protect from sudden late cold snaps.
Planting: Depth & Spacing
Blue Salvia is sold in cell packs, quarts, or gallons, and it also grows cleanly from seed. It is very rarely sold bare root. You can propagate by cuttings in warm rooms with bright light. Depth and spacing are simple but important for steady bloom and disease prevention.
Seeds: Blue Salvia seed benefits from light for germination. Sow on the surface of a sterile seed starting mix and press gently for seed to soil contact. Do not bury. Mist to keep the surface lightly moist. Maintain 70 to 75°F (21 to 24°C) until germination. Provide bright light as soon as seedlings emerge. When roots hold the mix and the first true leaves form, pot up and continue under strong light. Harden off for 7 to 10 days by moving trays outdoors to a protected bright spot for a few hours each day.
Bare root or divisions: Blue Salvia is not typically offered bare root and is not commonly divided like clumping perennials. If you do divide an overwintered clump in warm zones, split in spring when new growth begins. Replant at the same depth so the crown sits level with the soil surface. Water to settle soil around roots and provide afternoon shade for one week to reduce stress.
Container grown transplants: Dig holes the width of the root ball and only as deep as the pot. Place the plant so the top of the root ball is level with the surrounding soil. Do not plant deeper. Backfill and gently firm. Space 12 to 18 inches apart (30 to 45 cm) for good airflow. In mass plantings, set rows 16 to 20 inches apart (40 to 50 cm). Water thoroughly to eliminate air pockets. If roots circle the pot, tease them outward so they grow into native soil.
Minimizing transplant shock: Water the day before planting. Plant in the late afternoon or on a cloudy day so leaves and roots adjust without midday stress. After planting, water again and apply a light mulch. Begin a regular irrigation rhythm within the first week. If wind is strong, use low temporary hoops or short stakes with soft ties to steady tall seedlings for the first 10 to 14 days.

Watering & Mulching
Getting watering right is the single best step for strong Blue Salvia performance. Plants like consistent moisture while establishing, then they prefer the soil to dry a bit between waterings. Good drainage is essential. Roots that remain in saturated soil lose oxygen and decline. A finger test is simple and effective. Push a finger 2 inches (5 cm) into the soil. If it feels dry at that depth, water. If it is still moist, wait and check again the next day.
Establishment schedule: For the first two to three weeks after transplanting, water every 2 to 3 days in average spring weather. In sandy soils you may water more often. In clay based soils you may water less. Aim to moisten the top 6 to 8 inches (15 to 20 cm) of soil. After three weeks, reduce frequency to one deep soak per week during dry periods. In heat waves, add a second weekly soak. Avoid daily light sprinkles. Those encourage shallow roots and mildew.
Mulch guidelines: Apply 2 inches (5 cm) of shredded bark, pine straw, or composted wood chip mulch around plants. Keep mulch 1 to 2 inches (2.5 to 5 cm) away from stems to prevent crown rot. Mulch moderates soil temperature, conserves moisture, and limits weeds. In heavy rain climates, a coarse textured mulch dries faster and is safer around the crown. In arid regions, a finer textured mulch slows evaporation. For containers, top with a thin layer of compost or fine bark to slow crusting and reduce heat stress on roots.
Heat spikes and drought: During an extended heat event above 95°F (35°C), water in the early morning so plants start the day fully hydrated. Increase the application volume rather than the number of days unless leaves flag each afternoon. If plants wilt by noon despite moist soil, provide temporary shade cloth during the hottest hours. In windy coastal or high desert sites, place a low wind break upwind to reduce moisture loss.
Water quality notes: Hard water is common in many communities. Over time, salts can accumulate in container mixes. Flush containers monthly by watering until water flows freely from the drain holes for a full minute. In ground beds rarely need flushing if rainfall is regular. If your municipal water is very alkaline, retest soil pH each year and adjust with sulfur if needed.
Feeding
Blue Salvia is a light to moderate feeder. Too much nitrogen produces soft growth and fewer flowers. An organic preplant amendment plus a modest slow release dose early in the season is usually enough.
Timing: Work in compost before planting. At transplanting time, you can incorporate a small amount of a slow release balanced fertilizer into the top 4 inches (10 cm) of soil. A product in the general range of 5 to 10 percent nitrogen and with similar phosphorus and potassium values works well. In midsummer, evaluate growth. If plants look pale and flowering has slowed while soils are reasonably fertile, side dress with compost or give a diluted liquid feed. If plants are flowering heavily and foliage looks deep green, skip fertilizer.
Rates and product types: For slow release granular feeds, follow label rates for bedding annuals and stay at the low end of the range. For organic options, a handful of composted poultry manure or worm castings worked into the surface can be enough for another 6 to 8 weeks of bloom. In containers, supply a light liquid feed every 3 to 4 weeks since potting mixes hold fewer nutrients. Always water before and after feeding to protect roots.
Soil biology pointers: Your aim is living soil. Maintain at least 3 to 5 percent organic matter in garden beds. That level supports moisture retention, nutrient cycling, and good structure. If flowers fade early despite proper watering, send a soil sample to your Extension lab for nutrient analysis and salinity. Retest every few years in established borders or yearly in intensively planted cutting gardens.
Pruning & Support
Blue Salvia is easy to keep tidy. Most of the work is simple deadheading. The more you cut spent spikes, the more buds the plant sets.
Deadheading specifics: When the lowest florets on a spike begin to fade, cut that spike back to a strong set of leaves. New side shoots will push more flowers. If a plant looks tired after a long flush, shear the whole plant by about one third of its height. Water well. In warm weather you will see fresh bloom in two to three weeks. If you plan to save seed from open pollinated selections, allow a few spikes to dry on the plant in late summer.
Structural support: Compact varieties reach 12 to 18 inches tall (30 to 45 cm) and rarely need staking. Taller selections can grow 24 to 36 inches tall (60 to 90 cm) in rich soil. In windy sites, a short ring support placed early in the season keeps stems upright without looking obvious. Provide enough spacing so air can move between plants. Dense plantings lean toward light and break in storms.
Tool hygiene: Keep pruning shears clean and sharp. Wipe blades with isopropyl alcohol before you begin and again when moving from plant to plant. Clean tools limit the spread of leaf spots and blights that occasionally appear in very wet summers. Discard diseased clippings with the trash rather than composting them if you see spots on stems or leaves.
Overwintering
How you protect Blue Salvia depends on your zone. In cold winter regions, treat it as a seasonal bedding plant that finishes with frost. In warm winter zones, mild protection helps plants live another year.
Cold climates Zones 3 to 7: Expect the first hard frost to end the season. After frost blackens foliage, pull plants and compost the healthy material. If you want to carry genetics forward, take softwood cuttings in late summer and root them indoors under lights. Another option is to collect ripe seed from heirloom or open seed forms and store it in a cool dry place. Hybrids may not come true from seed.
Warm climates Zones 8 to 10: Where winters are dry and soils drain sharply, cut plants back to a low mound after the first light frost. Top with 2 to 3 inches (5 to 7.5 cm) of coarse mulch to reduce freeze to thaw swings. Remove mulch in early spring when new growth starts. In areas with winter wet, consider lifting and replanting in spring, since constant cold moisture is more damaging than short cold spells.
Rodent protection: Voles and other rodents rarely target Blue Salvia, but thick mulch provides cover. Keep mulch slightly away from crowns, and use coarse rather than soft materials in winter. If you have a history of vole tunneling, lay a 24 inch by 24 inch (60 by 60 cm) sheet of quarter inch hardware cloth flat on the soil and plant through it, then mulch. The mesh discourages tunneling beneath crowns.
Container storage: In Zone 8 and warmer, large containers can sometimes overwinter outdoors if they are placed against a south facing wall and kept on pot feet for drainage. In cooler zones, take cuttings or plan to replant in spring. Containers stored in unheated garages rarely provide enough protection for this species unless winters are very mild.
Growing Environments
Blue Salvia adapts to beds, borders, cutting gardens, and containers. It also performs in parking strip plantings and along sunny walks where reflected heat is strong.
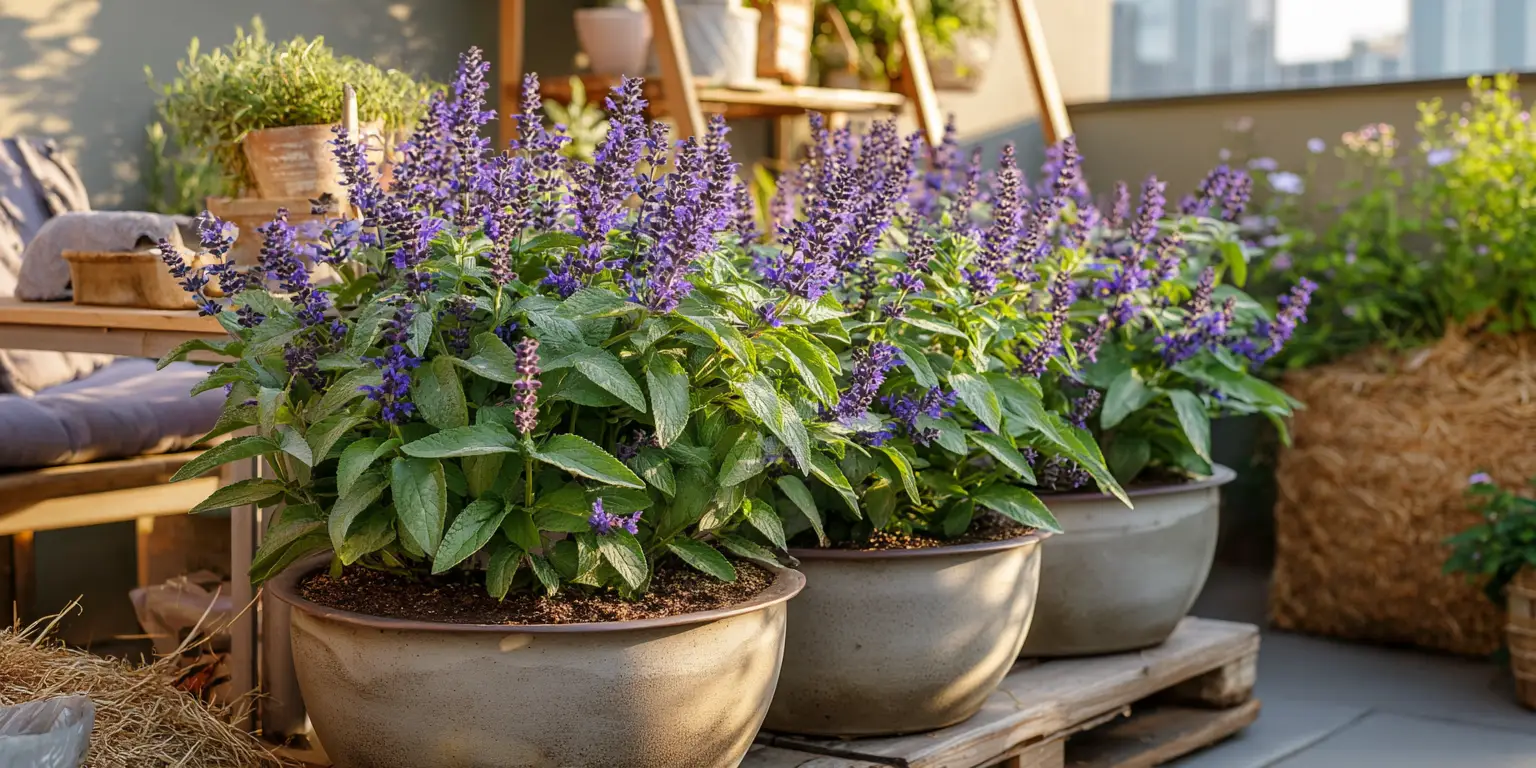
Containers: One plant needs a minimum of 10 to 12 inches (25 to 30 cm) of surface width and at least 2 gallons of volume. In a mixed container, give each Blue Salvia roughly that same space. Use a high quality peat or coir based potting mix that includes perlite or pine bark for drainage. Ensure there is at least one unobstructed drain hole. Water when the top 1 to 2 inches (2.5 to 5 cm) are dry, then water until it flows freely. Fertilize lightly since too much feed makes lanky growth. Turn containers every two weeks so all sides receive sun.
Beds and borders: Site in full sun. Blue Salvia flowers heavily in bright light. In the Deep South or low desert, provide morning sun and light afternoon shade to extend the bloom window. Position plants where you can reach them easily to deadhead. Keep 12 to 18 inches (30 to 45 cm) between plants for airflow. Combine with silver foliage or yellow bloomers to heighten the blue. Your design pages such as yellow flowers, white flowers, and purple flowers offer many companions that make the blue stand out.
Microclimates: Near brick or stone, reflected heat can stress new plantings. Start plants a foot away from south facing walls and move closer once roots fill the space. In windy coastal gardens, tuck plants where a fence or hedge reduces afternoon gusts. On slopes, water can run off before it sinks in, so use small basins around the root zone for the first month.
Companion Planting & Design
The cool blue of Salvia farinacea pairs well with many classic border plants and adds a steady vertical element between mounded or billowing forms. It is also a pollinator magnet, so combine it with nectar rich partners to support bees and butterflies all season.
Color and form partners: For strong contrast, mix with golden coreopsis, white gaura, or silver dusty miller. For a soft analogous palette, pair with catmint, blue pincushion flower, and airy ornamental grasses. In cottage borders, thread Blue Salvia between roses and lavender to create a sequence from spring through frost. In late summer displays, place it ahead of sunflower plantings so vertical spikes echo tall discs behind them.
Hiding dieback and extending color: Blue Salvia maintains a neat dome if you shear once or twice, but after a heavy rain the lower leaves can look tired. Plant low spreading alyssum, lantana, or blue fan flower at the feet to hide any bare stems in midsummer. To extend color through fall, work in marigolds, zinnias, or cosmos which keep their pace as days shorten. A few well spaced salvias in front of hydrangea macrophylla shrubs carry the blue theme from spring mopheads to fall spires.
Spacing for airflow: Many fungal leaf spots begin when foliage stays wet overnight. Maintain the 12 to 18 inch (30 to 45 cm) spacing, water at soil level when possible, and avoid overhead watering late in the day. In very humid regions, choose compact varieties and provide a light thinning of nearby companions to keep air moving.
Cutting garden use: Harvest spikes when one third of the florets are open. Strip leaves that would sit in water and place stems into a clean bucket. In arrangements, Blue Salvia fills the vertical line between broader faces like tulips in spring or daffodils and dahlias in fall. Replace water daily for longest vase life.
References
- North Carolina State University Extension. Mealycup Sage, Salvia farinacea.
- University of Florida IFAS Gardening Solutions. Salvias for Florida Gardens.
- Lady Bird Johnson Wildflower Center, The University of Texas at Austin. Salvia farinacea.


Written by: Your Flowers Guide editorial team
We are a small independent group of flower lovers who research and review each guide using trusted horticultural and educational sources. Learn more about us