
How to Grow and Care: Camellia
Contents
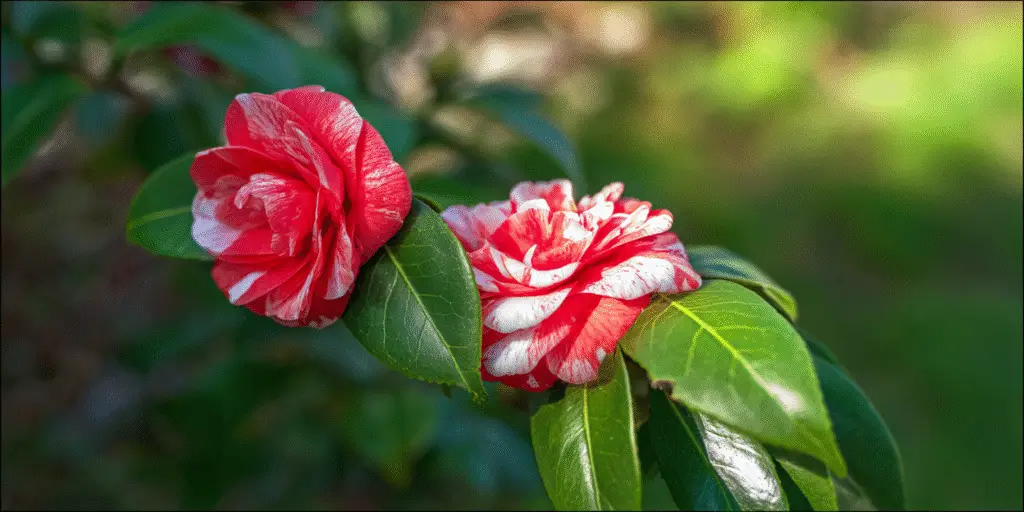
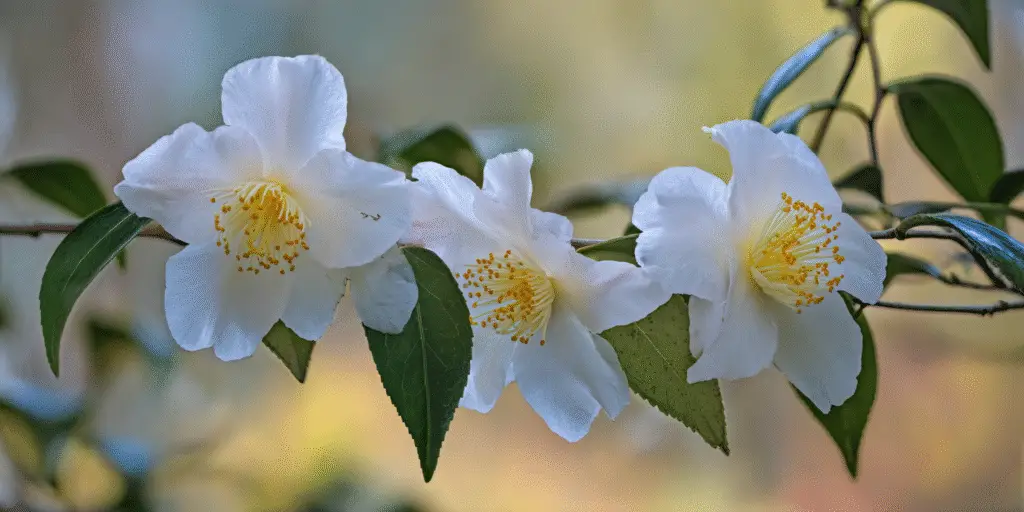
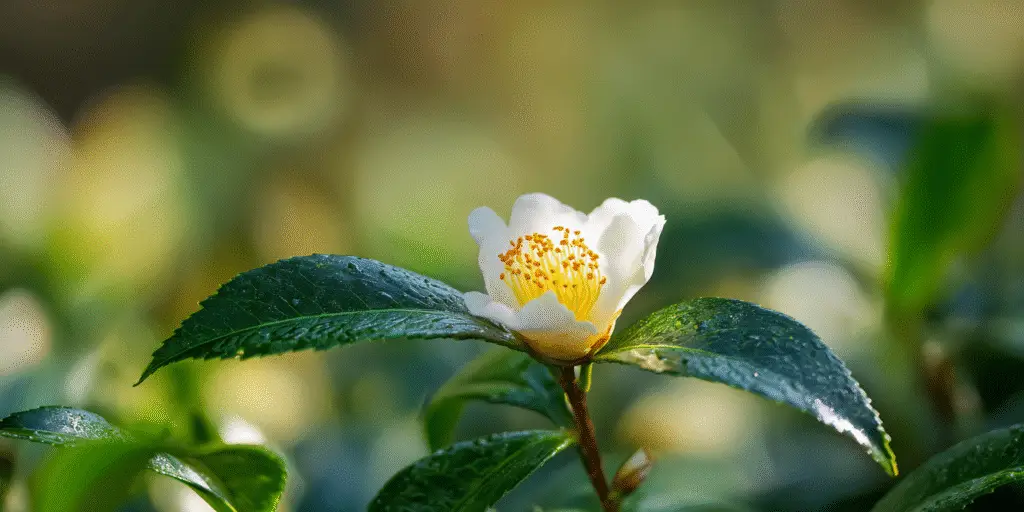
Camellias are evergreen shrubs or small trees in the genus Camellia, family Theaceae. The accepted botanical names for the two most common garden species are Camellia japonica and Camellia sasanqua. C. japonica is often called Japanese camellia and typically blooms late winter to spring. C. sasanqua is usually called sasanqua camellia and often flowers fall to early winter. Both prefer partial shade in hot summers and protection from drying winter winds. They thrive in climates roughly corresponding to USDA Zones 7 to 9. In favorable microclimates and with cold‑hardy selections, gardeners in protected parts of Zone 6 can succeed by choosing appropriate cultivars and providing winter protection.
Most C. japonica and C. sasanqua cultivars are hardy in Zones 7 to 9. C. sasanqua generally tolerates more sun and heat, while C. japonica prefers brighter shade and cool roots. In Zone 6b, cold‑tolerant hybrids and select japonicas can be grown in protected exposures, with burlap windbreaks and deep winter mulch helping reduce chill injury. Along salt‑spray coasts, C. sasanqua shows slight salt tolerance and usually performs better than C. japonica.
Camellias perform best with morning sun and afternoon shade or bright dappled light all day. Avoid reflected heat from south or west facing walls in hot regions. In maritime or mild summer climates, established plants can tolerate brighter exposures if their root zones stay cool and moist under mulch.
Choose a spot with filtered light, good air movement, and wind protection. Prepare a wide, well drained bed enriched with organic matter and adjusted to a slightly acidic pH. Plant the root flare high, mulch two to three inches, water to establish, and prune immediately after bloom. During late summer droughts provide consistent moisture as buds form for next year’s flowers. With these fundamentals, camellia care is straightforward and dependable.
Soil & Bed Preparation
Camellias demand soil that drains well yet holds consistent moisture. Loams enriched with leaf mold or fine pine bark are ideal. In heavy clay, loosen a wide area and mix in coarse composted bark to improve structure. In very sandy soils, increase water‑holding capacity with organic matter. Where water stands after rain, choose a raised bed or a higher site.
Aim for slightly acidic soil. A target pH in the 5.0 to 6.5 range suits camellias, with many extension guides recommending about 5.5 to 6.5 for garden plantings. If pH is higher, micronutrients like iron become less available and leaves may yellow between the veins. Correct high pH by top‑dressing sulfur according to a soil test, adding organic matter, and using acid‑forming fertilizers labeled for azalea, camellia, and rhododendron. If pH correction proves stubborn, grow camellias in large containers with an acid‑leaning potting mix.
A steady supply of organic matter fosters a living soil that buffers moisture and nutrients. Incorporate two to three inches of composted leaves or fine pine bark over the top eight to ten inches before planting. Maintain that organic layer under a mulch. Re‑test soil every two to three years if leaf color or vigor slips.
In heavy or compacted soils, raised beds solve both drainage and aeration. Build beds 8 to 12 inches high and as wide as needed, using a mix of native soil and composted pine bark. In naturally well drained, organic‑rich loams, in‑ground planting is fine. Avoid confining roots in small islands of good soil surrounded by dense clay. Instead, prepare a broad planting zone that transitions gradually into native soil.
To check drainage, dig a hole about 12 inches deep and 4 to 12 inches wide, fill with water to pre‑soak, then refill the next day and time the drop. Water should drain within about eight hours. If the percolation is slower, plan a raised bed or choose a better site. For pH, use your state soil‑testing service and request recommendations for acid loving shrubs. Keep camellias near pH 5.0 to 6.5 for best nutrient uptake.

Planting Calendar by USDA Zone
Zones 9 to 8b
In the Deep South and Gulf Coast, fall is prime planting time when soil is warm and air is cooling. Plant from October to early winter whenever soil is workable and air temperatures stay above freezing. Fall transplanting encourages root growth before summer heat returns. Spring planting is also successful from late winter to early spring if you can water regularly through the first summer.
Zones 8a to 7
In the Piedmont, mid‑South, and Pacific Northwest, plant in early spring after deep freezes have passed. Fall planting can work in mild years, but in exposed or windy sites spring is safer. Provide afternoon shade for C. japonica to prevent leaf scorch, and plan winter wind protection the first year.
Protected sites in Zone 6b
Choose cold‑tolerant cultivars and plant in spring after danger of hard freeze. Use a north or east exposure to avoid warm winter sun on frozen tissues. Mulch deeply over a wide radius and install burlap screening for the first winter. In Zone 6 landscapes with alkaline soils, consider container culture to control pH and drainage.
Regional caveats
In hot humid coastal areas, morning sun with overhead tree shade protects blooms and reduces petal blight. In arid or high‑elevation regions with intense sun and alkaline water, prioritize containers or raised beds, use captured rainwater when possible, and shelter plants from afternoon exposure.
Planting: Depth & Spacing
Most retail camellias are sold in containers. Loosen circling roots and gently tease the outer inch of the root ball. Set the plant with the root flare one to two inches above surrounding grade so settling does not bury the trunk. Backfill with native soil amended across a wide area, not just the hole, and water thoroughly to settle. Space by mature width: 6 to 10 feet for C. japonica specimens, 4 to 8 feet for C. sasanqua hedges or screens. For tight hedges of low or dwarf sasanquas, spacing can be 3 to 5 feet, understanding that closer spacing increases pruning needs.
If you plant a field‑dug camellia, always lift by the root ball. Position the top of the root ball one to two inches above surrounding soil. Remove or open burlap and wire from the top and upper sides after the plant is set so roots can expand. Backfill, water, and mulch promptly.
Camellias are seldom sold bare‑root, but if you receive one from a specialty grower, plant while dormant, prune any broken roots, and keep roots moist while planting. In all types, do not amend the planting hole heavily or add fertilizer into the hole. The goal is a firm, well drained, wide planting zone that encourages roots to move into native soil.
Harden sun‑grown nursery plants by staging them into brighter light over 7 to 10 days before planting in a high‑light site. Water the root ball thoroughly the day before planting. After planting, mulch immediately and irrigate deeply for the first growing season whenever rainfall is scarce. Avoid pruning at planting beyond removing damaged twigs.

Watering & Mulching
Camellias have shallow, fibrous roots that need even moisture but not wet feet. During the first year, check soil two to three inches below mulch and water when it is barely moist. Deep watering is better than frequent shallow sprinkles. In established plants, irrigation is usually needed only in extended dry spells, especially during late summer when next year’s buds set. In sandy soils or heat waves, increase frequency while allowing the surface to dry slightly between soakings.
Mulch two to three inches deep with pine straw, shredded leaves, or pine bark over the widest possible area, keeping mulch a few inches back from the trunk. Mulch moderates soil temperature, reduces weeds, and maintains the even moisture camellias favor. Renew mulch annually as it decomposes, which also adds organic matter.
Plant high, avoid covering the root crown with mulch, and let the upper inch of soil dry a bit between irrigations. If your soil drains slowly, use a raised bed. Reduce overhead watering in cool weather, which can splash disease spores onto blooms and leaves. Where municipal water is alkaline, watch for interveinal chlorosis and correct with soil acidification and chelated iron as needed.
During heat surges, deepen mulch to a full three inches, move containers into bright open shade, and water in the morning so foliage dries by night. In windy droughts, windbreaks and antitranspirant screens of burlap reduce desiccation. Bud drop later in winter often traces back to water stress during late summer.
Along the coast, C. sasanqua tolerates slightly salty air better than C. japonica, but both still need fresh water on roots. In areas with hard, alkaline irrigation water, monitor pH in containers, flush pots occasionally with rainwater, and favor acid‑forming fertilizers.
Feeding
Fertilize lightly after flowering and again in late spring if growth is modest and your soil test indicates a need. Skip fertilizer on new transplants until they show new growth. Established plants in rich, mulched beds often need little to no fertilizer beyond organic top dressing.
Use a balanced, acid forming fertilizer formulated for azaleas and camellias. For conventional granulars, products in the neighborhood of 10 5 4 to 12 4 8 supply modest nitrogen with lower phosphorus and potassium suitable for woody ornamentals. For organic options, slow release blends around 3 4 4 provide gentle feeding and minimize burn risk. Always follow label rates and water in thoroughly. Avoid late summer nitrogen that can trigger tender growth before winter.
Feed the soil as much as the plant. Annual two inch top dressings of leaf mold or composted pine bark help maintain organic matter near 5 percent in loams, which supports steady nutrient cycling. Re test soil every two to three years and adjust pH or micronutrients only as tests indicate.
Pruning & Support
Prune immediately after the last flowers drop, before next year’s buds set. Remove dead or crossing wood, thin congested interiors for airflow, and shorten wayward shoots by cutting back to a strong lateral. Old, overgrown camellias respond to gradual rejuvenation by reducing one or two main limbs per year rather than hard shearing. Deadhead fallen blooms and rake petals during petal blight outbreaks to reduce inoculum.
Most camellias do not need staking. In windy exposures, a single, loose stake for new transplants during the first season can help. Clean pruning tools between plants to reduce disease spread. Wipe blades with 70 percent isopropyl alcohol or dip and allow to dry. If using a bleach solution, mix one part bleach to nine parts water, soak, then rinse and oil tools to prevent corrosion.
Overwintering
Before hard freezes, top up mulch to a full three inches across a wide radius, leaving a gap around the trunk. In places with freeze–thaw cycles, deep mulch stabilizes root temperatures and reduces heaving. Water soil ahead of arctic fronts if the ground is dry. Moist soil holds heat better than dry soil and helps limit root desiccation. In exposed sites, install burlap screens on the windward side to reduce drying winds and winter sun on frozen foliage. East or north exposures reduce rapid thawing that can cause leaf scorch. Do not wrap plants in plastic. In severe cold snaps, a temporary frame of stakes and burlap can protect buds and foliage on young plants. In Zone 7 and colder, move containers to an unheated garage or sheltered porch where temperatures stay above the mid 20s °F (about −4 °C). Water sparingly through winter to keep the root ball slightly moist. Return containers outdoors once hard freezes pass and buds begin to swell. Where voles or other rodents are active, use hardware cloth guards at the base in winter to deter bark chewing, especially under snow cover.
Growing Environments
Camellias adapt well to containers if you choose a wide, heavy pot with ample drainage. Use a high quality, bark‑based, acid‑leaning potting mix labeled for azalea or camellia. Start with a container about 12 to 16 inches in diameter for a one‑gallon plant and shift up gradually as roots fill the pot; mature patio specimens often need vessels 20 to 24 inches wide and deep. Elevate pots slightly for free drainage and rotate the plant a few times each season for even growth. A bark‑based mix with coarse texture keeps air around the fine roots. Avoid saucers holding standing water in winter. Top‑dress with composted bark each spring and refresh the top few inches of mix every year or two. In alkaline water areas, monitor pH and correct with acid‑forming fertilizer or iron chelates if leaves show chlorosis. Give C. japonica morning sun and afternoon shade; give C. sasanqua a bit more sun where summers are mild. Shelter both from winter winds. In heat traps near walls or paving, use deeper mulch and extra irrigation to keep roots cool. In coastal gardens, site camellias where shrubs or fences reduce salt‑laden winds.
Companion Planting & Design
Camellias provide backbone structure and cool season flowers. Pair them with plants that enjoy the same acidic, organic soils and partial shade. For spring and summer foliage layers, use Japanese holly fern, autumn fern, and hellebores at the front of borders. For larger companions, hydrangeas and azaleas extend bloom into warm months and echo the texture. Single or semi‑double sasanqua types provide late nectar and pollen when few shrubs bloom. Maintain spacing that reflects the mature width to encourage airflow. Avoid crowding hedges; tight spacing increases pruning and humidity around leaves. White camellias read well in shade, while clear pinks and reds pop against dark evergreen backdrops. Tie your design back to your broader plant palette by exploring hub pages like types of flowers, pink, white, and purple flowers for color planning ideas that fit a shade garden. For structure and seasonal transitions around camellias, consider companions featured on hydrangea macrophylla, roses, and lavender pages for sun‑to‑shade edges, and borrow palette ideas from the wedding flowers guide if you want a romantic winter display indoors and out. Use these as inspiration hubs, then select acid‑loving, shade‑tolerant plant partners that match your site.
References
- University of Florida IFAS Extension, Gardening Solutions. “Camellias.”
- University of Florida IFAS Extension, Gardening Solutions. “Sasanqua Camellias.”
- Clemson Cooperative Extension, Home & Garden Information Center. “Camellia.”
- Clemson Cooperative Extension, Home & Garden Information Center. “Camellia Diseases & Insect Pests.”
- North Carolina State Extension, Plant Toolbox. “Camellia japonica.”
- North Carolina State Extension, Plant Toolbox. “Camellia sasanqua.”


Written by: Your Flowers Guide editorial team
We are a small independent group of flower lovers who research and review each guide using trusted horticultural and educational sources. Learn more about us