How to Grow and Care: Shasta Daisy
Contents
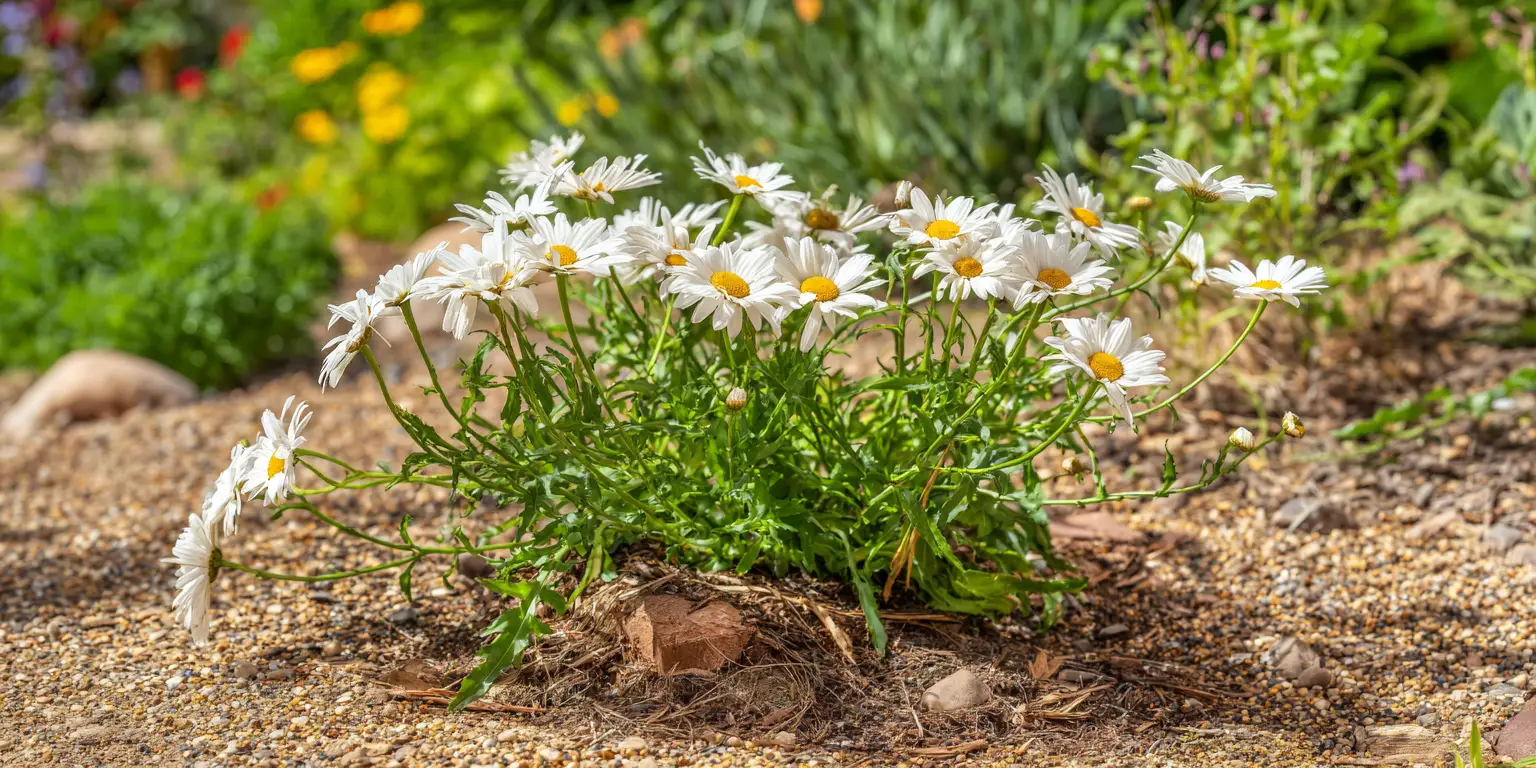
Shasta Daisy is a classic summer perennial valued for crisp white rays and sunny yellow centers that hold a border together from early summer into fall with regular deadheading. The accepted botanical name is Leucanthemum × superbum. In older literature you may see it placed in Chrysanthemum, which explains why some labels still show that name. Mature clumps form tidy mounds of mid green foliage topped by sturdy flowering stems. Most selections reach 1 to 3 feet tall and 1 to 2 feet wide, with compact and taller cultivars available to match small patios or deep borders. Shasta Daisy thrives in full sun with at least 6 hours of direct light. In the warmest zones a touch of afternoon shade keeps blooms fresh. Hardy through much of the United States, it rewards consistent Shasta Daisy care with long bloom, simple maintenance, and an easy fit alongside many types of flowers. Most Shasta Daisies are reliable in USDA zones 4 to 9 when planted in well drained soil and given winter mulch in colder regions. Winter wet is the main threat to longevity, so the top priority is drainage. In hot humid summers, afternoon shade and free air movement keep plants clean. In arid climates, deeper but less frequent irrigation encourages a deep root system that rides out heat spells. Full sun produces the most flowers and the strongest stems. Plants tolerate bright open shade for part of the afternoon in zone 8 to 9, which can reduce stress during peak summer heat. In dense shade the plants stretch, flop, and bloom sparsely. Choose a full sun site with loamy soil that drains well. Aim for slightly acidic to neutral pH around 6.0 to 7.0. Plant divisions or container plants so the crown sits level with the surrounding soil. Water to establish during the first season, mulch lightly, and deadhead after the first flush to prompt more buds. Divide every two to three years to keep clumps vigorous and flowering hard.
Soil & Bed Preparation
Shasta Daisy performs best in soils that are loose, moderately fertile, and consistently moist yet never saturated. A loam or sandy loam with plenty of organic matter supports deep roots and sturdy stems. Heavy clay can work if you improve structure and drainage. Mix in 2 to 3 inches of compost over the planting area and incorporate it 8 to 10 inches deep. Compost improves tilth and moisture balance while adding a slow stream of nutrients. Avoid fresh manure that can burn roots and promote weak, lush growth. For soils that stay wet after storms, build mounded beds or use raised beds to lift crowns above winter wet and to speed spring warm up. In coastal sites exposed to wind, the same raised approach gives you improved drainage and better anchorage.
Shasta Daisy is adaptable across a modest range of soil reaction. It prefers slightly acidic to neutral soil, and many gardeners succeed in pH up to the low sevens if drainage is very good. If your soil is very alkaline, flowers can still be good, but iron chlorosis may appear as pale leaves with green veins when pH drifts too high. Correct the underlying pH rather than chasing foliar fixes. Avoid overfertilized soils. Excess nitrogen produces tall, lush top growth that flops and blooms less. A soil with moderate fertility and stable organic matter usually grows the best daisies with minimal extra feeding.
Before planting, dig a hole 12 inches wide and 12 inches deep. Fill it with water and let it drain completely. Refill and time the drop during the next hour. A fall of about 1 to 2 inches per hour is ideal. Less than 1 inch per hour indicates poor drainage that needs correction with raised beds or soil amendment. More than about 4 inches per hour signals very fast drainage, so add compost and mulch to hold moisture. For pH, aim for 6.0 to 7.0. Use a home kit for a first look, then confirm with a laboratory soil test for precise lime or sulfur recommendations. If pH is high, elemental sulfur is the usual amendment. If pH is low, agricultural lime is used. Work amendments into the top 6 to 8 inches, then recheck in several months because pH shifts take time.
Raised beds give immediate control over drainage and can be the difference between a short lived planting and a vigorous stand in climates with wet winters. Keep the bed 8 to 12 inches high and at least 24 inches wide so roots have room to spread. In ground plantings are fine in most regions when you correct compaction and protect the bed with mulch. In either case, plan walkways so you never compact soil around crowns.

Planting Calendar by USDA Zone
Shasta Daisy transplants and divisions plant well in both spring and fall. The best window depends on your zone and local climate pattern.
Zones 4 to 5. Favor spring planting after the soil is workable and daytime highs are reliably above 50 °F (10 °C). This gives a full season to root in before the first hard freeze. Fall planting is possible if you can set plants 6 to 8 weeks before your usual ground freeze, often early to mid fall depending on your area. In colder pockets or wind exposed sites, spring is the safer choice. Container stock can go in as soon as the soil can be prepared. Bare root or mailed divisions should go in promptly on arrival.
Zone 6. Spring remains a dependable window, especially after the last frost date. Fall planting works well when the ground stays workable into late autumn. Aim for 6 weeks before a typical hard freeze to let new roots settle. Where winters are open with little snow cover, mulch becomes important to prevent see saw freeze and thaw cycles that lift crowns.
Zones 7 to 8. Fall planting is often preferred. Set container plants or fresh divisions in early to mid fall while the soil is warm and the air is cooling. Roots will grow well through fall and early winter, leading to stronger plants the next summer. Spring planting is also successful if you can water through the first warm spells. In humid summers provide good spacing and airflow to limit leaf diseases.
Zone 9. Plant from fall into winter when soils are cool and moist. Early spring works in mild winters. Avoid peak summer installs. Afternoon shade in the hottest inland sites helps flowers last. In sandy soils irrigate more deeply at wider intervals. Along coasts with salt spray, shelter plantings from direct salts since Shasta Daisy is not particularly salt tolerant.
Bare root versus container windows. Bare root or freshly shipped divisions establish best in cool soil. Plant them promptly in early spring or early fall in zones that allow it. Container grown plants can be set any time the ground is workable. In summer heat, plan for consistent water for several weeks to avoid stress while roots leave the potting mix and explore the native soil.
Planting: Depth & Spacing
Trim damaged root tips, then set the plant so the crown sits level with the surrounding soil. The crown is the junction where roots meet stems. Do not bury it. Fan the roots outward into loosened soil. Backfill and firm gently so there are no air pockets. Water thoroughly to settle soil. Space most garden selections 18 to 24 inches apart center to center, which is 45 to 60 centimeters. Wider spacing reduces mildew and gives airflow in humid summers. In colder zones, slightly closer spacing knits a fuller display and offers a touch of mutual shelter without crowding. Water the pot and slide the plant out. If roots circle the outer edge, slice the mat in three or four vertical cuts about one half inch deep, which is 1.3 centimeters, to encourage new roots to grow into the soil. Plant so the crown is at the same level as it was in the pot. Set spacing as above or according to the mature spread listed for your selection. Water deeply after planting. Add a light mulch, leaving a bare ring 1 to 2 inches wide around each crown to keep the crown dry. Transplant on a cloudy day or in late afternoon so new plants do not face full midday sun immediately. Water thoroughly at planting and again when the top inch of soil is dry. If you move plants from a greenhouse or shade house into full sun, acclimate over 7 to 10 days. Start with bright shade, then give morning sun, and finally full sun. Temporary shade fabric can help during an unexpected heat spike. Keep soil evenly moist during the first several weeks, then taper to your regular schedule as roots establish.

Watering & Mulching
During the first season, water consistently so the root zone stays evenly moist. As a general rule, provide about 1 inch of water per week, which is 2.5 centimeters, split into two soakings if your soil drains quickly. In sandy soil, water a little more often. In heavier soil, water more slowly so moisture moves down and not sideways. Once established, Shasta Daisy is moderately drought tolerant. In most climates, a deep soak every 7 to 10 days during summer dry spells is adequate. In extreme heat at 95 °F to 100 °F, which is 35 °C to 38 °C, increase frequency while keeping the crown area dry. Morning irrigation reduces leaf wetness overnight and lowers the risk of leaf spot and botrytis.
Mulch with 1 to 2 inches of shredded leaves, fine bark, or compost, which is 2.5 to 5 centimeters. Mulch prevents crusting, moderates soil temperature, and suppresses annual weeds. Pull mulch back from the crown by at least 1 inch. A mulch layer thicker than 2 inches can hold too much moisture around the crown, especially in clay soil, which invites rot in winter. In very hot or very dry regions, a slightly thicker layer of coarse organic mulch can help, provided you maintain the open ring around each crown. Avoid stone mulch in hot inland climates because it reflects heat and stresses plants. If a heat wave arrives, water early in the day and again lightly in the late afternoon if leaves flag. Do not splash soil onto the foliage. A breathable temporary shade cloth can lower stress on tall varieties while buds are forming. During long drought, water deeply but infrequently and refresh your mulch. Overhead irrigation late in the day is risky because leaves stay wet overnight. Use rainwater or tap water that is not softened if possible. Water passed through a sodium based softener can harm plants over time. If your tap water is very alkaline, monitor leaves for iron chlorosis. Maintain soil pH near 6.0 to 7.0 and rely on compost to buffer swings. Shasta Daisy does not thrive in saline conditions, so shelter plantings from salt spray and avoid ice melt runoff in winter.
Feeding
Shasta Daisy is not a heavy feeder. It flowers best in moderately fertile ground. Before reaching for fertilizer, build and maintain organic matter with compost. If a soil test shows low nutrient levels, choose a modest, balanced analysis. A slow release or organic fertilizer in the range of 5 to 10 to 5 or 10 to 10 to 10 works well at a light rate. Apply once in early spring as new growth expands. Water it in well. If plants show good color and steady growth, skip a second feeding. Overfeeding causes floppy stems and fewer blooms.
If you shear plants after the first bloom flush to encourage rebloom, a very light side dressing of compost or a small dose of balanced fertilizer can support new buds. Keep fertilizer particles off the foliage. Do not fertilize in late fall because tender growth will not harden before frost. In containers, nutrients leach faster, so use a slow release product in spring and supplement with a diluted liquid feed if leaves pale. Again, restraint pays. The most common fertilizer mistake with Shasta Daisy is too much nitrogen that trades flowers for leaf and stem mass. Aim for stable organic matter near 3 to 5 percent in landscape beds. Compost, shredded leaves, and mulches feed soil microbes that convert organic nutrients into plant available forms. Retest soil every two to three years to track pH and nutrient levels. Adjust based on test results rather than routine feeding.
Pruning & Support
Regular deadheading extends bloom. Cut individual spent flowers back to the first strong lateral bud or leaf. After the heavy early summer flush, shear the entire plant by about one third to one half to remove dozens of finished stems at once. Water well and maintain mulch. This groom often produces a second wave of buds that carry color into late summer or early fall, especially in cooler regions. In late fall after hard frost, you can cut plants down to 2 to 3 inches, which is 5 to 7.5 centimeters, to neaten the bed and reduce overwintering disease spores. In colder climates with little snow cover, leave a few inches of stubble to catch mulch and protect crowns. Some gardeners leave seed heads for winter interest and to feed birds. If you do, cut back in very early spring before new growth elongates. Many modern varieties have strong stems. Tall selections and rich soils can still cause flop. Install a low ring or discreet stakes early in the season before stems lodge. In breezy coastal sites, group plants so they shelter one another while keeping spacing for airflow. Clumps that thin in the center or bloom less are ready to divide. The usual rhythm is every two to three years. Dig the clump in early spring as new shoots emerge or in early fall. Pry it apart into several pieces with healthy outer growth and firm white roots. Replant divisions promptly at the original depth with the crown level to the soil. Water to settle. Divisions are the easiest path to a big drift for the cost of one plant. Clean pruners and knives between plants to reduce disease spread. Wipe blades with 70 percent isopropyl alcohol. Allow them to dry briefly before the next cut. Avoid working in the bed when foliage is wet.
Overwintering
In zones 4 to 6, Shasta Daisy benefits from winter mulch. After the ground freezes, scatter 2 to 4 inches of clean straw or shredded leaves over the crowns, which is 5 to 10 centimeters. The goal is consistent cold and moisture, not warmth. Remove most of the mulch in spring as soil thaws. In zones with frequent freeze and thaw cycles, mulch helps prevent frost heave that lifts crowns and exposes roots. In zones 7 to 9, a light mulch keeps soil from swinging wildly in temperature and helps conserve winter moisture. If repeated thaws lift a plant, gently press it back into contact with the soil during a mild spell and top up the mulch. Do not bury the crown. Make sure the bed drains so meltwater does not pool around crowns. Winter wet is more dangerous than cold in many regions. In areas with voles, line the planting hole with a vertical sleeve of half inch hardware cloth and remove it in spring, or place a coarse gravel collar around the planting area to discourage tunneling. Keep grass and weeds trimmed near the bed. Avoid deep organic mulch right against the crown in winter because it offers cover for chewing pests. In cold zones, containers are more exposed than in ground plantings. Move pots to an unheated garage or against a wind sheltered north wall once consistent hard frosts arrive. Water sparingly through winter so the root ball does not completely dry. In mild coastal areas, group pots together and wrap the cluster with burlap stuffed with dry leaves to buffer wind.
Growing Environments
Shasta Daisy grows well in roomy pots. Use a container at least 12 inches in diameter for compact types and 14 to 16 inches for standard selections, which is 30 to 40 centimeters. A volume of 3 to 5 gallons suits most plants. Ensure generous drainage holes. Fill with a high quality potting mix that drains freely. A mix with coarse bark and perlite gives the airy structure daisies like. Set the crown level with the surface and leave an inch, 2.5 centimeters, of headspace to allow easy watering. Water when the top inch becomes dry, and do not allow water to pool under the pot. Refresh the top few inches of mix with compost each spring. After two to three years, repot or divide to renew vigor. In regions with intense afternoon sun, give several hours of morning sun and light afternoon shade to keep flowers bright. In wind corridors, use low hedges, fences, or groups of ornamental grasses as wind filters. Near south facing walls that radiate heat, increase mulch and watering frequency during summer. On reflective patios, interplant with airy companions that cast dappled shade on the crown and cool the root zone. In the humid Southeast, prioritize spacing and morning sun to dry leaves quickly. If you garden on a balcony or in a deck box, use a lightweight soilless blend and avoid native soil, which compacts and drains poorly in containers. Check that planters shed water freely after a heavy soak. Elevate pots on feet so drain holes are not sealed by the patio surface.
Companion Planting & Design
Shasta Daisy is a generous mixer. Its clean white rays and cheerful discs coordinate with many colors and textures. For a classic sun border that flowers from early summer to frost, pair daisies with coneflower, catmint, Russian sage, yarrow, and salvias. The daisy’s white eye calms stronger colors and ties the planting together. To extend color beyond white, choose forms with pale yellow or double petals and mingle them with yellow flowers such as coreopsis or daylilies for a warm scheme. For cool harmony, weave Shasta Daisy among blue flowers like perennial salvia or delphinium. Add purple flowers such as verbena bonariensis or agastache to lift the planting and support pollinators.
For cottage borders and relaxed edges, combine Shasta Daisy with lavender to echo the gray green foliage and entice bees. The sturdy daisies frame taller spires and soften structural grasses. In wilder designs, allow seedlings of annual cosmos to drift among clumps for a cloud of pink above the white discs. To hide die back after the first frost, flank daisies with ornamental grasses or late asters that carry the border into fall. In narrow beds or front yards that seek a bright but restrained palette, repeat daisies down the line and punctuate with compact shrubs so the eye reads the space as one unified band of white and green.
In wedding season gardens, Shasta Daisy offers brilliant cutting material and mixes effortlessly in bouquets and centerpieces. If you care about event timing and continuous bloom, shear after the first flush to prompt a second wave and schedule peak color. Our wedding flowers guide has ideas for pairing white daisies with seasonal stems for garden parties. For shade adjacent areas that need larger blooms, cluster hydrangeas nearby for mass without taking sun from the daisies. If you love big mopheads, you can explore hydrangea macrophylla options for the cool side of the garden, then let Shasta Daisy carry the sunny side. When you crave a classic white garden, use Shasta Daisy to link other white flowers such as phlox, Shasta and oxeye types, and seasonal bulbs. A few well placed sunflower clumps at the back of a large bed will give you late summer height and a warm counterpoint to the daisies. In spring, edge nearby beds with daffodils to start the year with gold, then let Shasta Daisy step in for summer. In humid climates, design with spacing top of mind. Keep 18 to 24 inches between crowns to limit disease. Stagger clumps, not straight rows, to avoid wind tunneling down a corridor of leaves. Avoid overhead irrigation late in the day. Mulch to reduce soil splash. If leaf spot appears, cleanly remove affected foliage and deadhead promptly.
References
- North Carolina State University Cooperative Extension. Plant Toolbox: Leucanthemum × superbum Shasta Daisy.
- Clemson University Cooperative Extension, Home and Garden Information Center. Changing the pH of Your Soil.
- Clemson University Cooperative Extension, Home and Garden Information Center. Soil Testing.
- University of Minnesota Extension. Dividing Perennials.
- University of Missouri Extension. Raised Bed Gardening.
- United States Department of Agriculture Agricultural Research Service. Plant Hardiness Zone Map.


Written by: Your Flowers Guide editorial team
We are a small independent group of flower lovers who research and review each guide using trusted horticultural and educational sources. Learn more about us